| View previous topic :: View next topic |
| Author |
Message |
Baxsie
Joined: 12 Apr 2012
Posts: 253
|
|
| Back to top |
|
 |
Baxsie
Joined: 12 Apr 2012
Posts: 253
|
 Posted: Sun Aug 11, 2013 9:04 am Post subject: Just for fun: Royze No. 64112 engine rebuild kit Posted: Sun Aug 11, 2013 9:04 am Post subject: Just for fun: Royze No. 64112 engine rebuild kit |
 |
|
I found this in an old box. I used to keep it in the glove box of my bug for emergencies. Maybe I'll pass it down from father to son like the family heirloom it is.
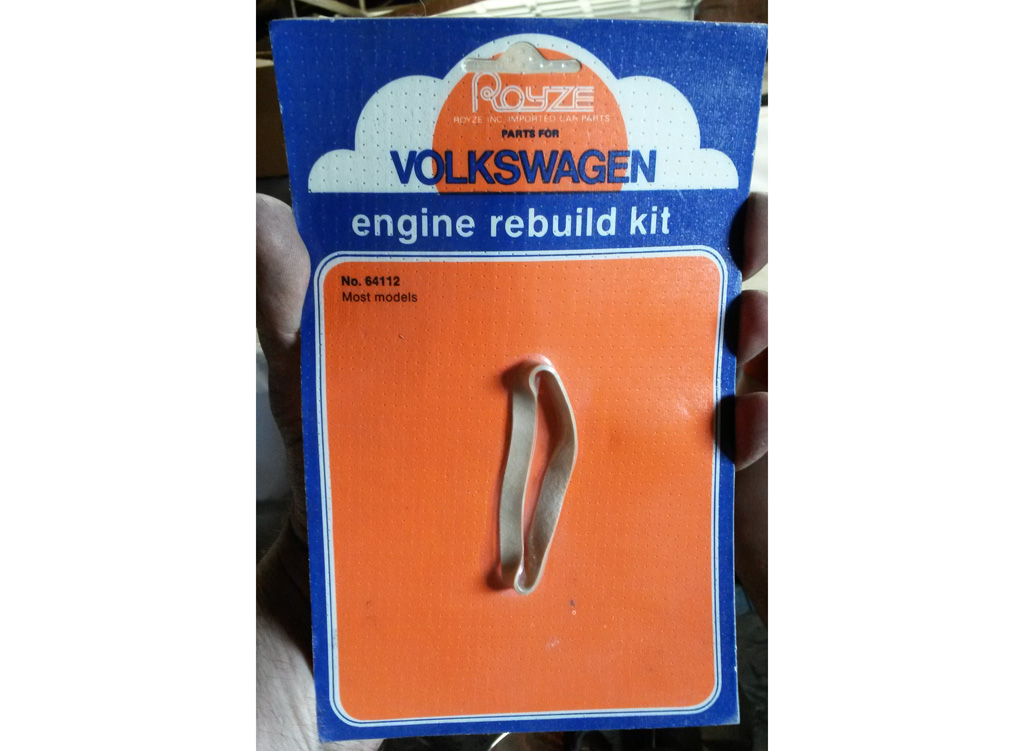
Image of Royze No. 64112 engine rebuild kit
Last edited by Baxsie on Fri Aug 08, 2014 12:01 pm; edited 1 time in total |
|
| Back to top |
|
|
Baxsie
Joined: 12 Apr 2012
Posts: 253
|
| Posted: Sun Aug 11, 2013 9:06 am Post subject: Test fit body to chassis, AC condenser & oil cooler |
|
|
We finished the test assembly of the chassis:
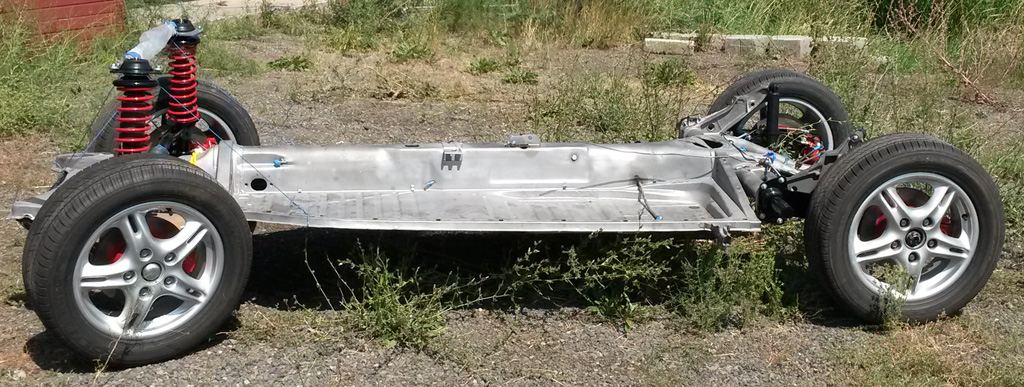
Rolled it into the other bay of the barn and placed the body onto it:
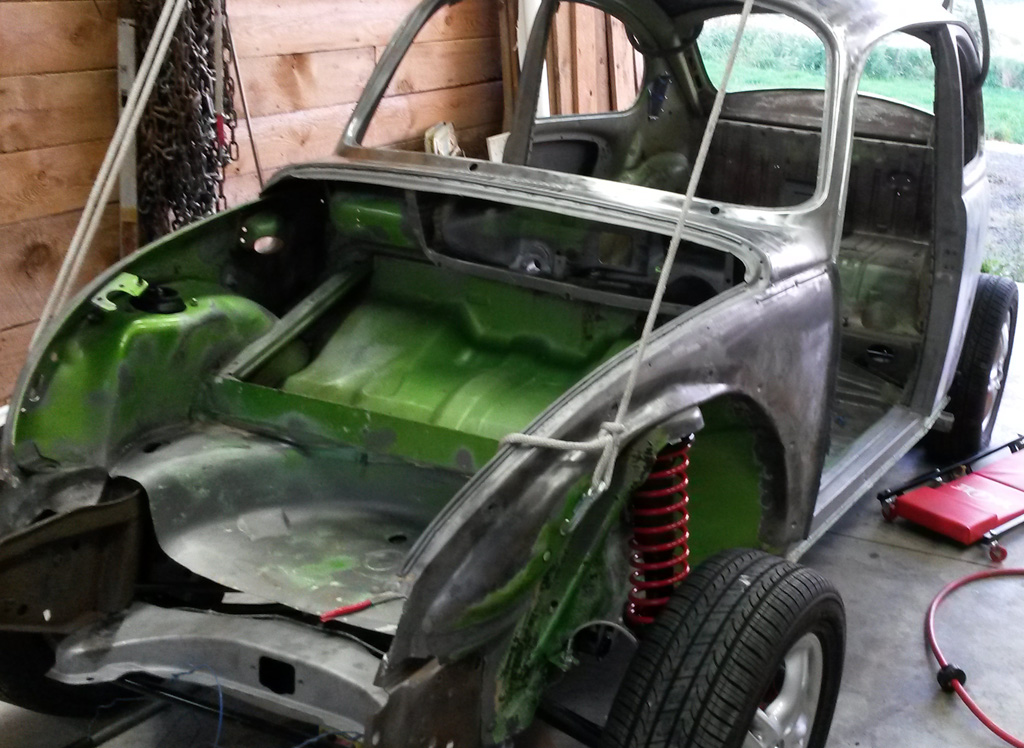
There seems to be an infinite number of pan bolts involved. All lovingly wire wheeled and anti-seized by my son. Body washers bead blasted, DP-90 2k Epoxy Primer and Industrial enamel:
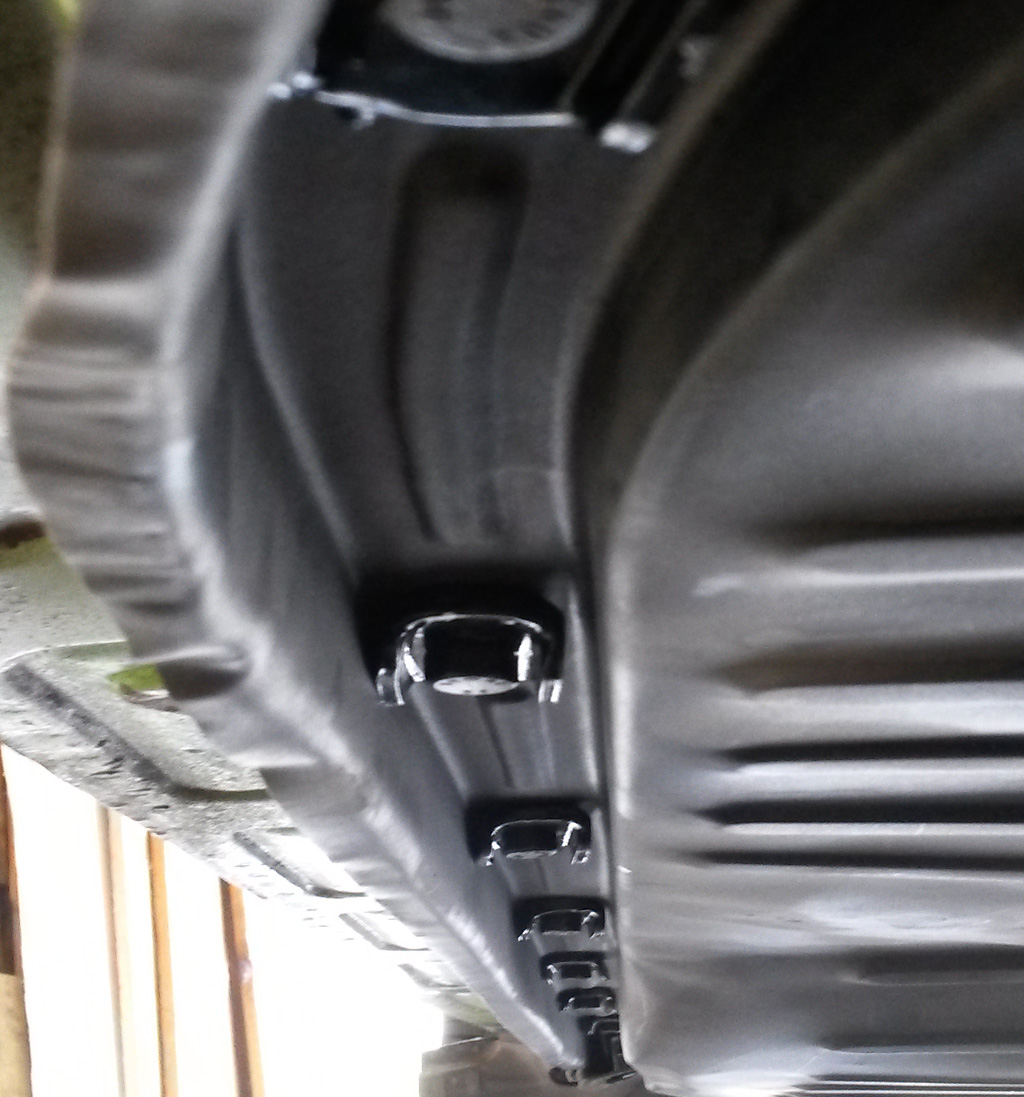
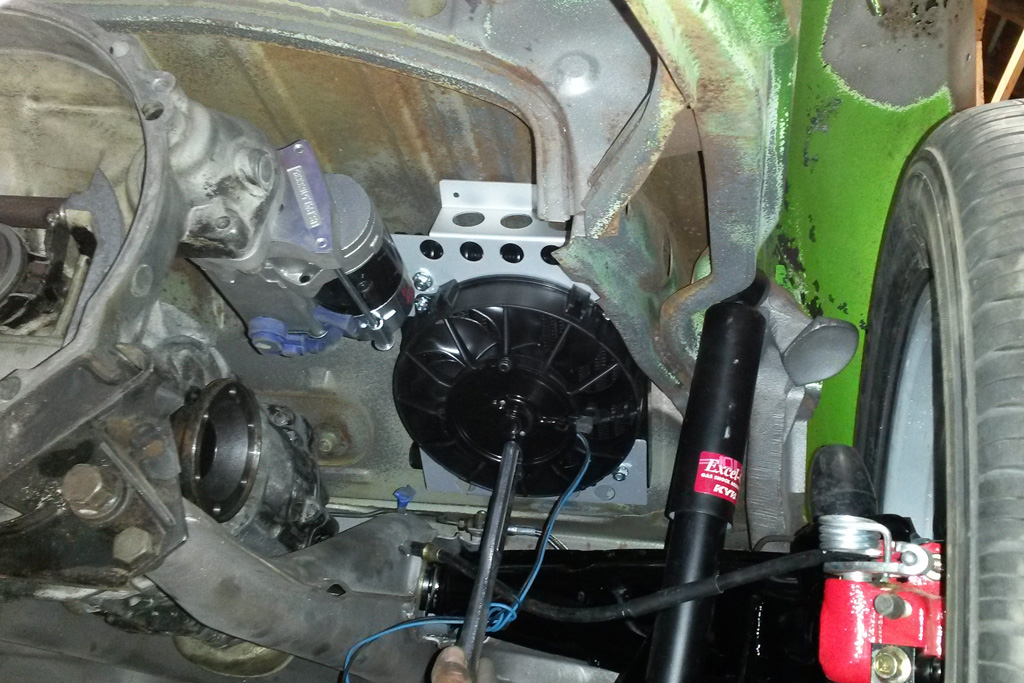
We have a lot of plans for the largely empty area above and to the sides of the transmission. To check out the fit of things, we installed the transmission and did some test fitting.
Test fitting the ICE AC condenser:
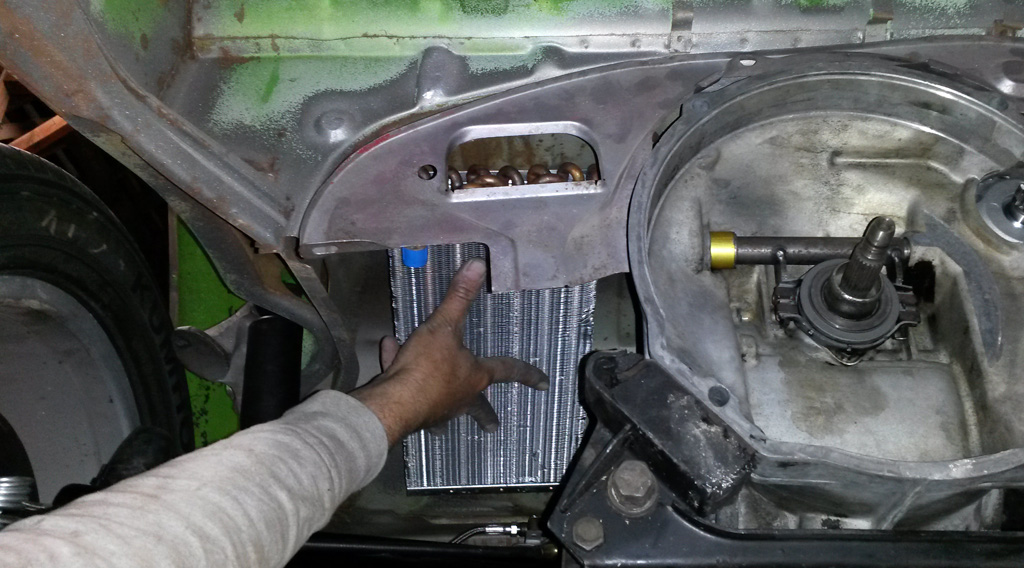
We will use two 400 CFM Derale Tornado 7" fans on the condenser to push/pull air through it:

The CB Atomic Cool oil cooler also has a Derale fan. I loves my matching. We think it will fit OK on the other side:
We may be able to get some ground effect with all those fans running 
Last edited by Baxsie on Fri Aug 08, 2014 12:01 pm; edited 2 times in total |
|
| Back to top |
|
|
ONEBADBUG

Joined: 25 Oct 2003
Posts: 440
Location: Spokane
|
| Posted: Sun Aug 11, 2013 2:50 pm Post subject: |
|
|
| Um... those floppy late model engine mounts are not going to like the power you guys are making. |
|
| Back to top |
|
|
Baxsie
Joined: 12 Apr 2012
Posts: 253
|
|
| Back to top |
|
|
Baxsie
Joined: 12 Apr 2012
Posts: 253
|
| Posted: Sun Aug 11, 2013 9:34 pm Post subject: Installing Metra 44-UA40 Antenna |
|
|
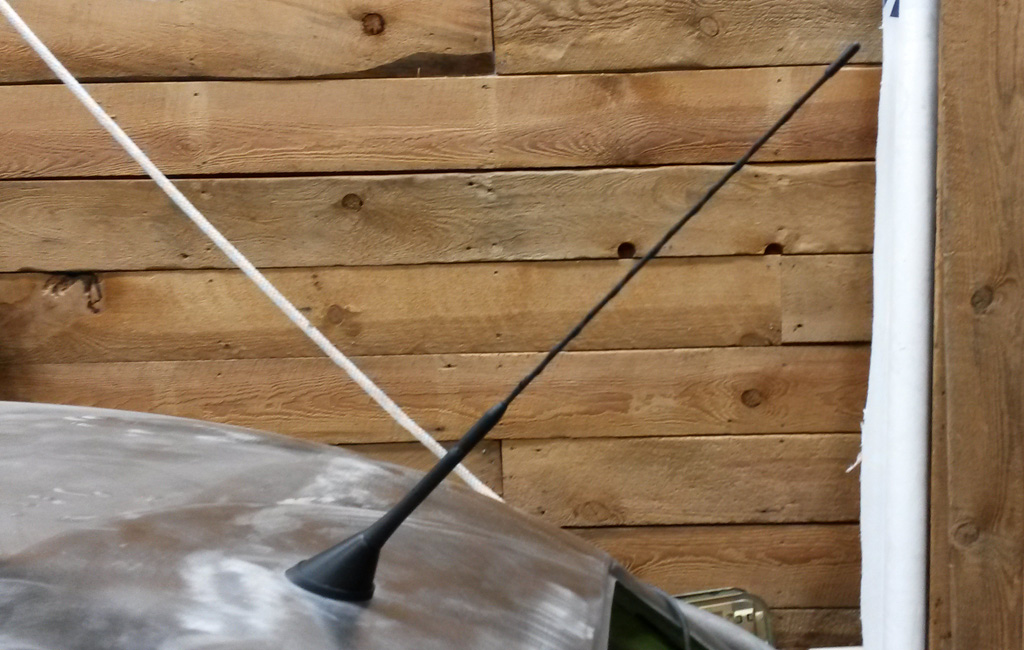
My son installed the Metra 44-UA40 Antenna today.
This is an amplified antenna, so to use it with a regular old stereo, you also need a antenna adapter that supplies power to the antenna's amplifier.
You need a 14.5mm square hole. He cut it with the Dremel. He did a great job, nice and straight, with a very close fit that keeps the antenna square and sturdy:
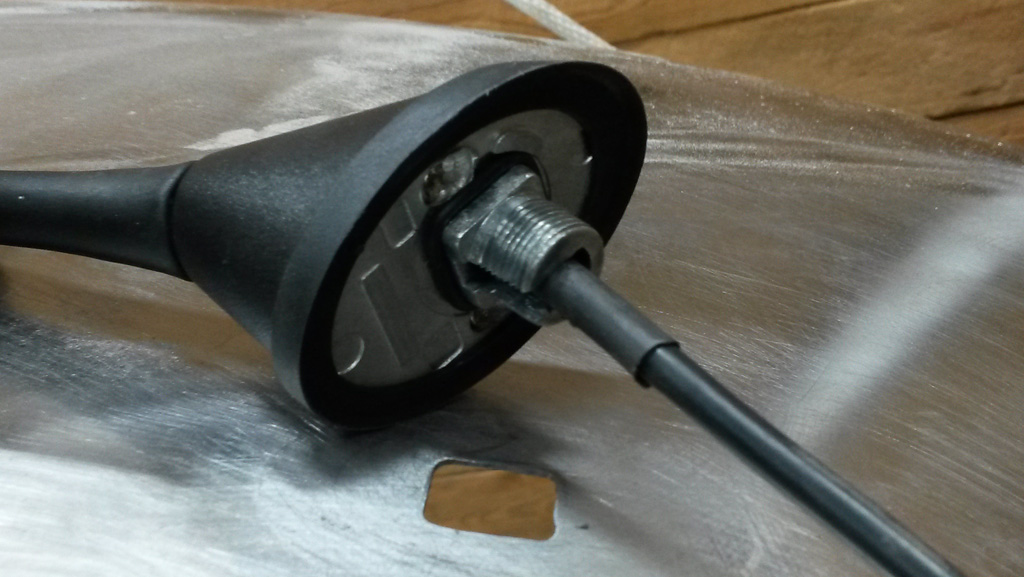
This antenna has a nice 90 degree cable exit:
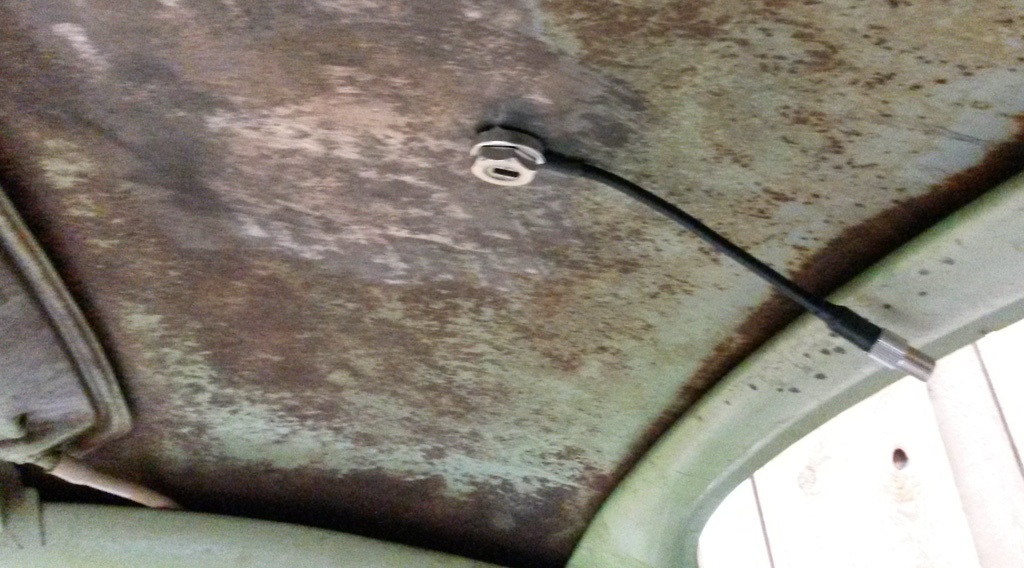
Looking good:
Last edited by Baxsie on Fri Aug 08, 2014 12:00 pm; edited 1 time in total |
|
| Back to top |
|
|
Baxsie
Joined: 12 Apr 2012
Posts: 253
|
| Posted: Sun Aug 11, 2013 9:55 pm Post subject: Super Beetle Hood Trim Blasphemy |
|
|
If you are a purist, you probably have not made it very far in this thread. But just in case you made it here anyway there is VW blasphemy ahead. Fair warning . . . .
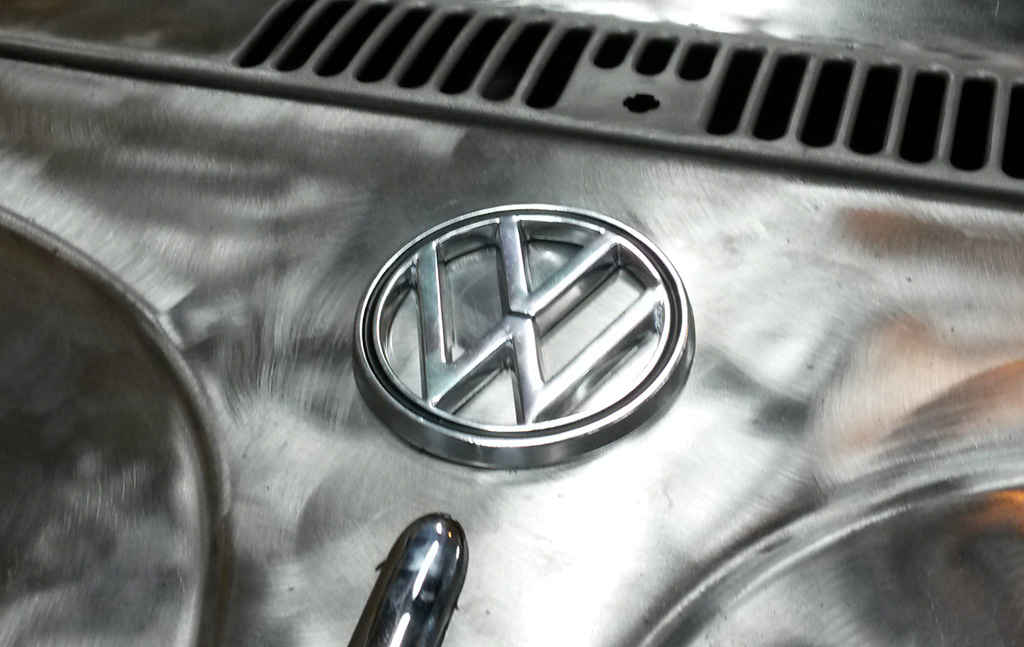
I always felt ripped off that neither of my bugs had a Wolfsburg crest. Then this 1975 super comes along and it does not even have a VW logo on the hood.
Well, it is our car, we can do what we want . . . and we did:

The trim is the "wide" style, in stainless. Part of that is because we like the look, the other part is that this body has been "dechromed" and te wider trim can take a little pressure off the body folks there. We put the VW logo back in its rightful place:
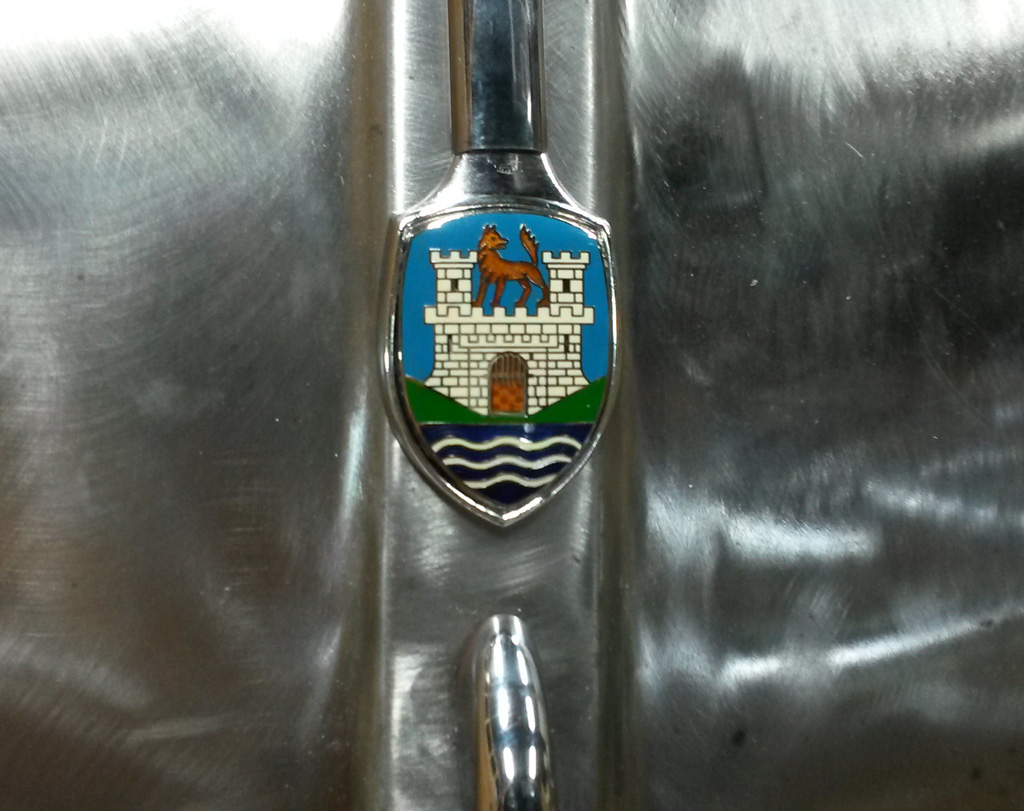
And planted a wolfsburg crest right where it should be:
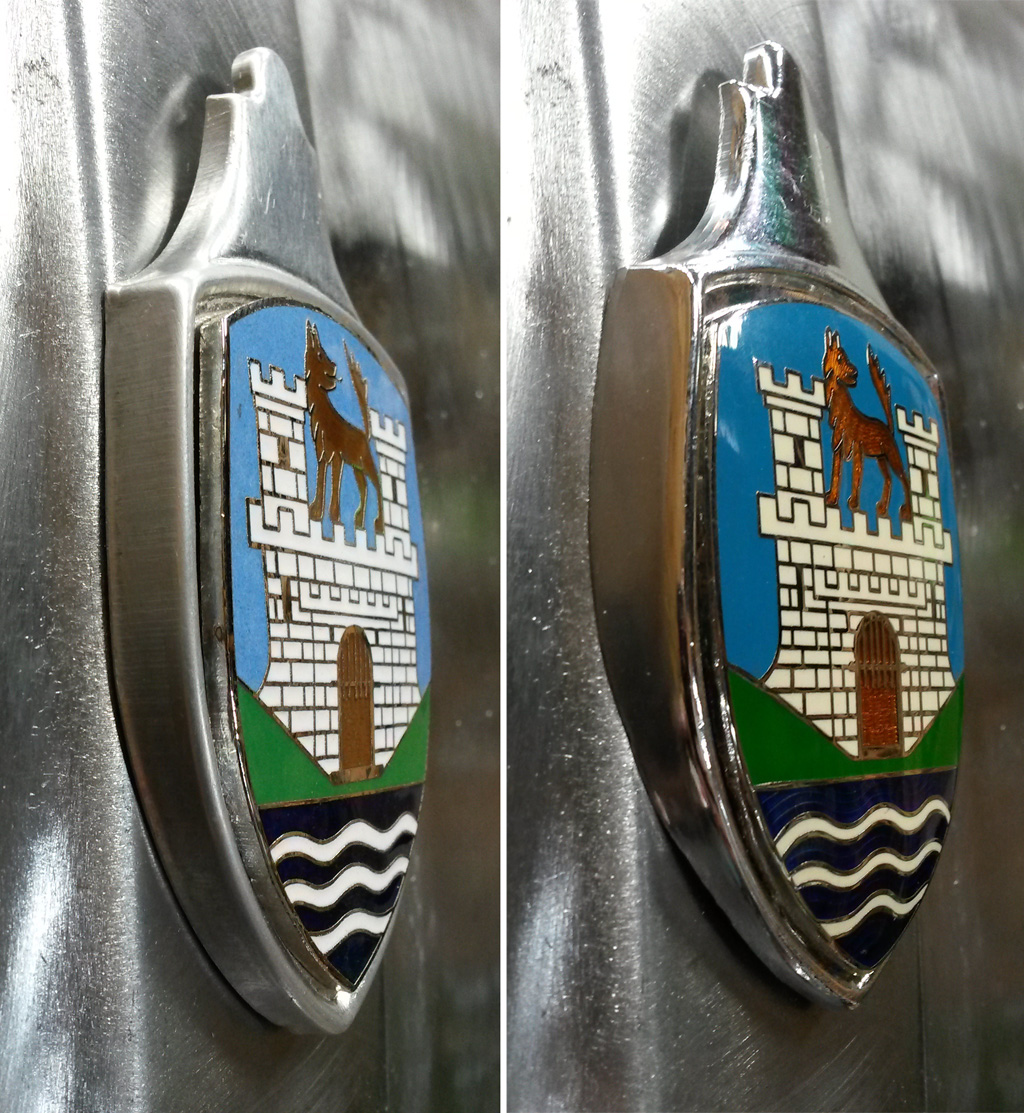
We got two Wolfsburg crests (from Wolfsburg West of course), one was low cost, the other is supposedly a "real" one. Here is a compare from the front:
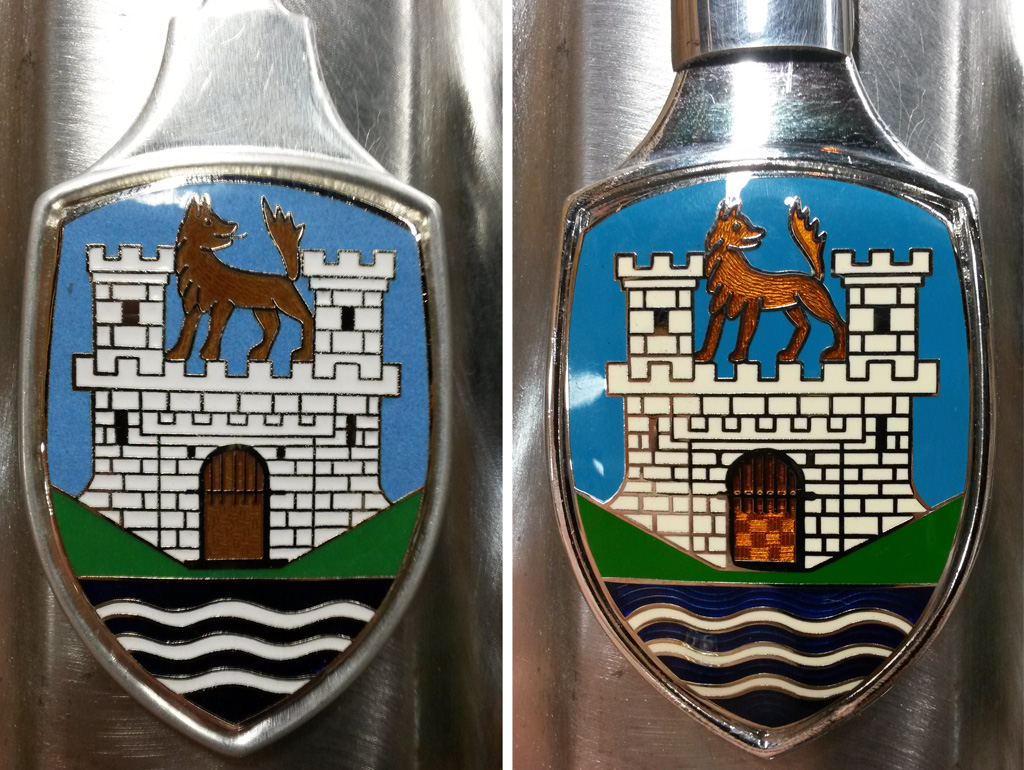
Here is a compare from the side. The real one fits the hood brilliantly, snugging down over the body ridge:
Last edited by Baxsie on Fri Aug 08, 2014 12:00 pm; edited 2 times in total |
|
| Back to top |
|
|
Baxsie
Joined: 12 Apr 2012
Posts: 253
|
| Posted: Sun Aug 11, 2013 10:17 pm Post subject: Do these tires make my bug look fat? |
|
|
We put the front fenders and tires on. Here is a pic from the side. We ballasted the trunk with 200 lbs of sand in an attempt to make up for so much stuff not installed on the car:
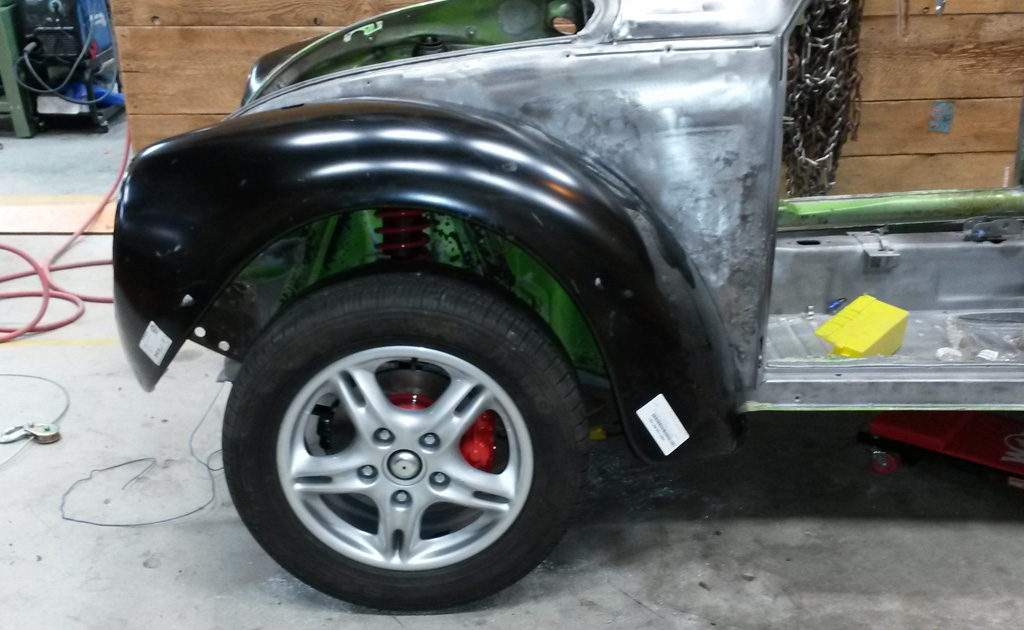
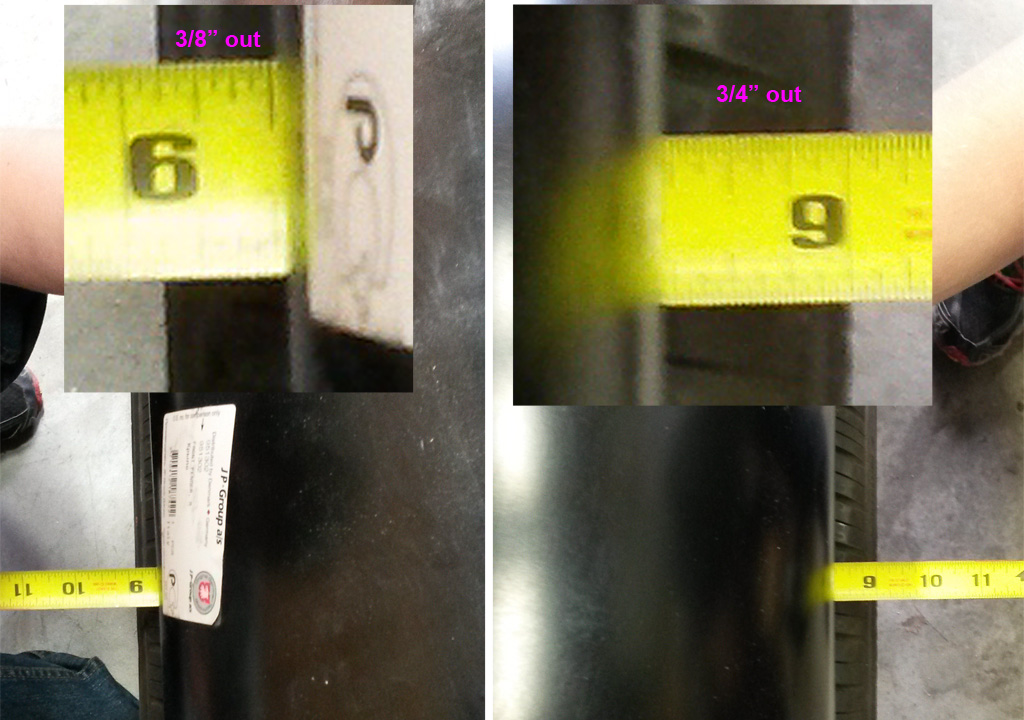
A shot from the front shows that the tire is outside of the fenders:
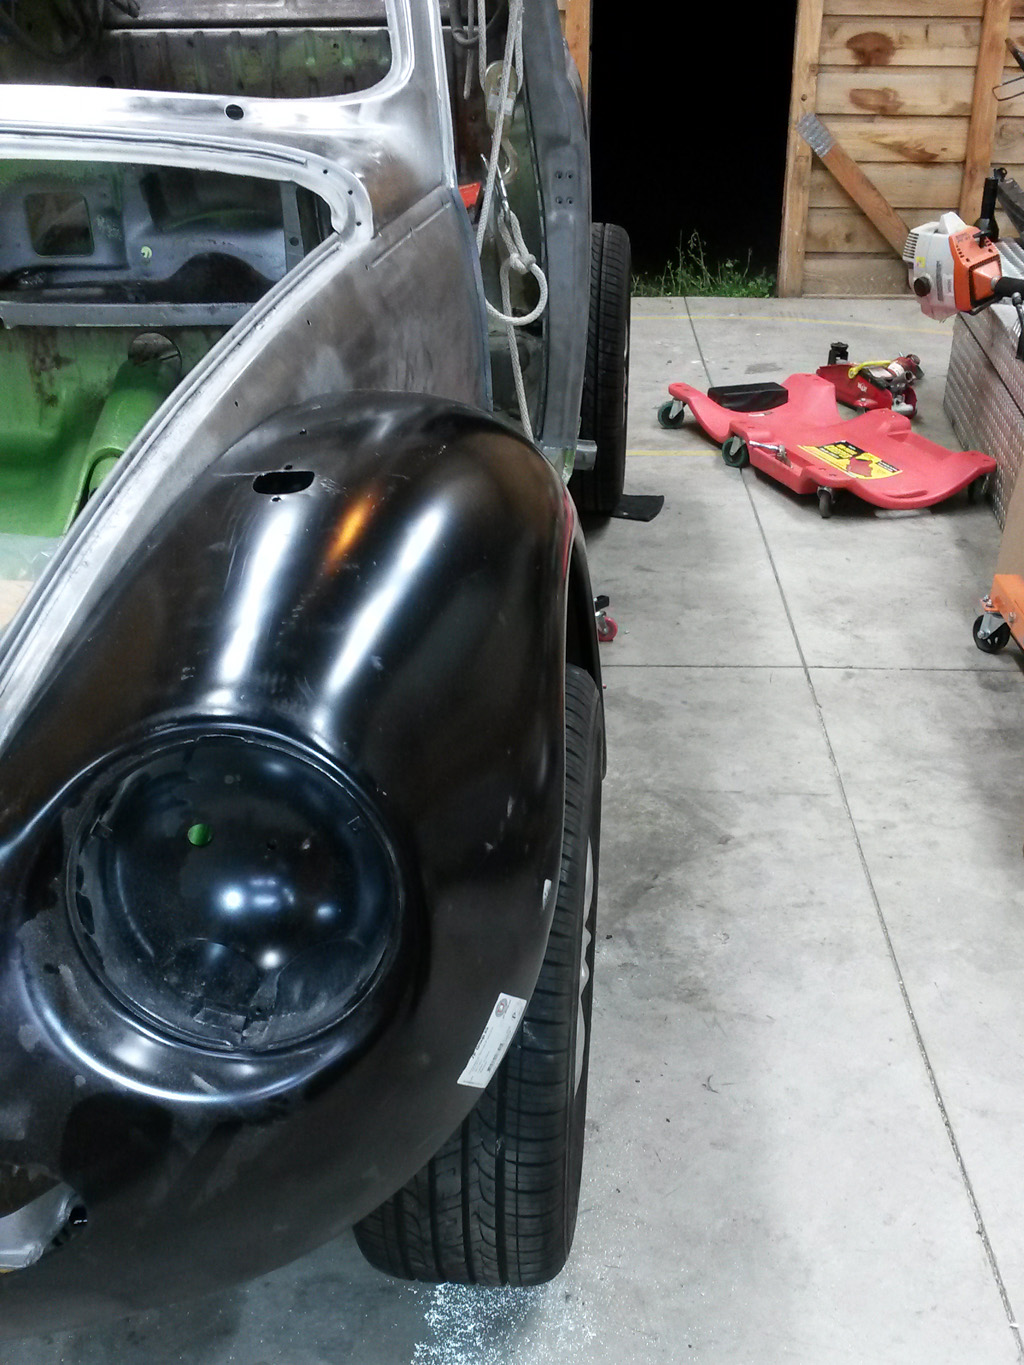
Confirmed from the rear:
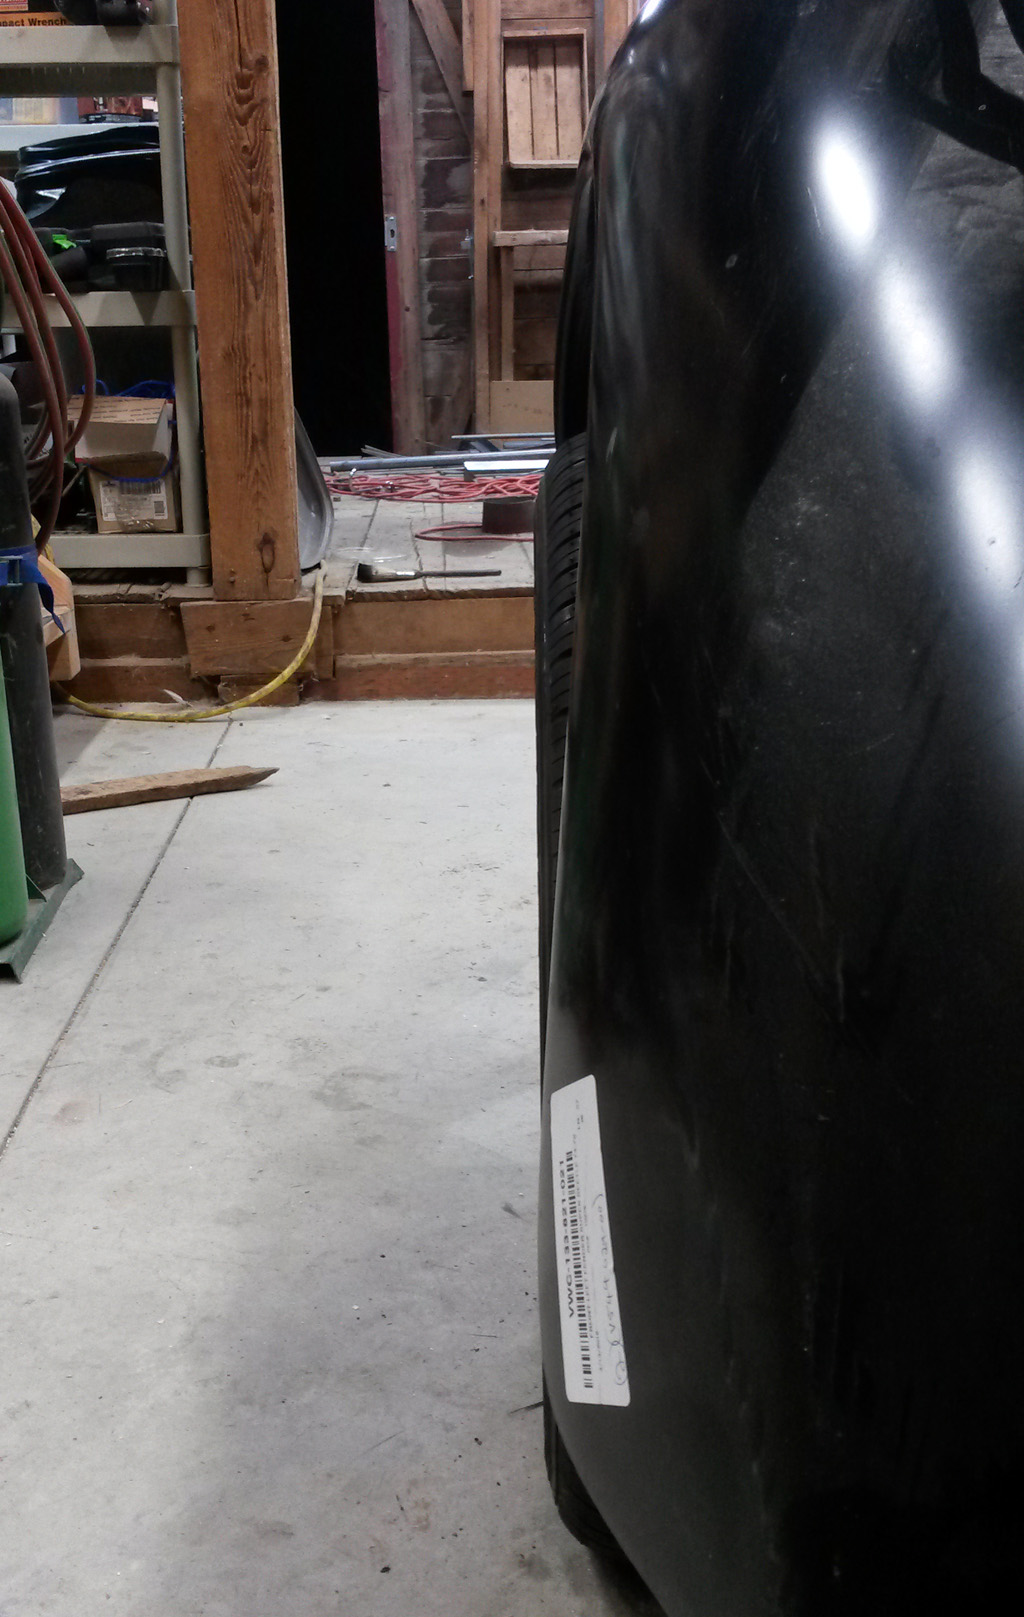
Lining up carefully from the top shows that the drivers side sticks out ~3/4 inch, the passenger side ~3/8 inch. We know that the passenger side metal is tweaked, which probably accounts for that difference.
We messed with the camber on the drivers side, finally got it to be "not crazy out of spec". We are just using a level and a digital degree meter, so I would not claim to be close, but we are probably within 2 degrees.
We can tweak the camber in slightly more if we use the TopLine race bolts (they are slightly smaller, and allow the spindle to be shifted on the strut) we can get the camber right on, and the wheel does not look so bad, but by then the tire is rubbing on the spring.
Turning the wheels stop-to-stop, things are DAMN close, but do not quite rub.
So we are not too far in, but we cannot go any farther in, that is for sure.
So I am not sure what to do:
1) let the gravel spray
2) skinnier tires (these are 215)
3) skinnier tires, combined with a deeper offset wheel.
4) wider fenders (is there such a thing?)
Suggestions?
Last edited by Baxsie on Fri Aug 08, 2014 11:59 am; edited 2 times in total |
|
| Back to top |
|
|
Baxsie
Joined: 12 Apr 2012
Posts: 253
|
| Posted: Mon Aug 12, 2013 9:44 pm Post subject: CB 1771 Breather box vs. MST Billet Alternator Stand |
|
|
I have been trying to figure out a good breather box solution. I like the CB Performance breather box:
http://www.cbperformance.com/ProductDetails.asp?ProductCode=1771
(a bit like EMPI's: http://www2.cip1.com/ProductDetails.asp?ProductCode=C13-17-2941 )
but we already have the MST Red Billet Alt/Gen stand:
http://216.85.143.142/ProductDetails.aspx?id=102&IsChild=1
and the CompuFire "90A" alternator:
http://www.cbperformance.com/ProductDetails.asp?ProductCode=2187
My hopes of three aftermarket parts lining up were not high, and I was not disappointed.
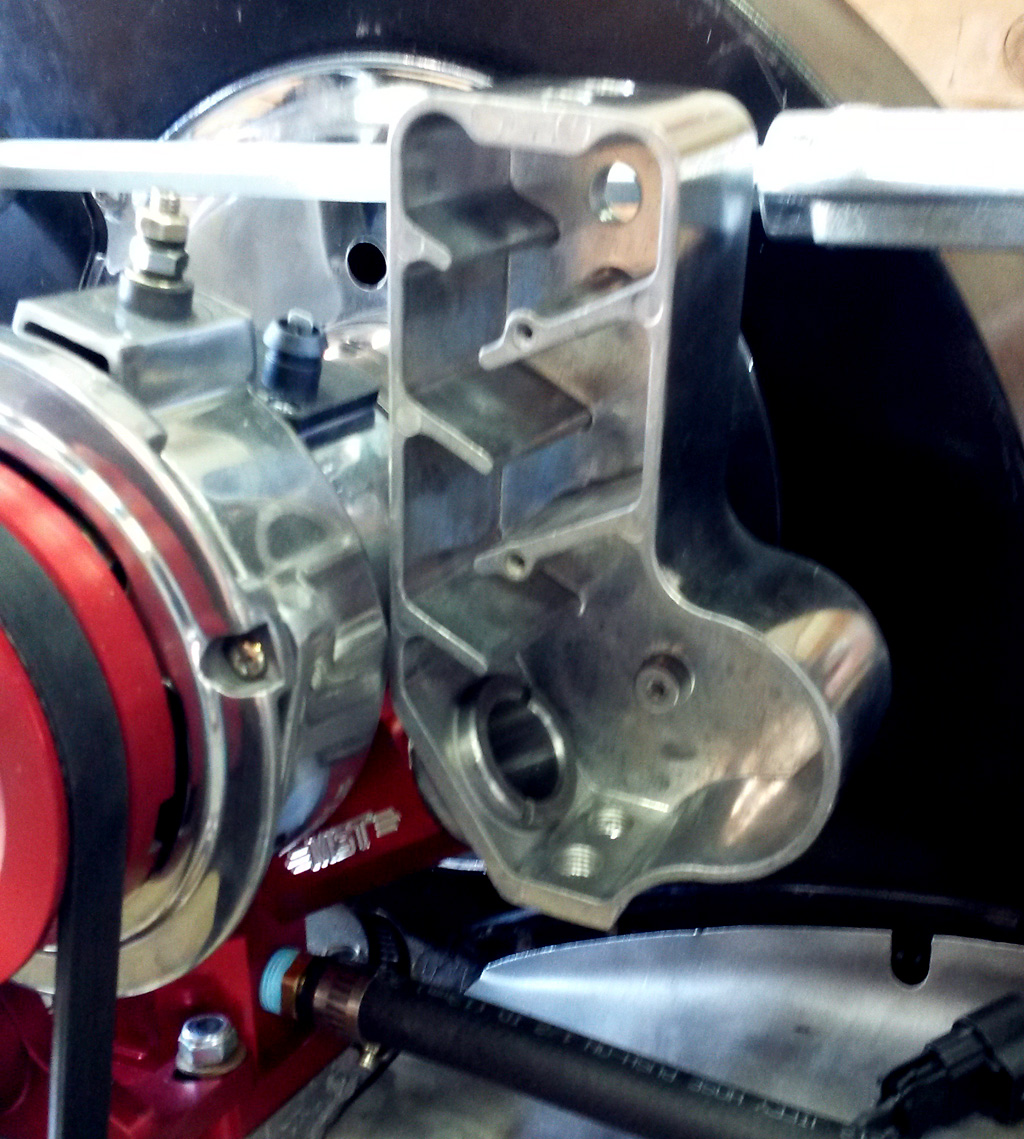
At first things looked pretty good, and I am thinking "It bolts right up. Nice":
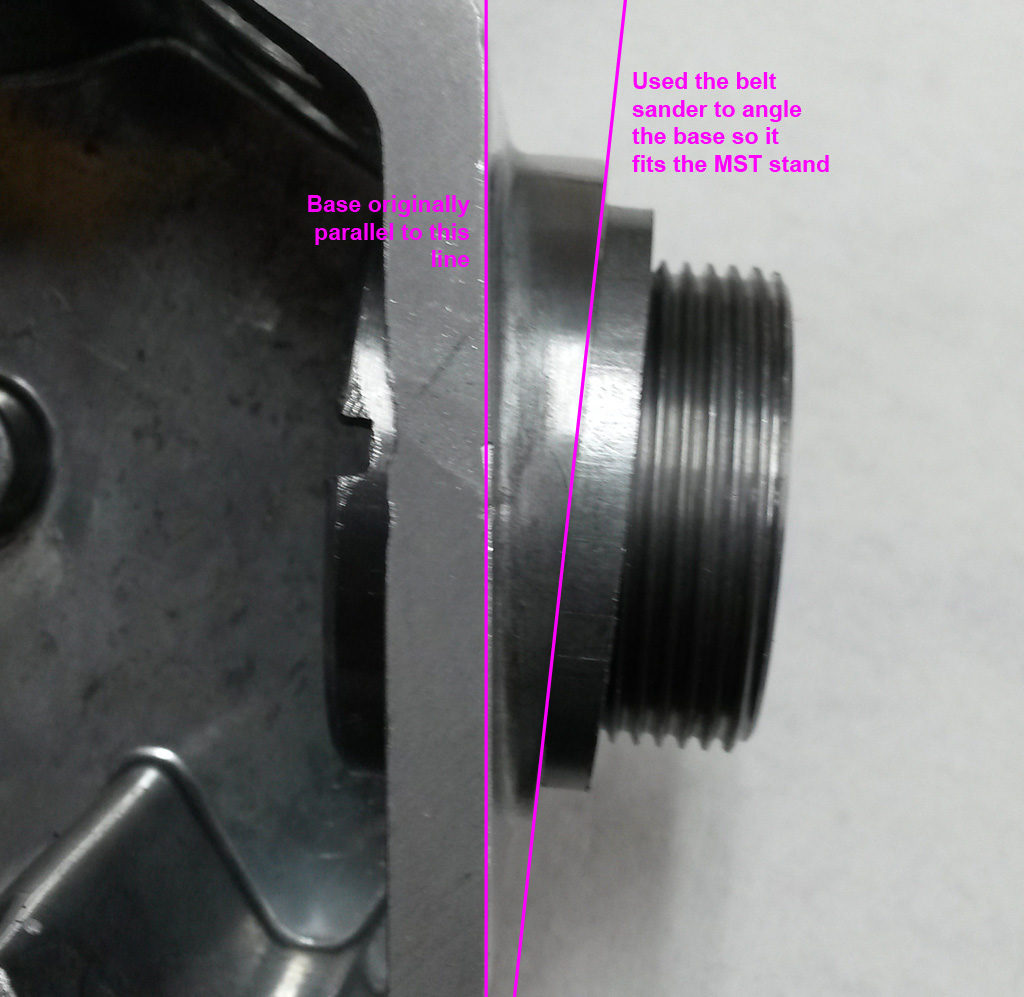
The my son took a look and pointed out that it was crooked. D'oh!:

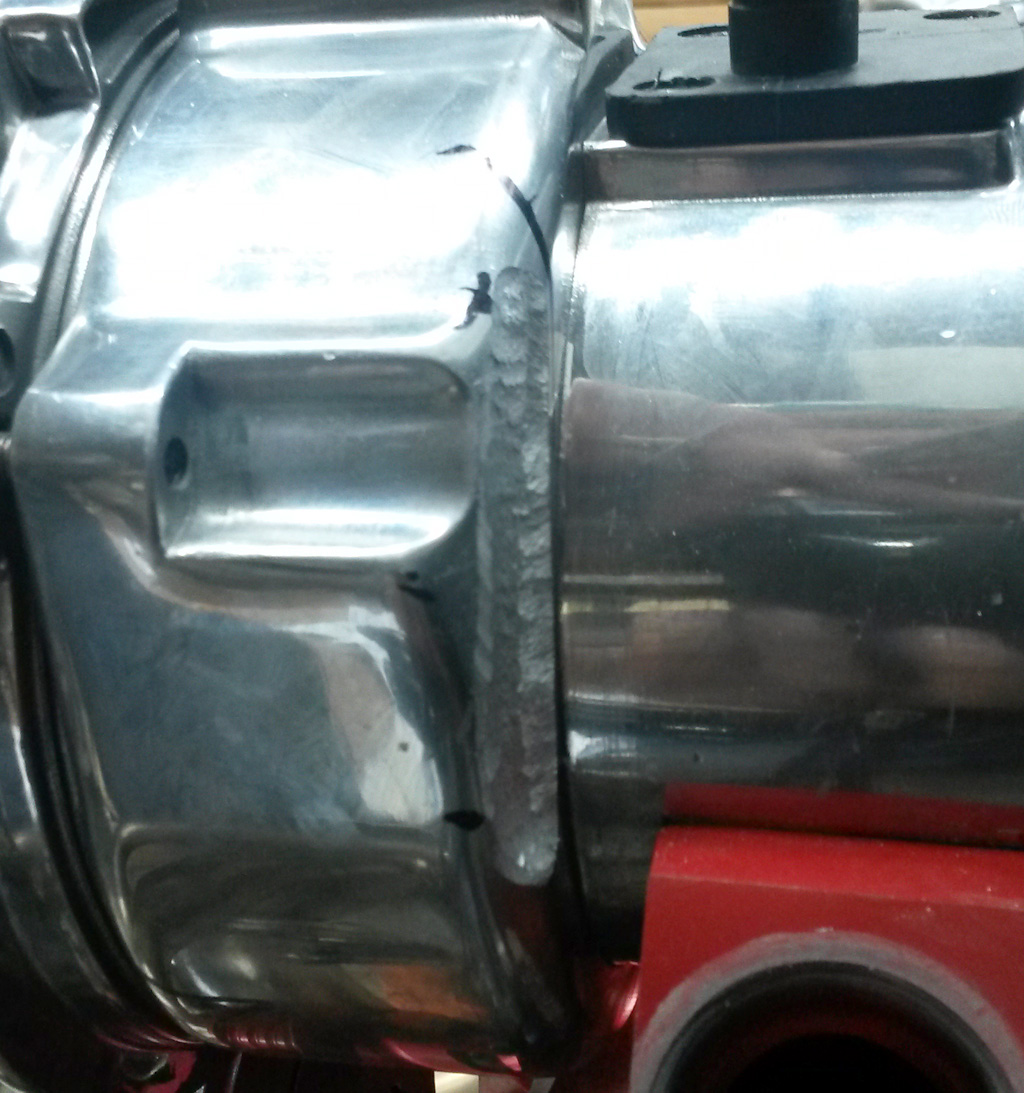
So I measured the angle, drew the line and used the belt sander to make it angled:
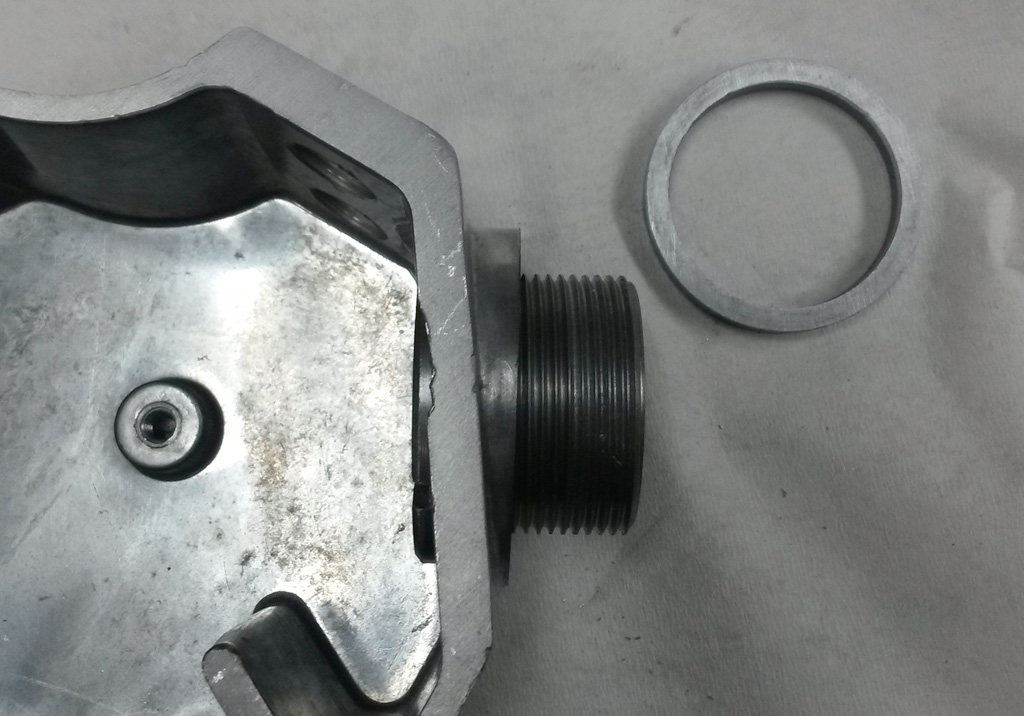
I made a spacer to back it away from the alternator, we happened to have some perfect pipe (cut with band saw, plane smooth with the belt sander). Once that was done, the nut thing had less thread engagement than I would like, so I used a carbide bur and an air die grinder to remove material from the inside to make the lip a consistent 5mm thick:
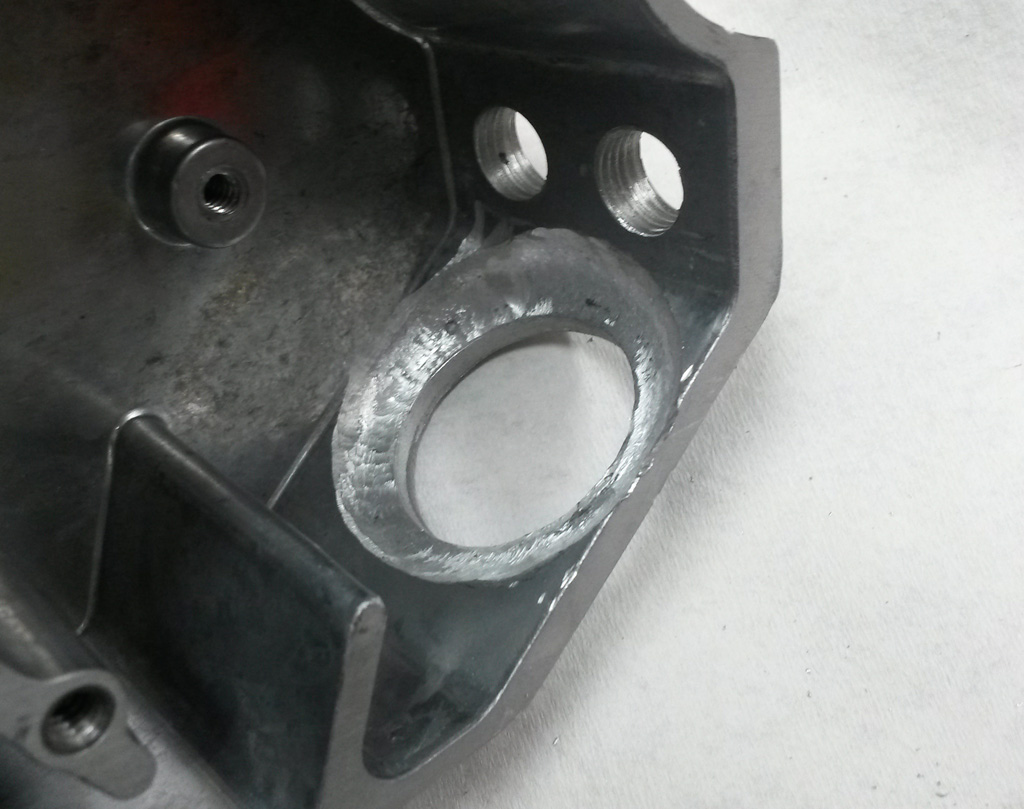
Now the nut thing fits in well, following the new angle and still has plenty of threads exposed:
In order to be able to get the cover off to service the foam (I'll need to get some from an Briggs & Stratton Air Cleaner, CB does not provide any) I needed to clearance the alternator:
And the breather lid:
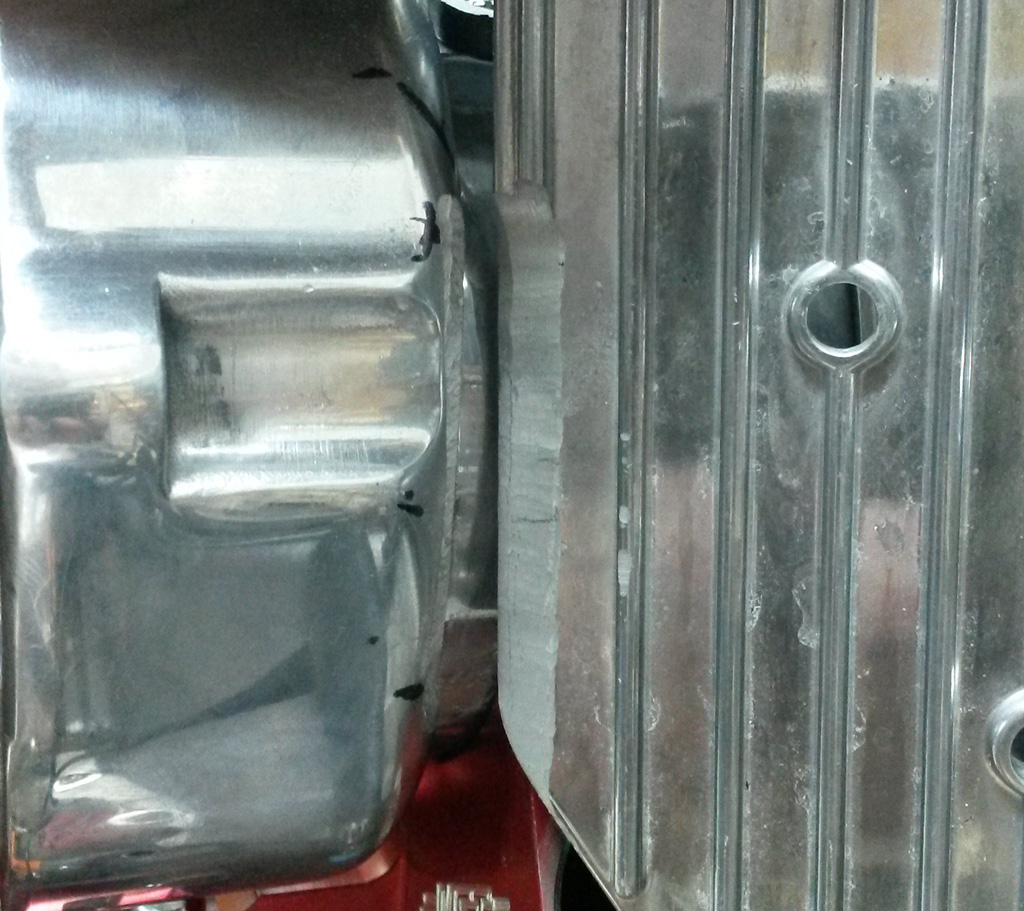
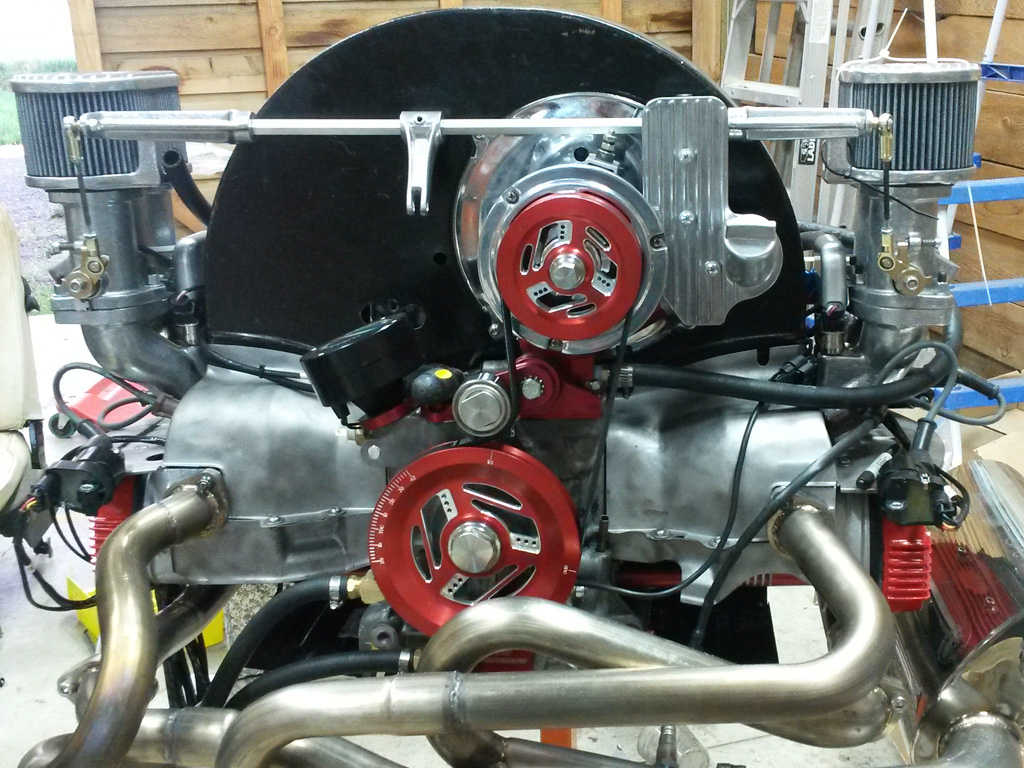
A lot of work, but it fits well and looks teh bomb:
==== EDIT: ADDING FOAM =============================================
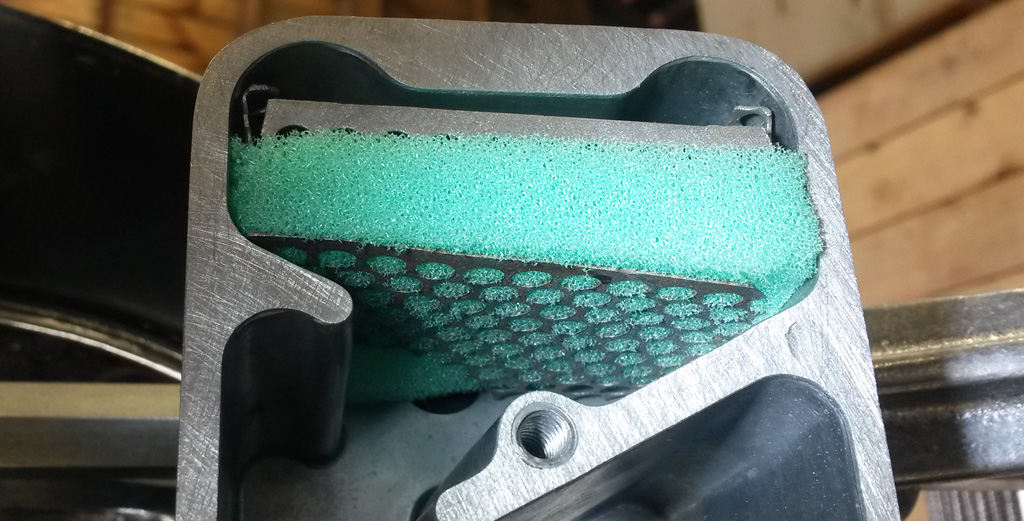
I saw a pic of the EMPI breather that shows it has foam in the top of it. I kind of assumed that the CB breather would also have foam, but it does not. I was trying to think of a very breathable foam that would withstand engine oil. I came up with the foam from Briggs and Stratton engine air cleaners. I used the screen material to make a locating screens to hold the new foam in place:

The foam is cut slightly oversize to assure a seal against the walls of the breather:
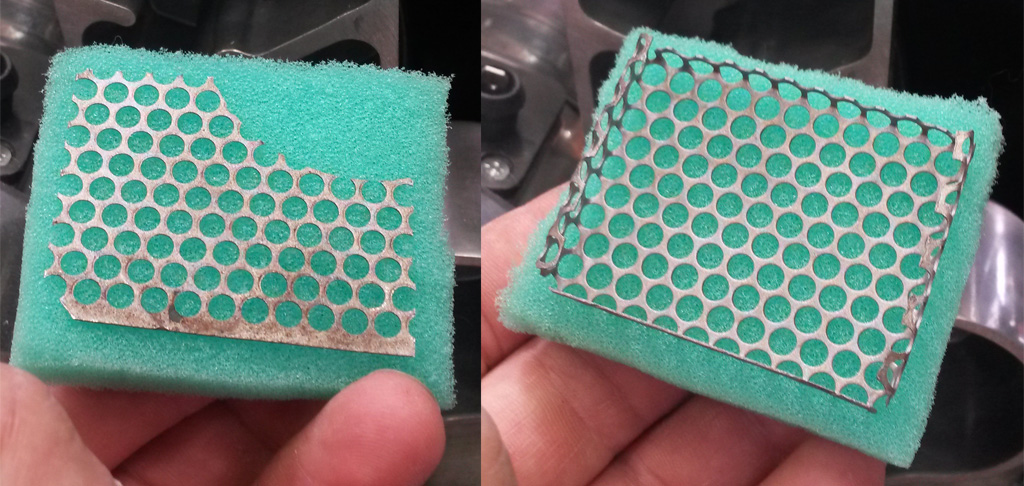
I used the B&S screen to hold the foam off the outlet ports. If the foam pushes up against the ports it greatly restricts the flow. The screens make sure the entire surface of the foam is unrestricted:
Last edited by Baxsie on Fri Aug 08, 2014 11:59 am; edited 2 times in total |
|
| Back to top |
|
|
Baxsie
Joined: 12 Apr 2012
Posts: 253
|
| Posted: Sat Aug 24, 2013 3:32 pm Post subject: Making Gas Door Release Inside Again |
|
|
My 1972 flat window super 1302 had the gas door release inside the cabin, which was good. The 1973 - 1975 (and probably more) have spring loaded doors that you just open with your finger. Since the door does not protect from theft, locking gas caps are needed for those years. Locking gas caps suck.
So we took on the project of adding the remote release gas door back to the 1975. We got a donor door and release pin. We removed the hinge and latch from the donor and placed them on the 1975 door:

The latch and hinge welded on. Still can't get the hang of making consistent welds. One good, 18 crappy:
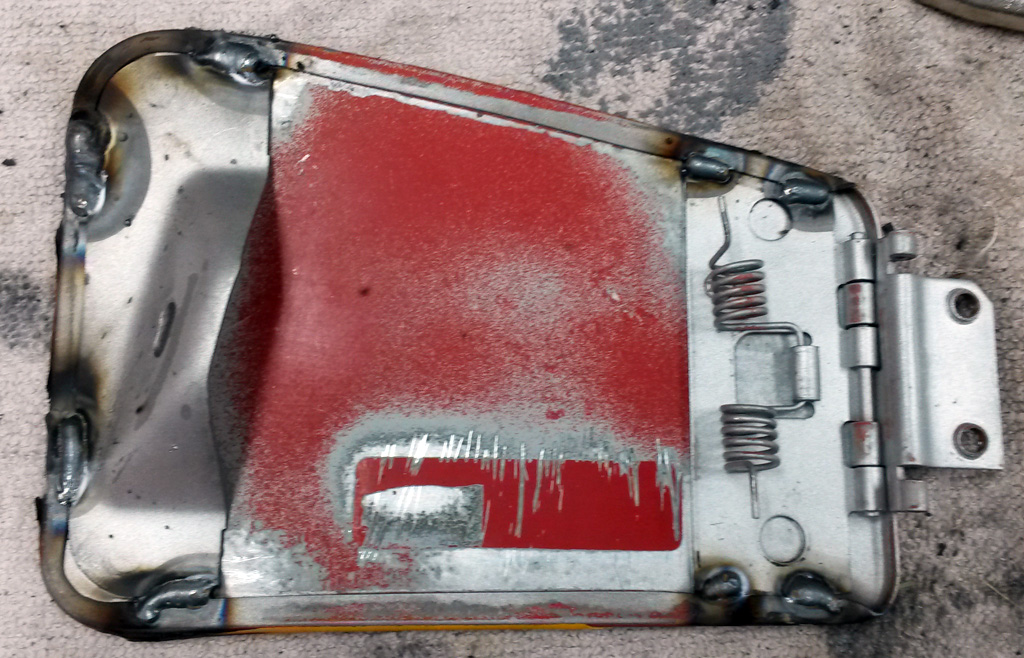
Sins of welding forgiven with penance of grinder, sander, and bead blaster:

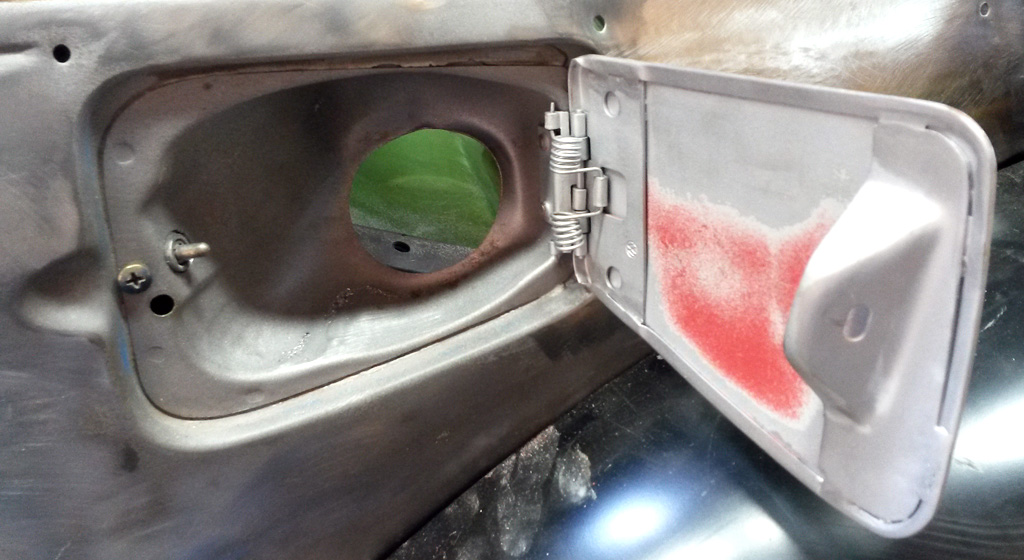
Latch located in the body:
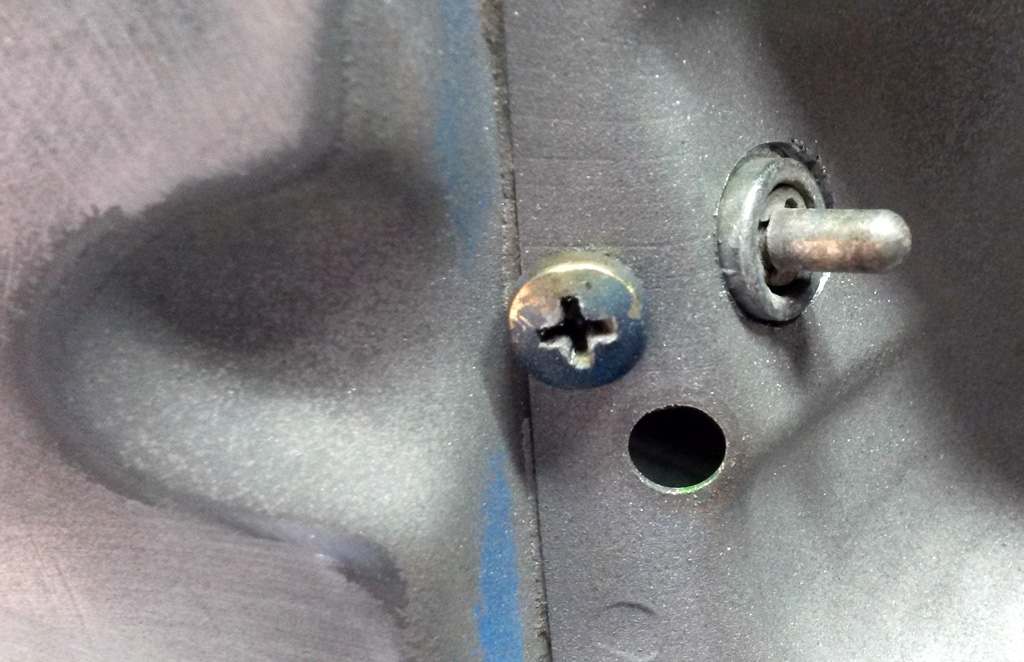
Tracks of the pin on the latch show good alignment:
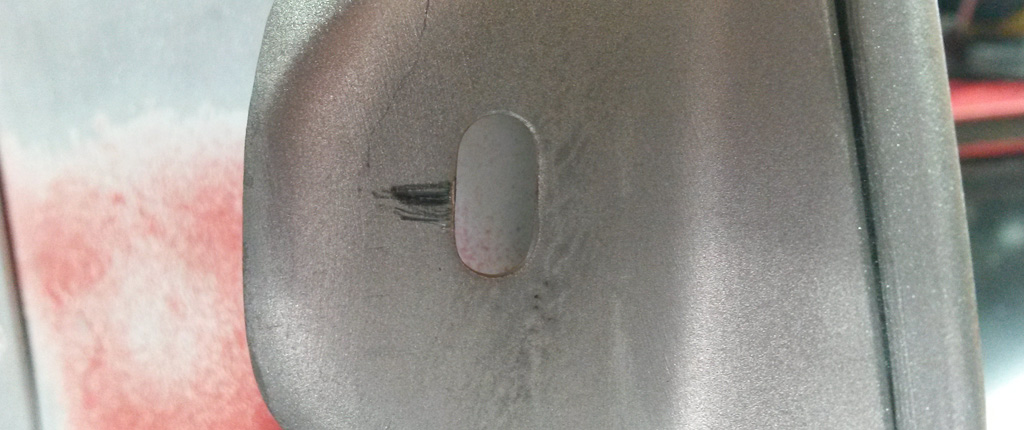
Finished gas door.
Still need to run a control cable to a handle somewhere in the cabin. Another project for another day.
Last edited by Baxsie on Fri Aug 08, 2014 11:58 am; edited 1 time in total |
|
| Back to top |
|
|
Baxsie
Joined: 12 Apr 2012
Posts: 253
|
| Posted: Sun Aug 25, 2013 9:41 pm Post subject: Combining Oil Thermostat and Oil Cooler Fan Thermostat |
|
|
We have the CB Oil Thermostat, which appears to be a Derale part. We also have a CB fan thermostat. It bothered me that these two parts are not combined, making the system more bulky and less reliable. Plus, the fan thermostat fitting is tapped all the way through for the switch's mounting stud, which could block flow and potentially leak.
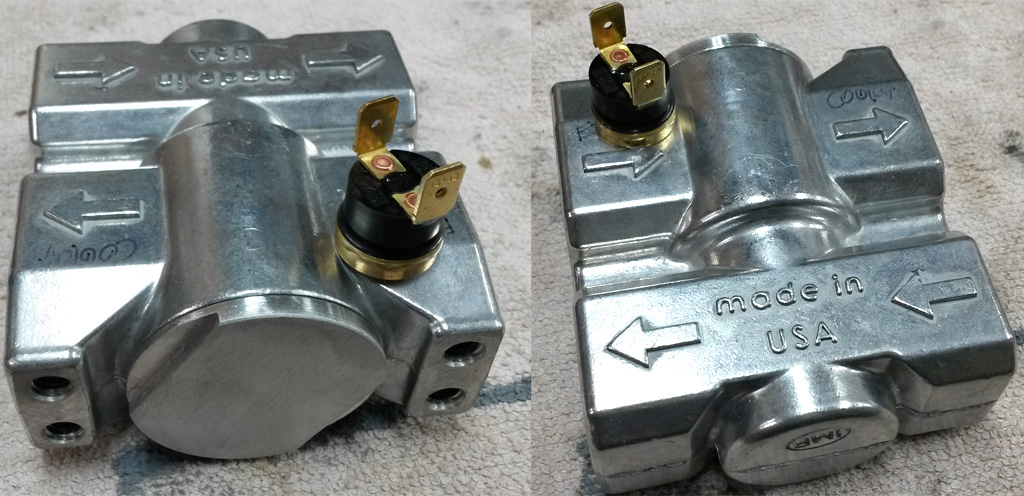
The Fan Thermostat has a threaded 6-32 stud, so we drilled and threaded a blind hole in the body of the oil thermostat to accept the fan thermostat stud. We also had to clearance the arrow a bit so it set flush:
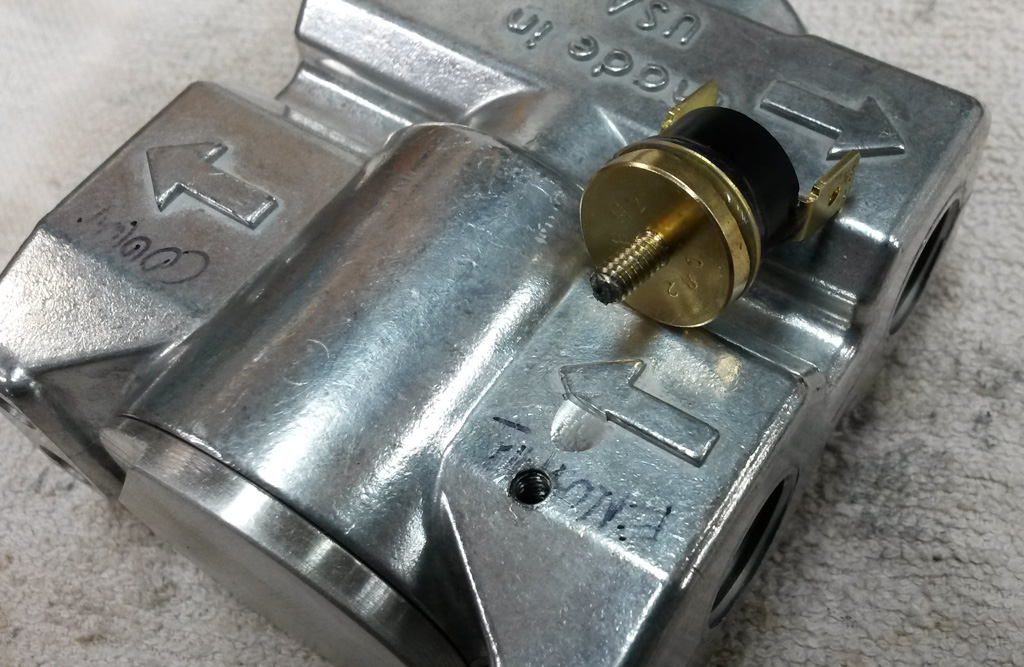
Here it is installed:
Last edited by Baxsie on Fri Aug 08, 2014 11:58 am; edited 1 time in total |
|
| Back to top |
|
|
Baxsie
Joined: 12 Apr 2012
Posts: 253
|
| Posted: Sun Sep 01, 2013 8:48 pm Post subject: Making modern fan shroud work with Fuel Injection (left) |
|
|
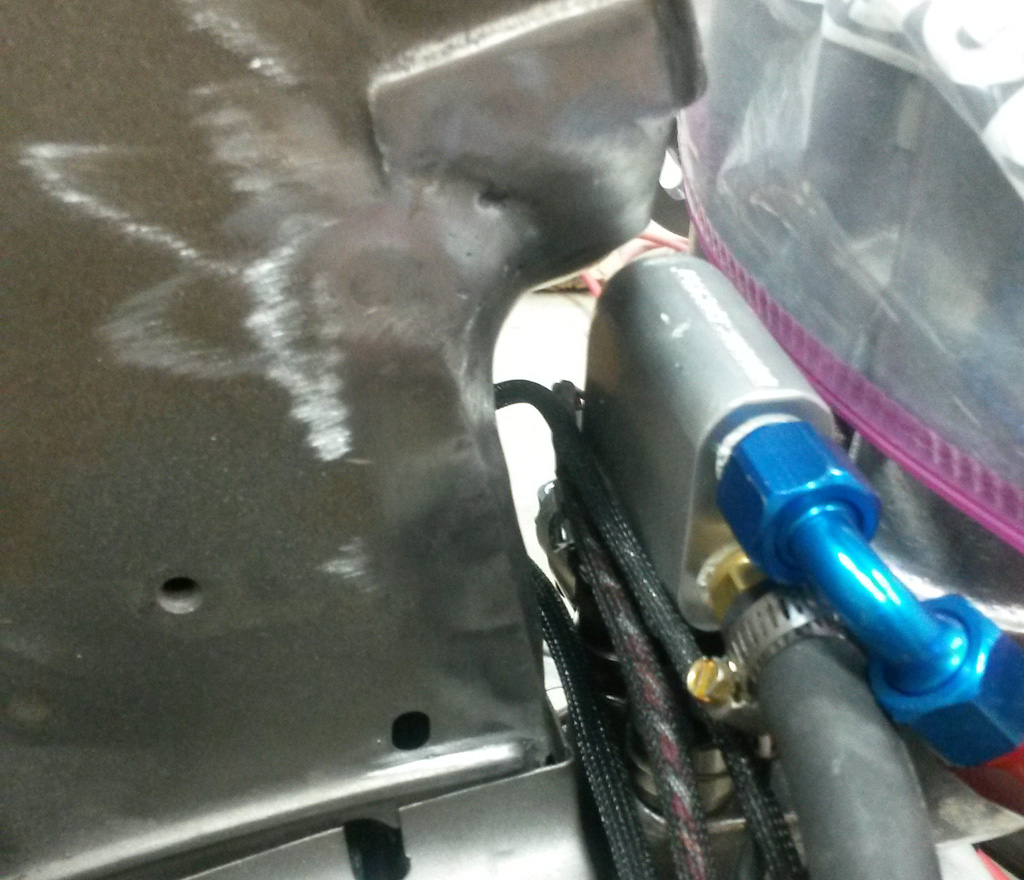
Back in the one of the engine build posts, we found that the nice, modern fan shroud (doghouse + venturi) intersects with the fuel rails. Since we wanted to get going, we borrowed a "36 hp" doghouse shroud for testing.
As I poked around at the modern shroud, it seemed to me that there was some "dead space" below the heater outlet. Time to cut it open and verify my hunch:
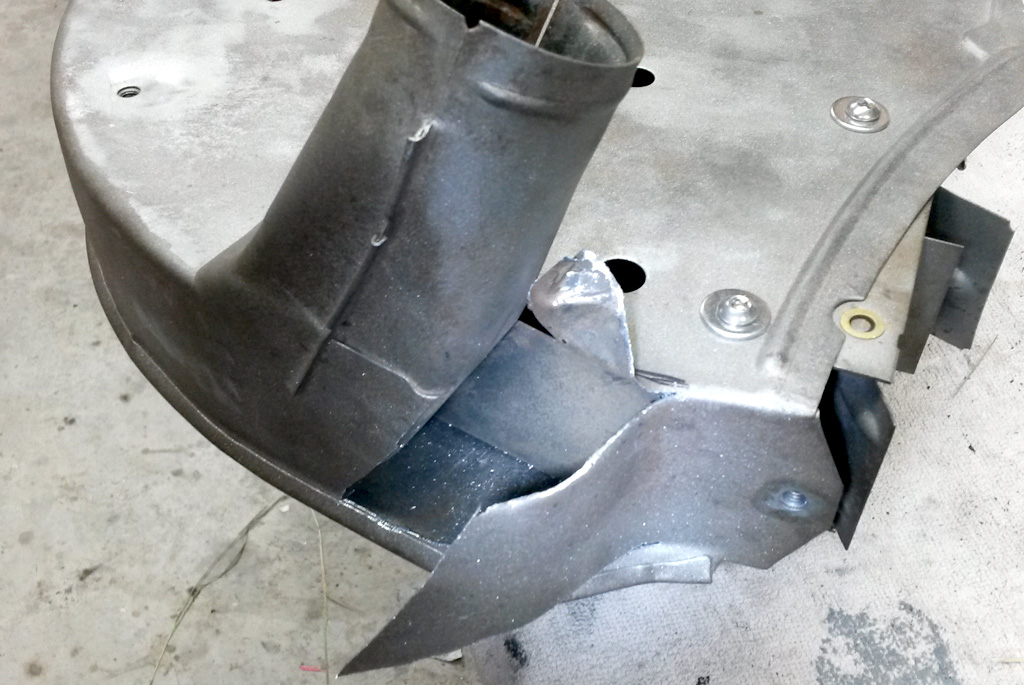
I folded the tin out of the way and gave it a test fit:
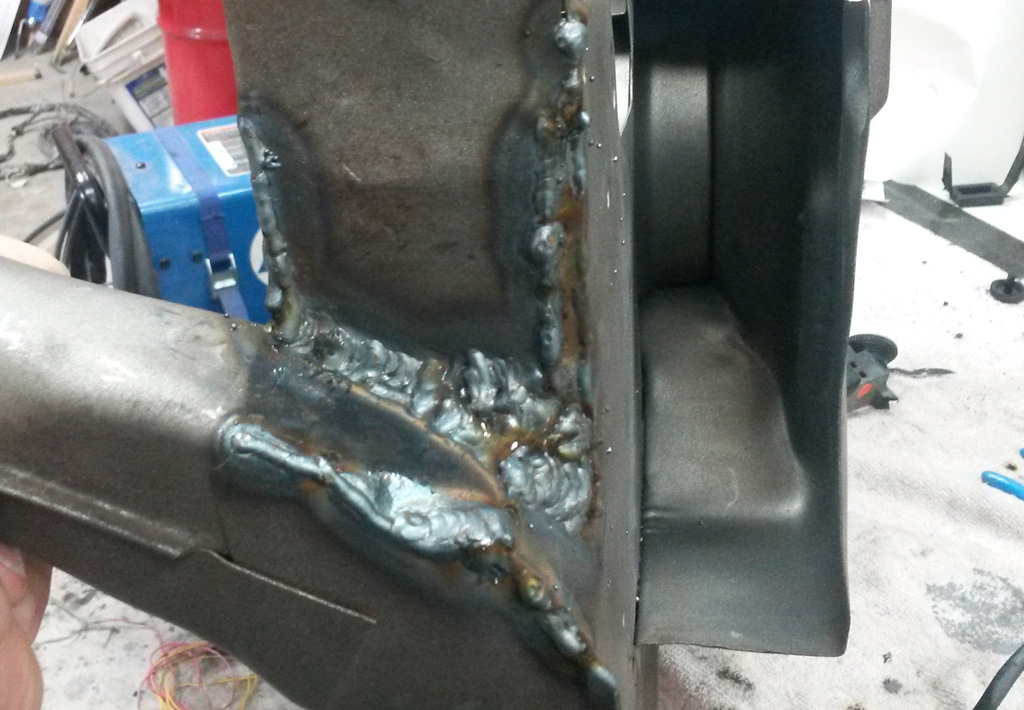
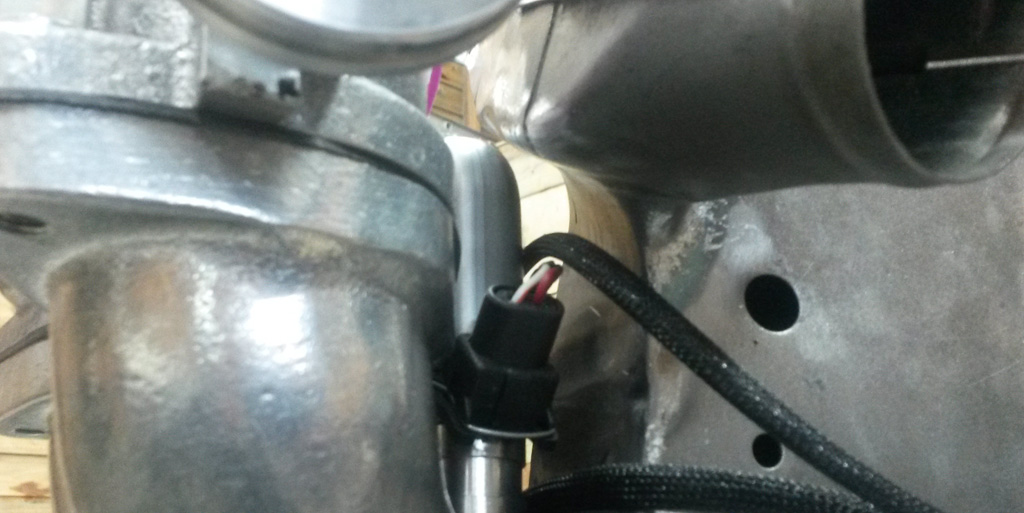
A little more love to the tin. To keep the strength I flattened out the outer skin, and formed a very thin "box" between it and the inner skin:

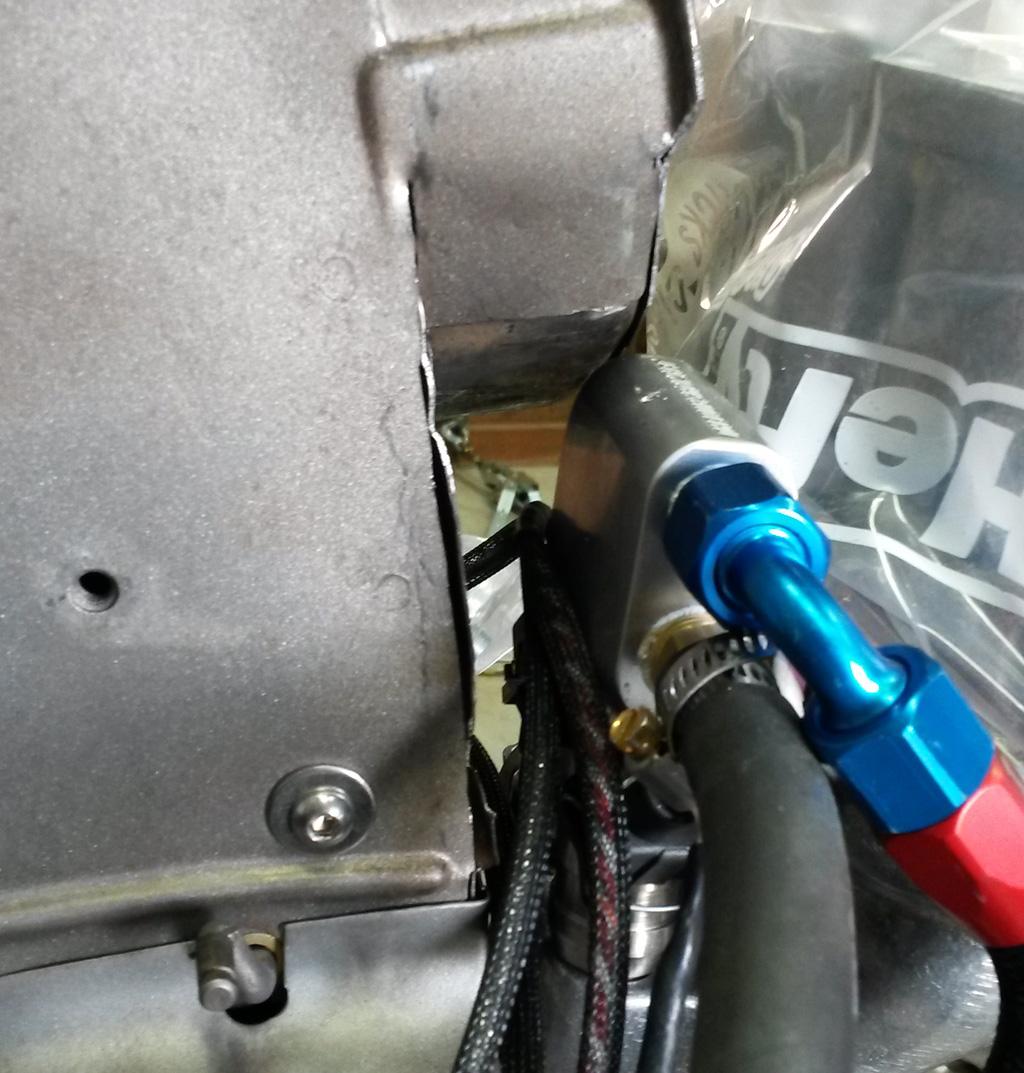
Another test fit indicated that a tiny bit of extra clearance at the corner of the injector would be nice. You can see where I dented the heater outlet a bit in this pic, it is marked in sharpie in the pic above. Then it was another depressing battle between me and the MIG. Pretty sure the fan shroud lost:
I might not be able to weld my way our of a damp paper bag, but I can grind and sand with the best of 'em A little primer and sanding and I think this will look good:

Does it work? I think so:
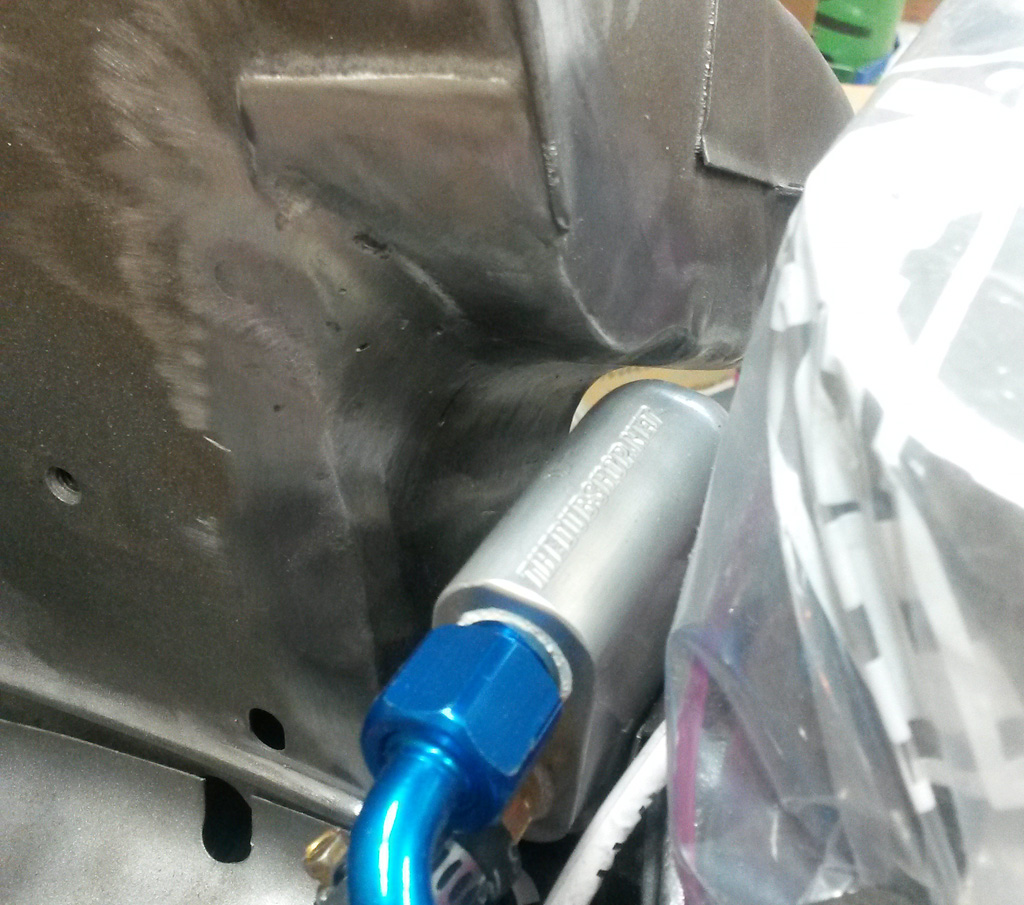
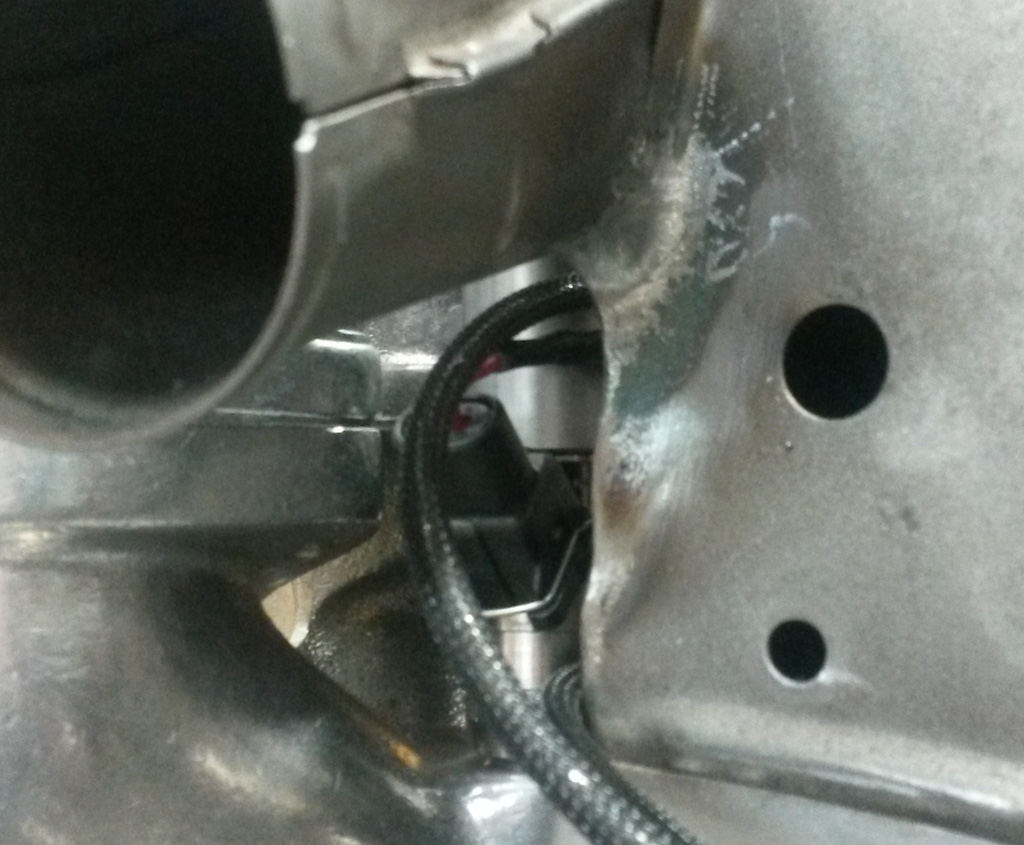
It does look like the fan shroud might have to come out to remove the injectors. Oh well.
This is the "easy" side. The passenger side injector is farther rearward so it will be a different animal. For another day.
Last edited by Baxsie on Fri Aug 08, 2014 11:57 am; edited 1 time in total |
|
| Back to top |
|
|
ONEBADBUG
Joined: 25 Oct 2003
Posts: 440
Location: Spokane
|
| Posted: Mon Sep 02, 2013 7:13 am Post subject: |
|
|
| I've been meaning to mention that you should fill that oil/air separator with stainless steel wool, Brillo pad from the grocery store. I used that and it works great. |
|
| Back to top |
|
|
Baxsie
Joined: 12 Apr 2012
Posts: 253
|
| Posted: Mon Sep 02, 2013 8:03 am Post subject: |
|
|
| ONEBADBUG wrote: | | I've been meaning to mention that you should fill that oil/air separator with stainless steel wool, Brillo pad from the grocery store. I used that and it works great. |
I thought about that (I think from your mention), but if bits fell out they would drop right into the crankcase. Scary. |
|
| Back to top |
|
|
dukebradbury

Joined: 13 Oct 2009
Posts: 185
Location: Spokane 5-mile
|
| Posted: Mon Sep 02, 2013 4:13 pm Post subject: |
|
|
Baxsie,
You are killing it!!! Great job. Fun thread to read and watch your progress. Keep up the good work and keep the pics coming!! |
|
| Back to top |
|
|
|
|
You cannot post new topics in this forum
You cannot reply to topics in this forum
You cannot edit your posts in this forum
You cannot delete your posts in this forum
You cannot vote in polls in this forum
You cannot attach files in this forum
You can download files in this forum
|
|


