| View previous topic :: View next topic |
| Author |
Message |
Baxsie
Joined: 12 Apr 2012
Posts: 253
|
 Posted: Sat Sep 06, 2014 6:19 am Post subject: Paint and Body Work Complete (photo storm) Posted: Sat Sep 06, 2014 6:19 am Post subject: Paint and Body Work Complete (photo storm) |
 |
|
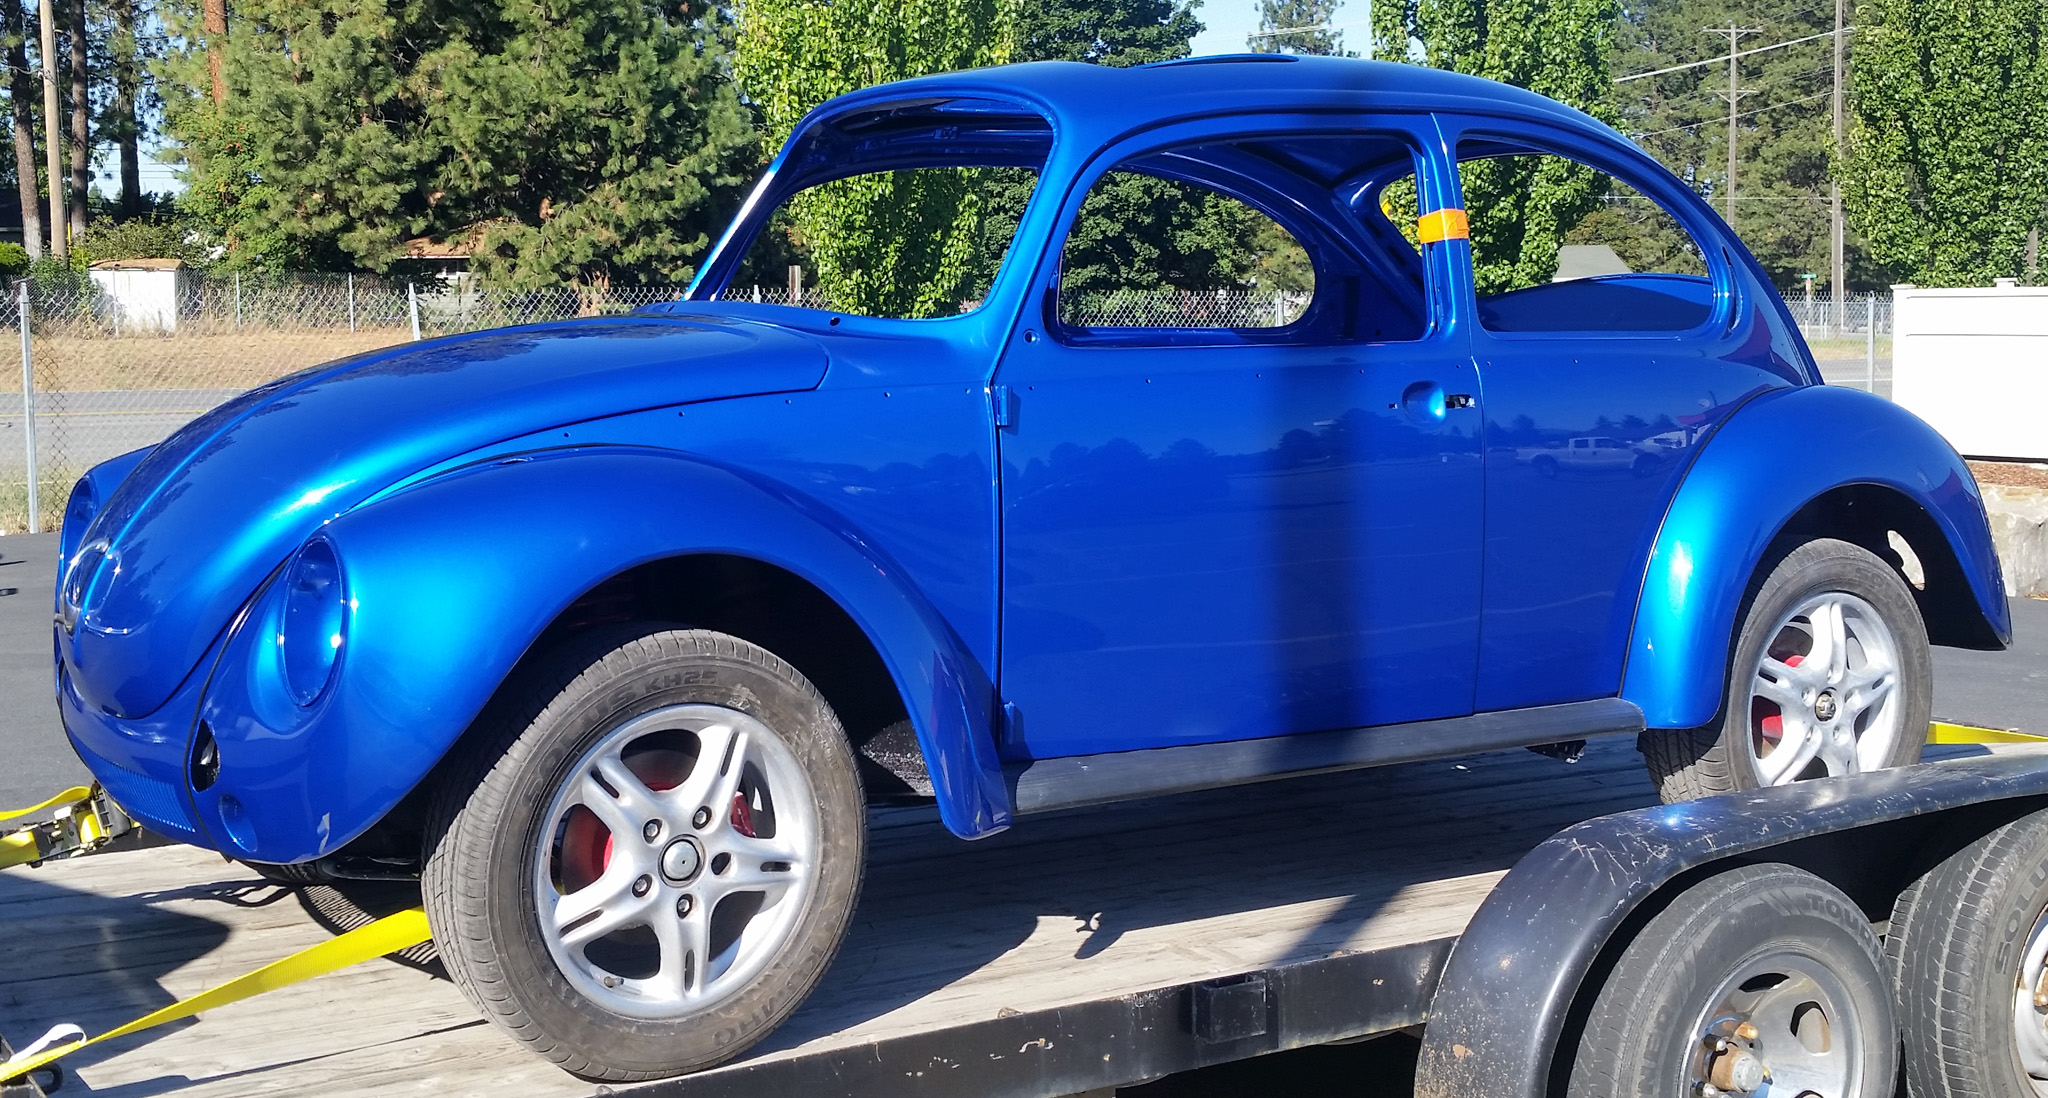
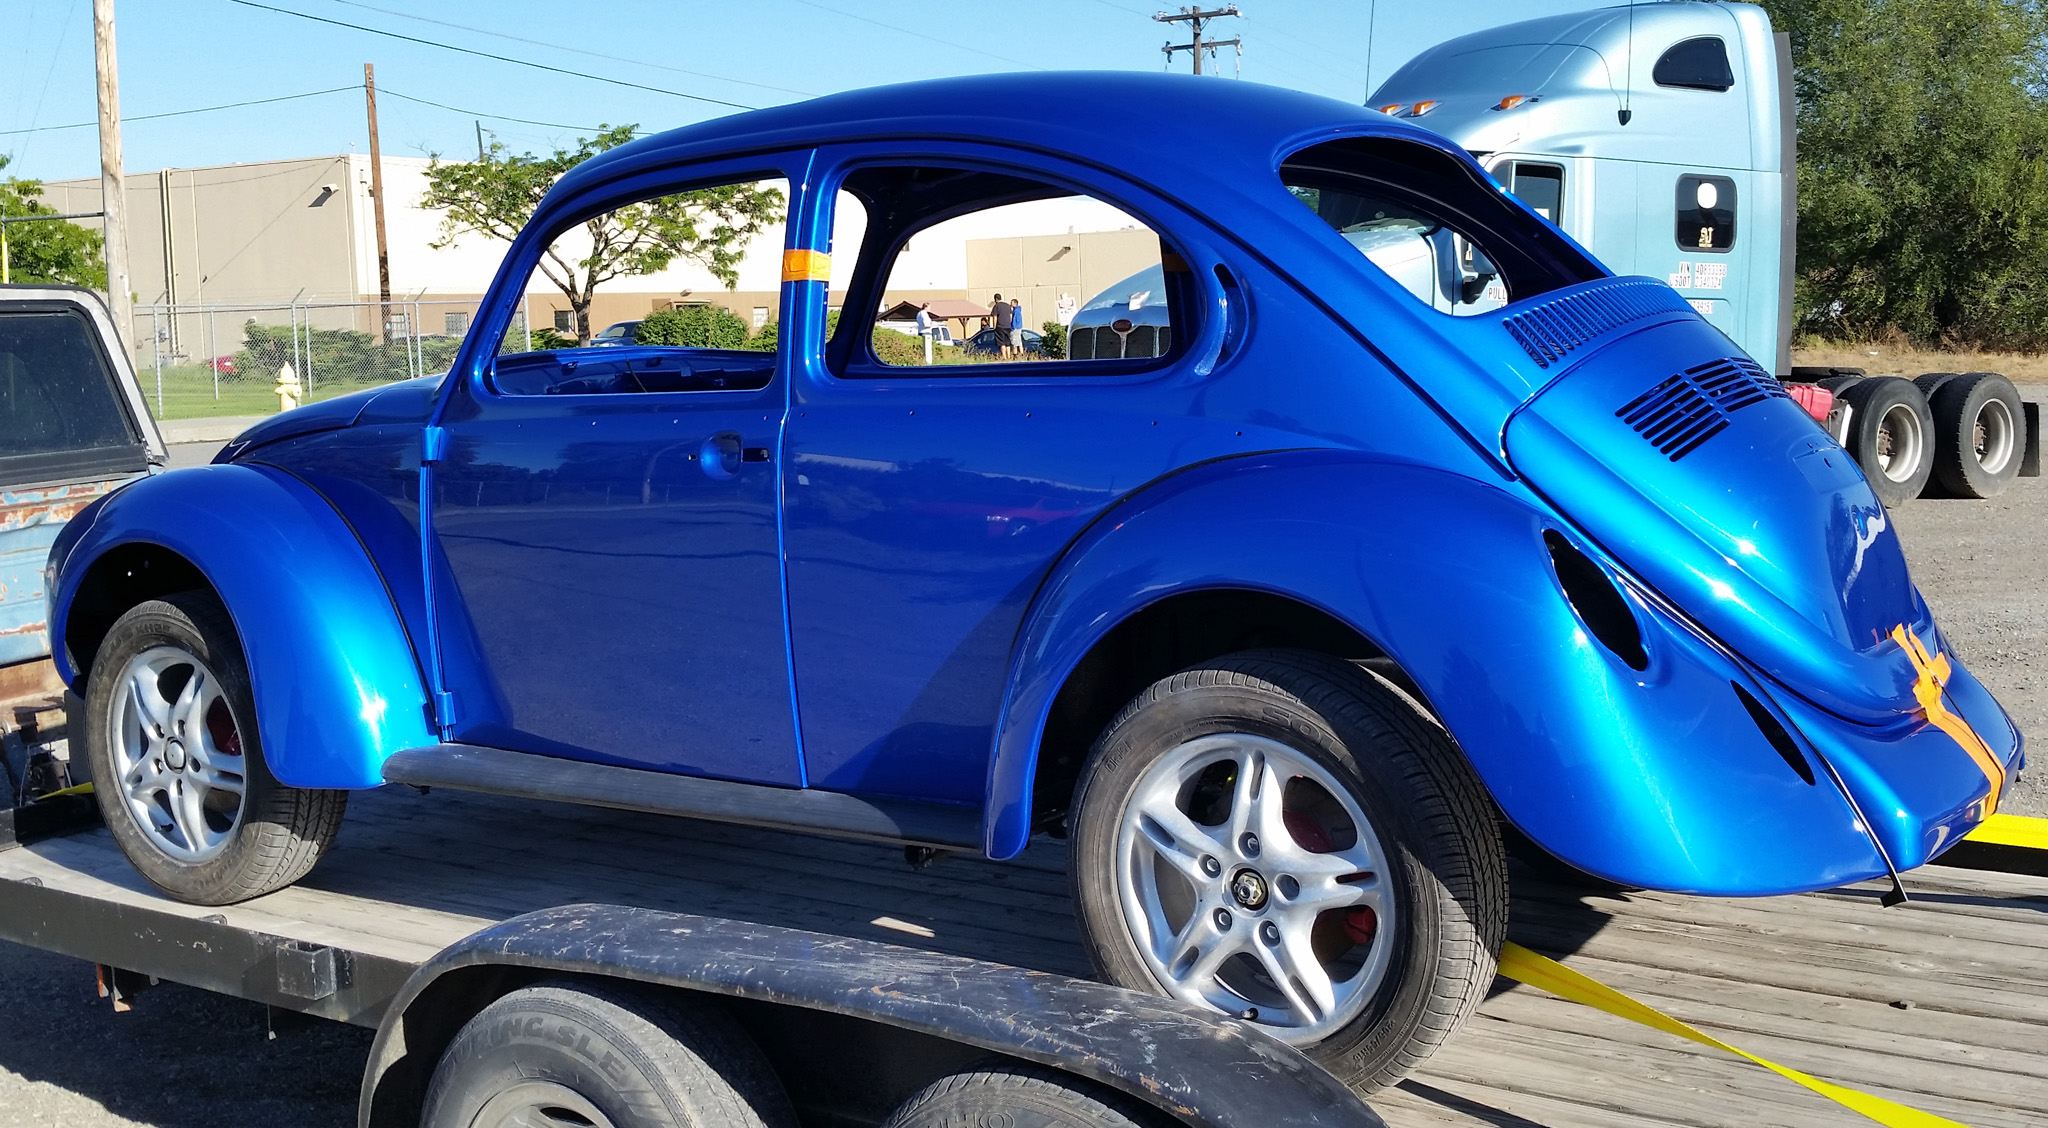
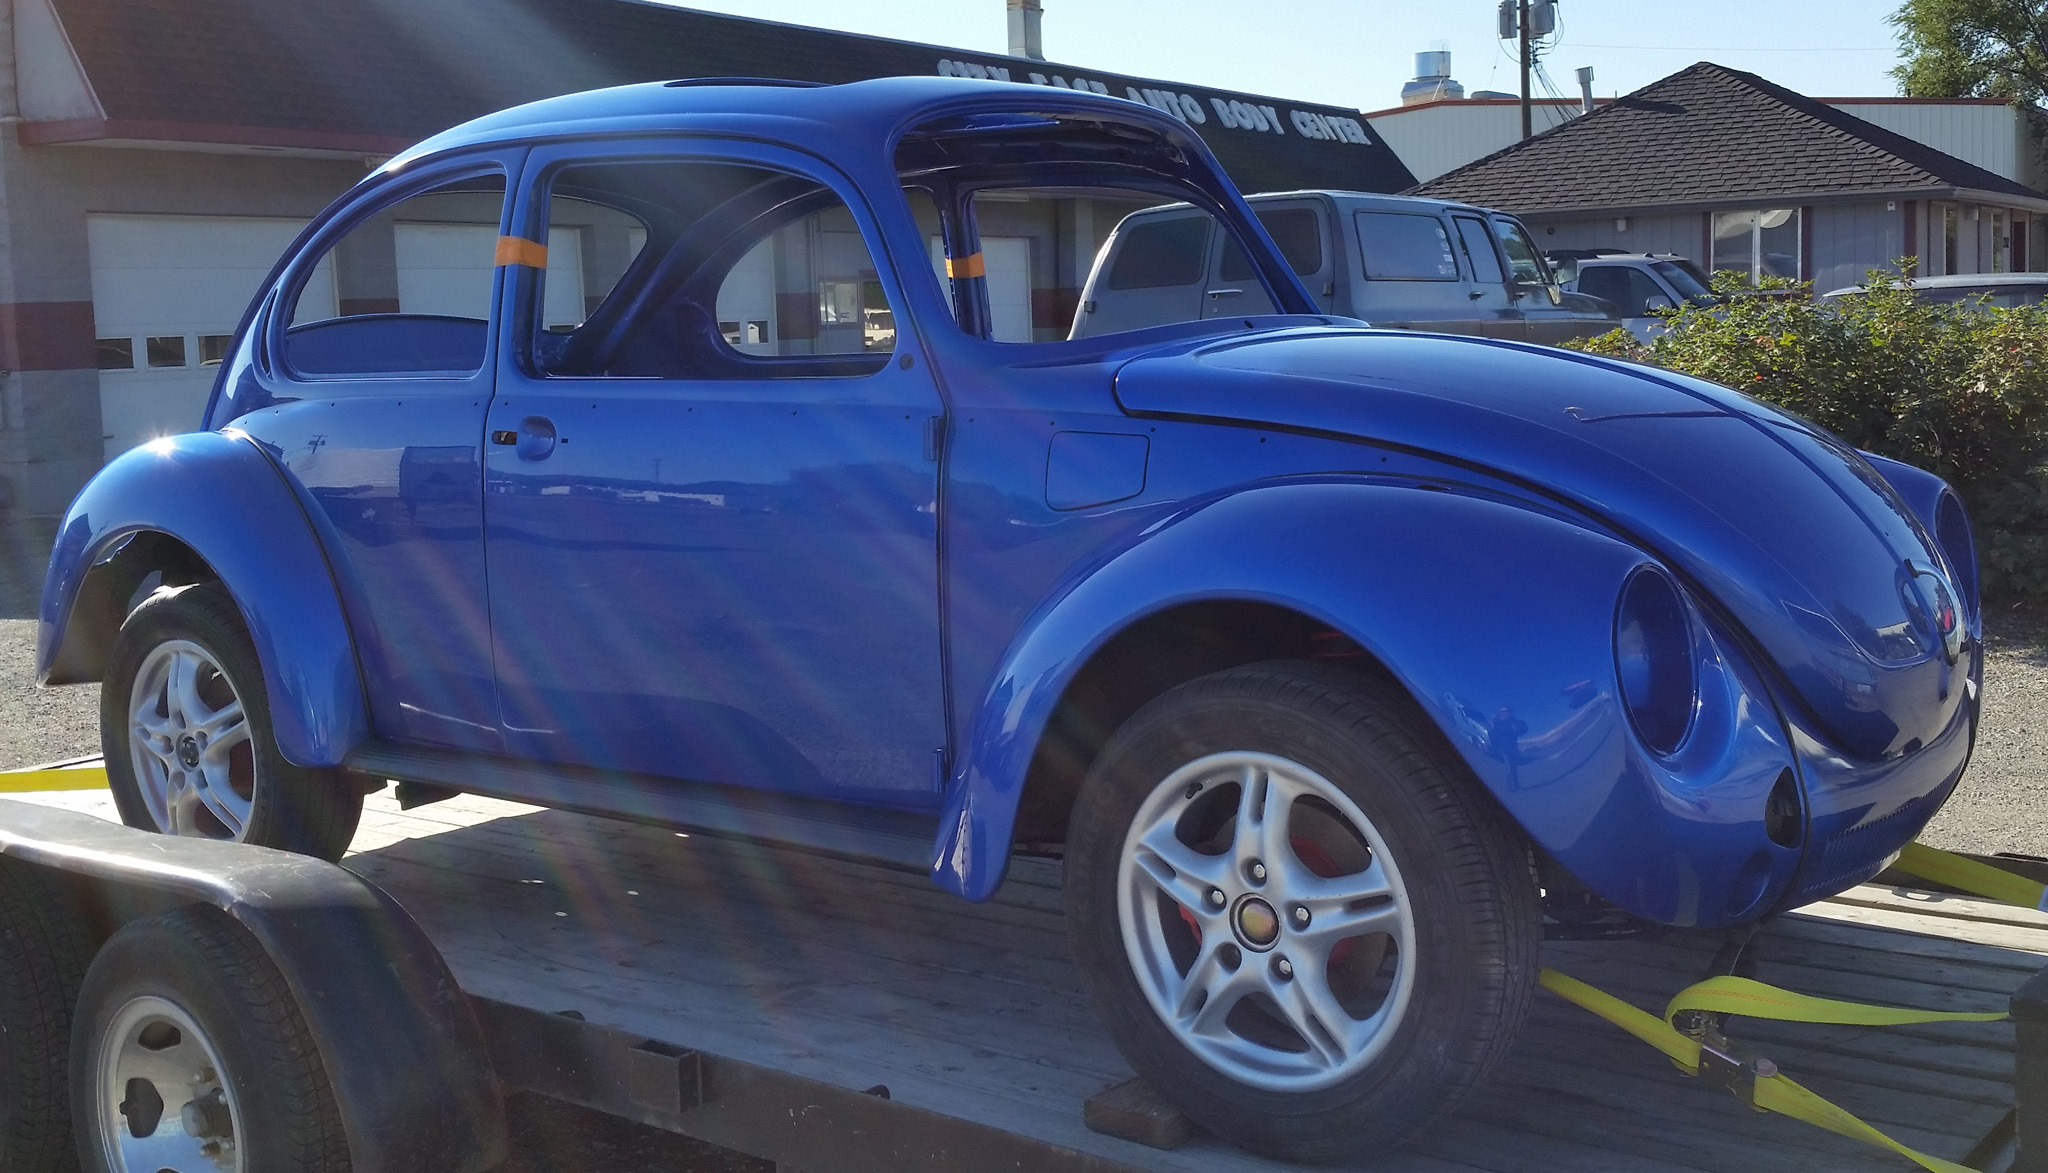
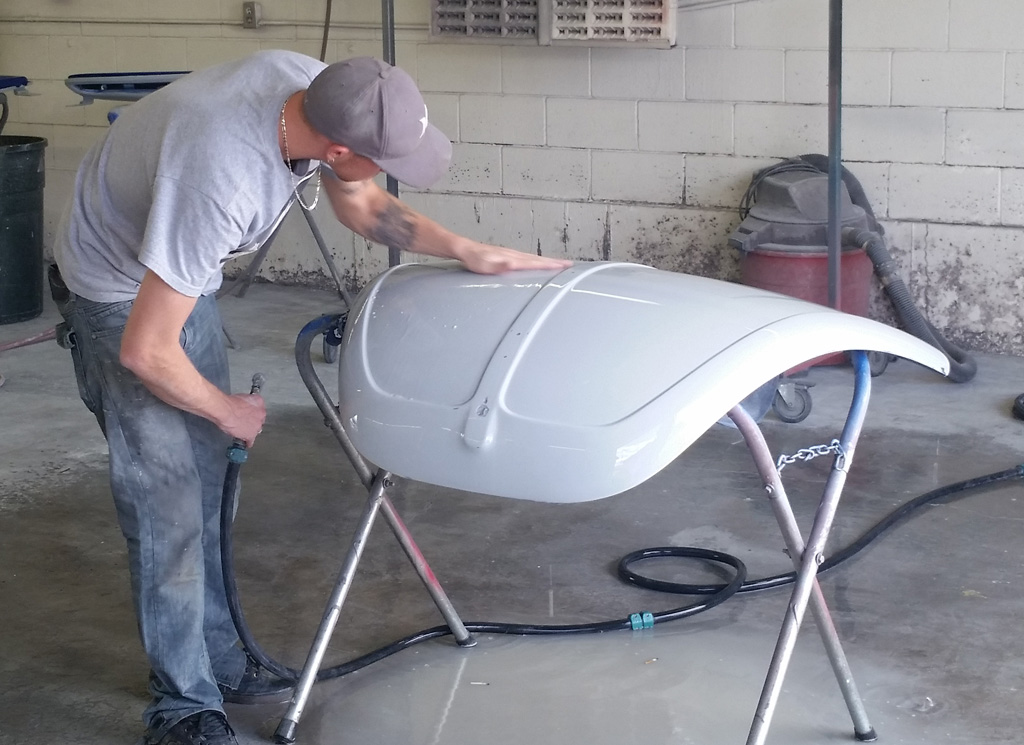
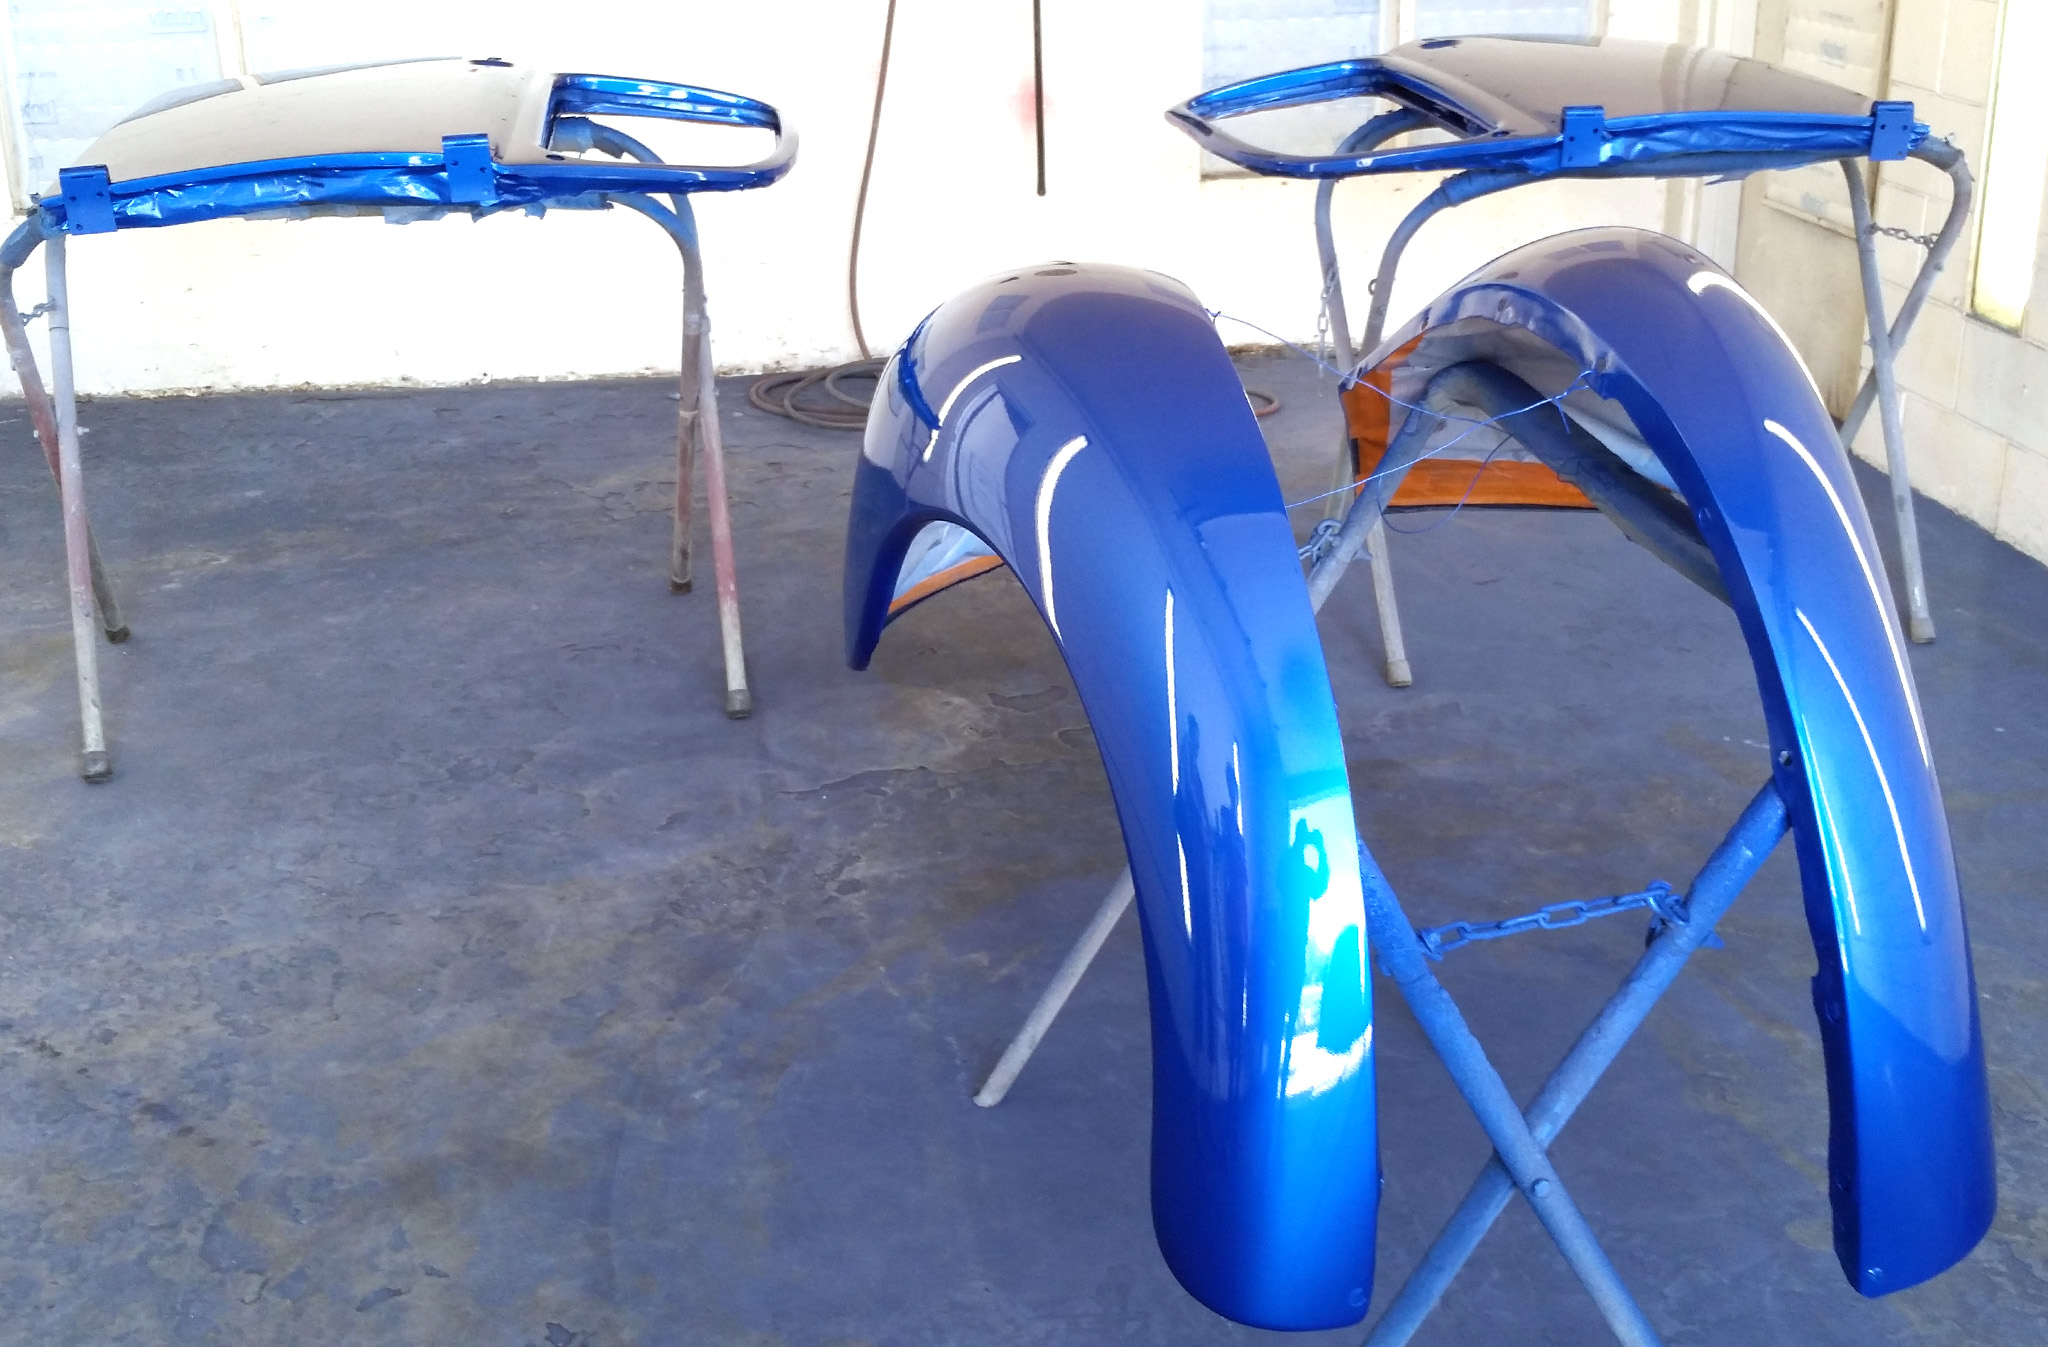
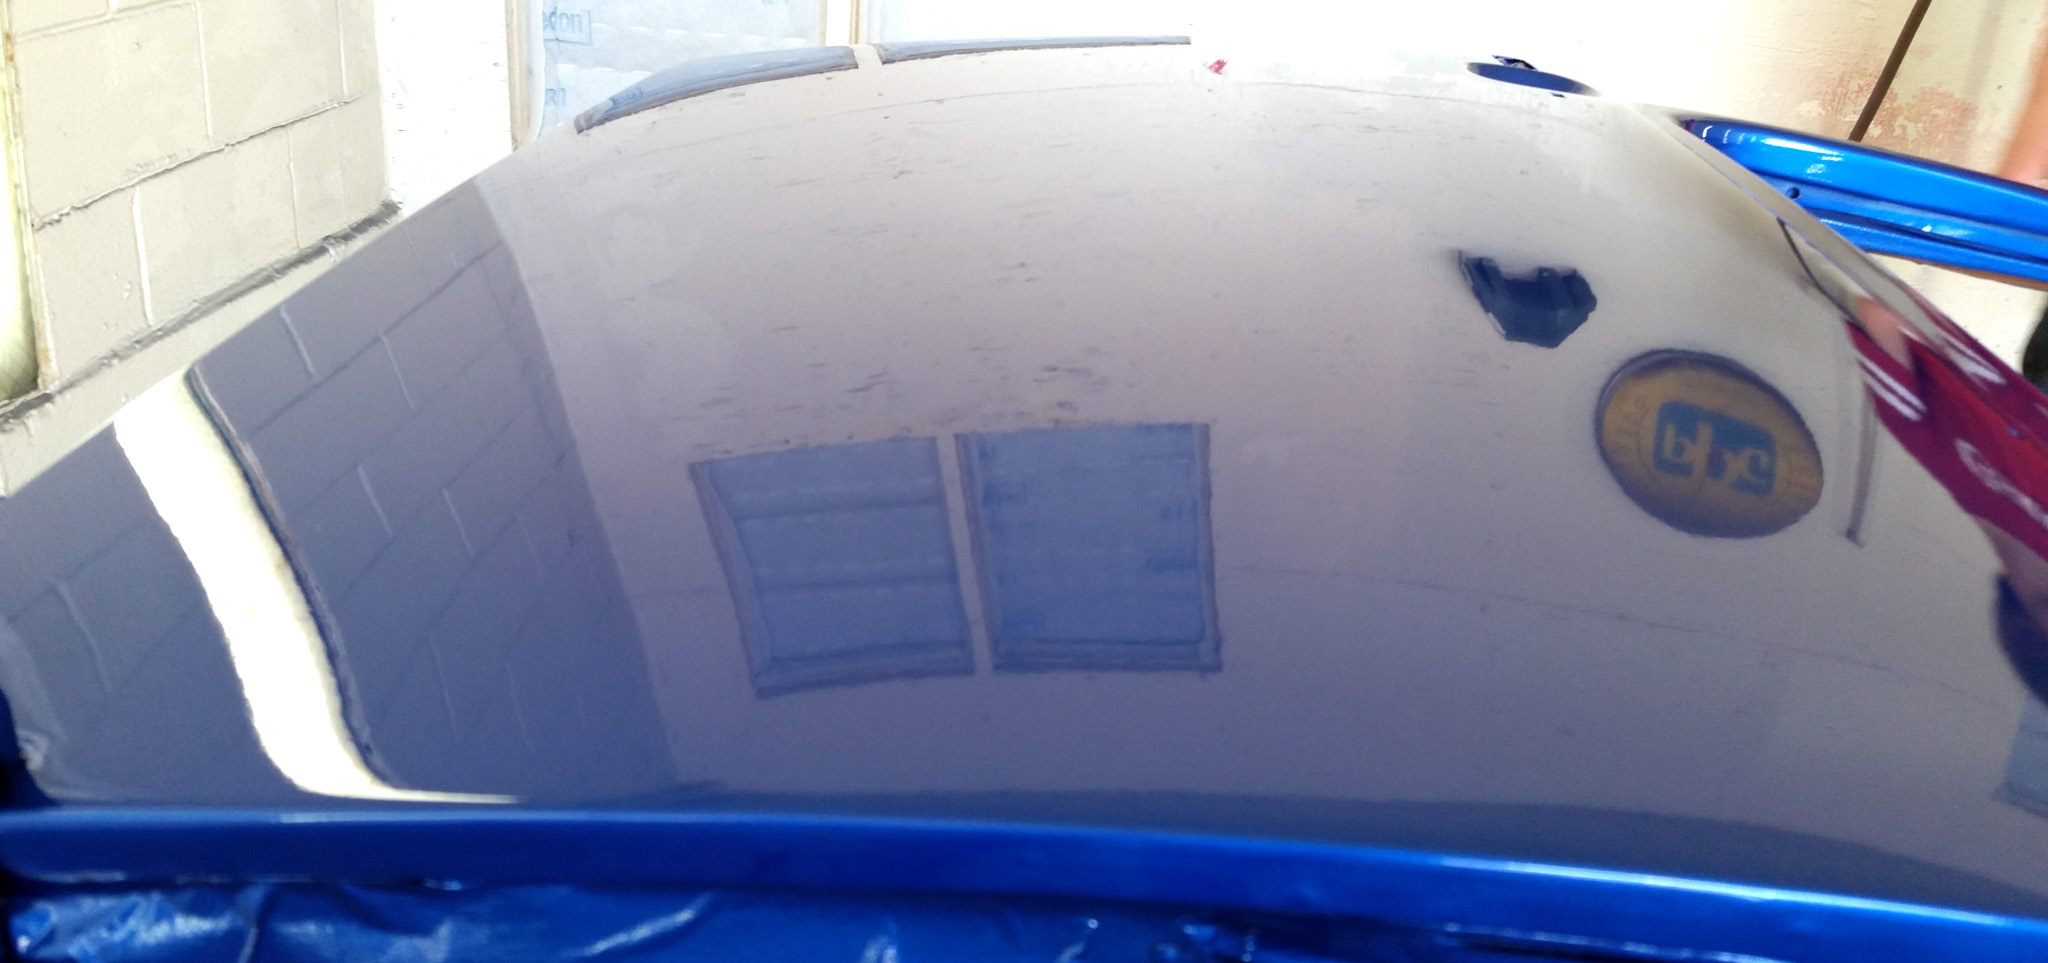
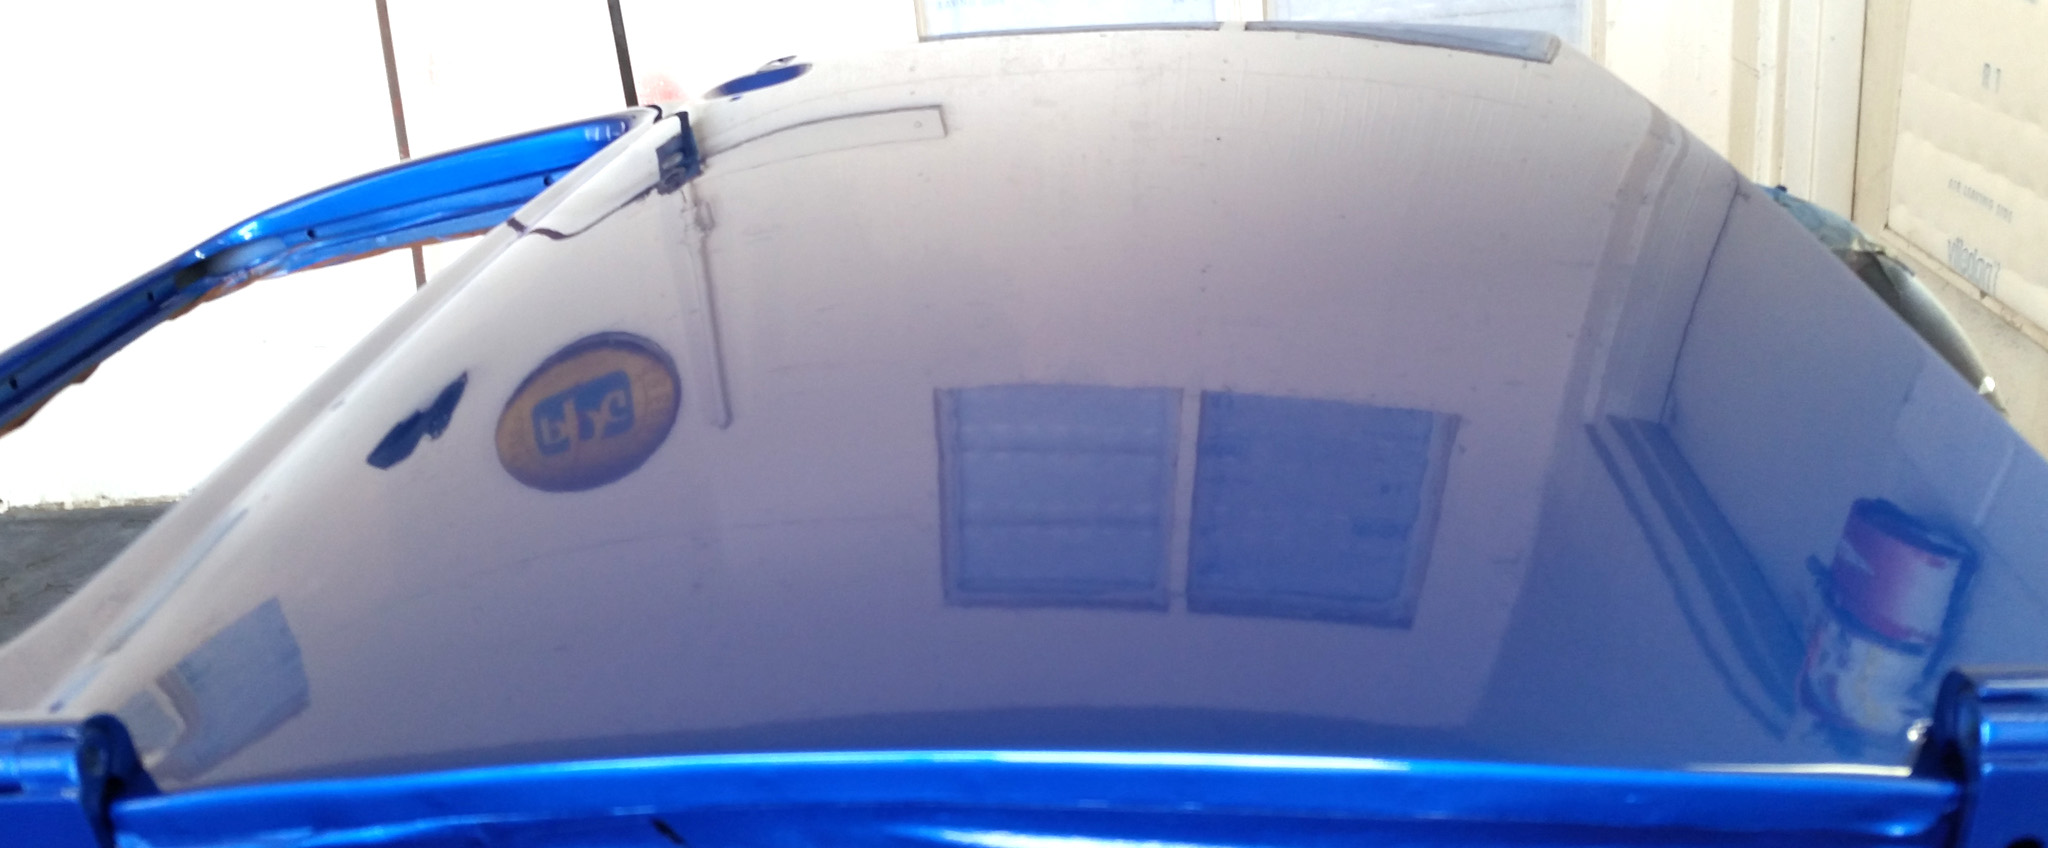
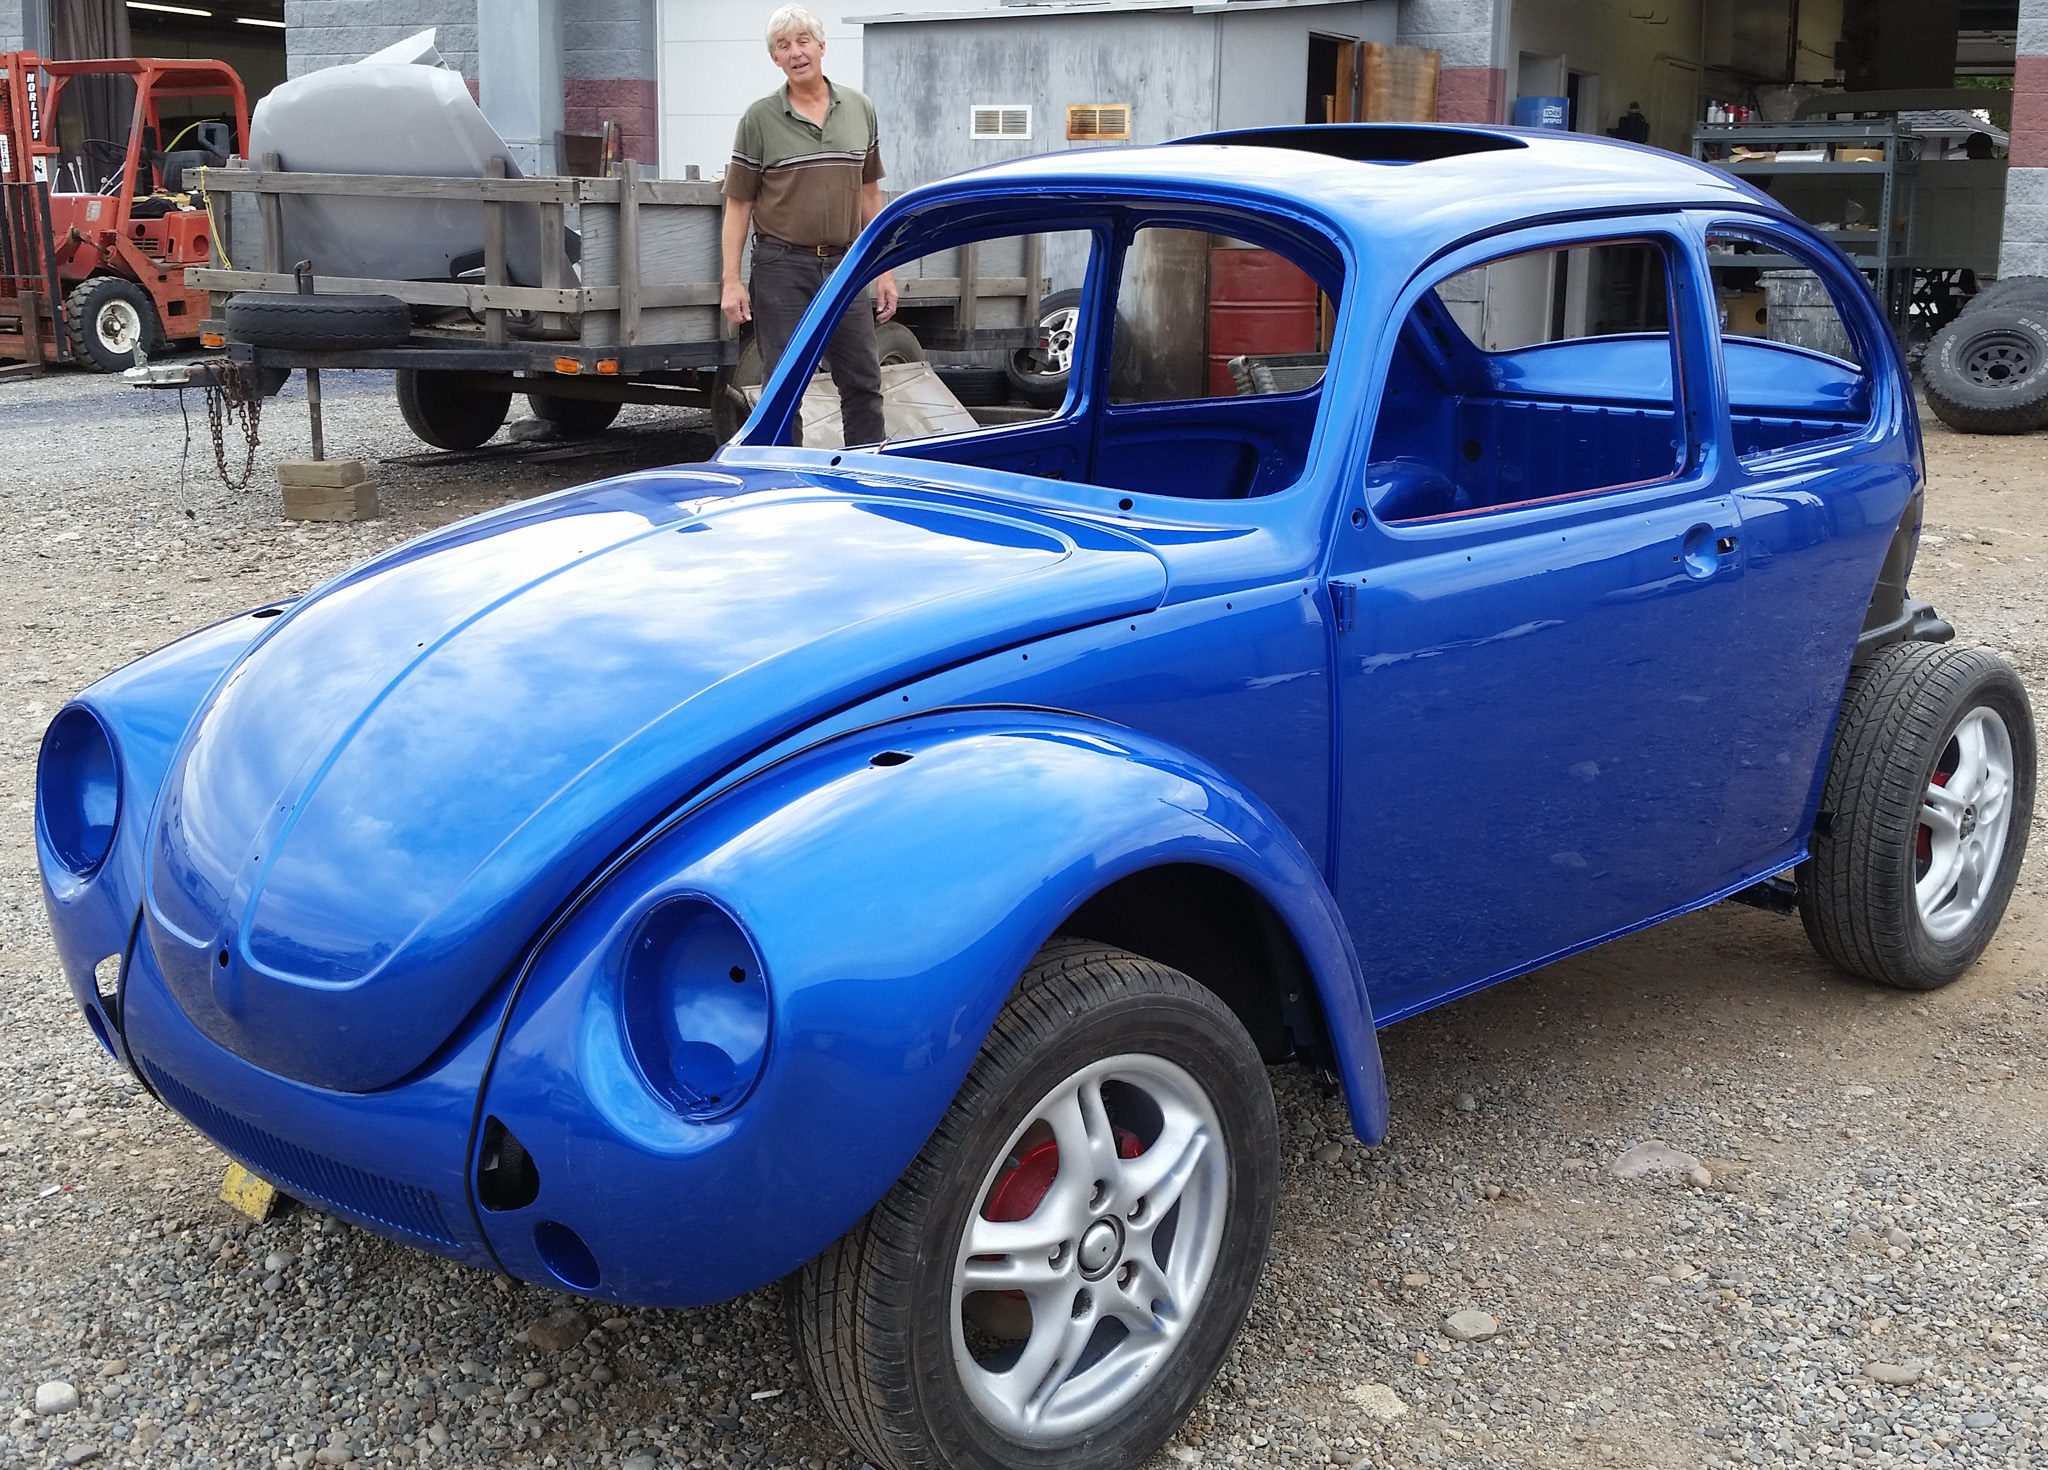
We had City East Auto Body do the remaining collision repair, final body work and paint. The owners lives right up the road from us--we have known them for years.
I could not be more happy with the results. The paint is beautiful, the car is super straight. Here is a quick walk-around:

Body and paint history: previous body & paint posts:
Engine Tin painted, Body in Primer
Underside of body painted, reassemble body to pan
Collision repair on front of car
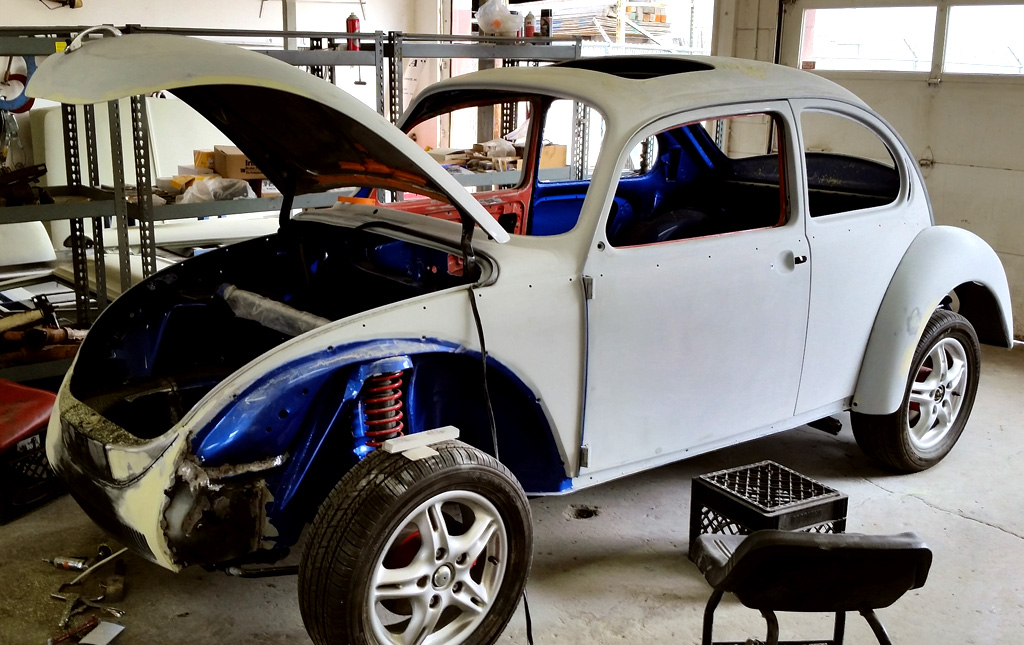
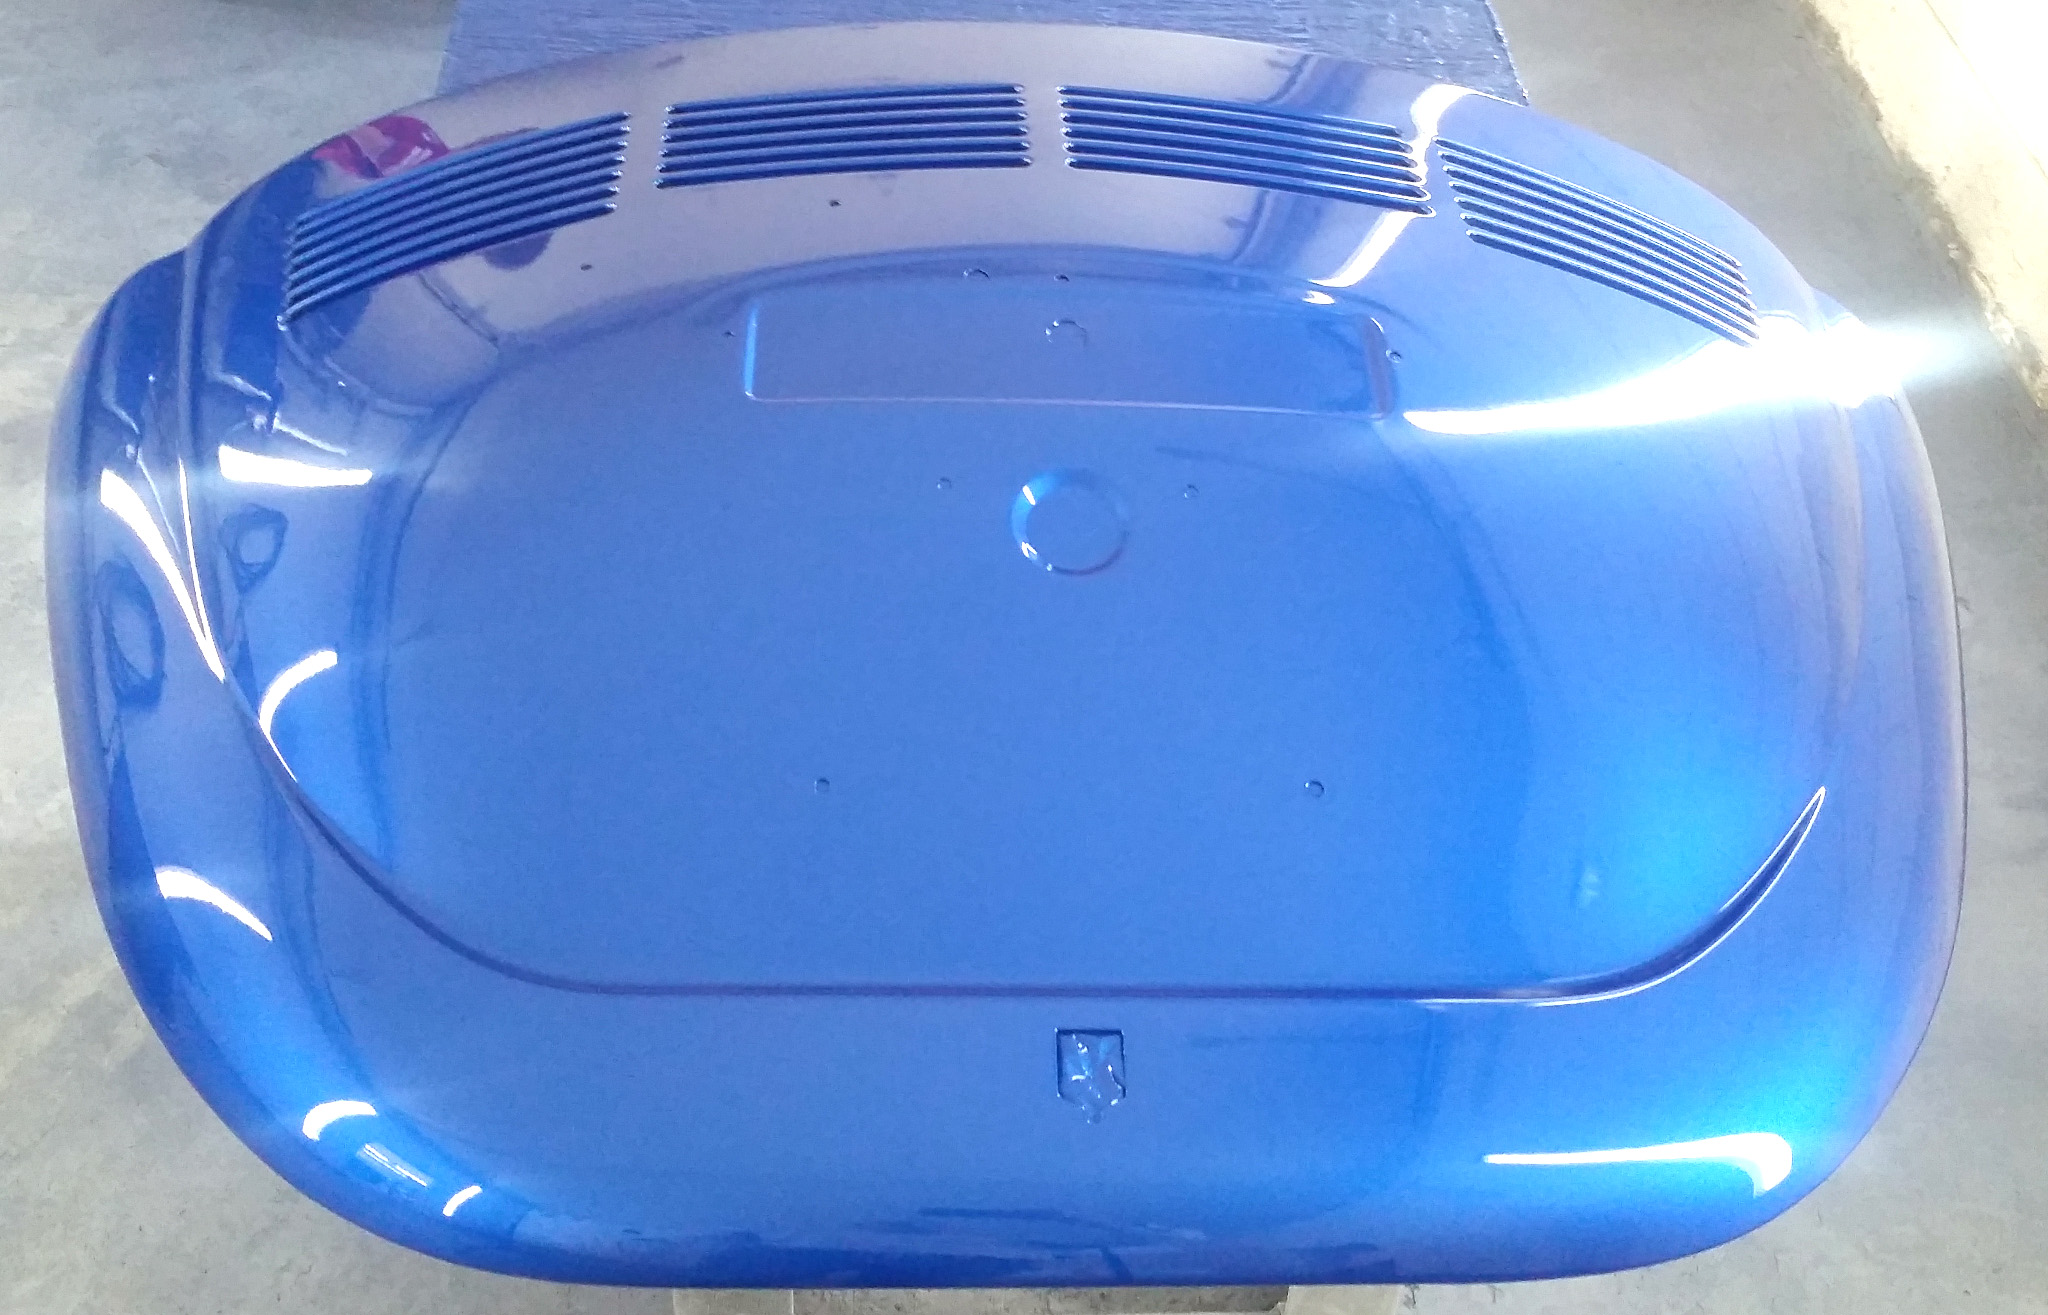
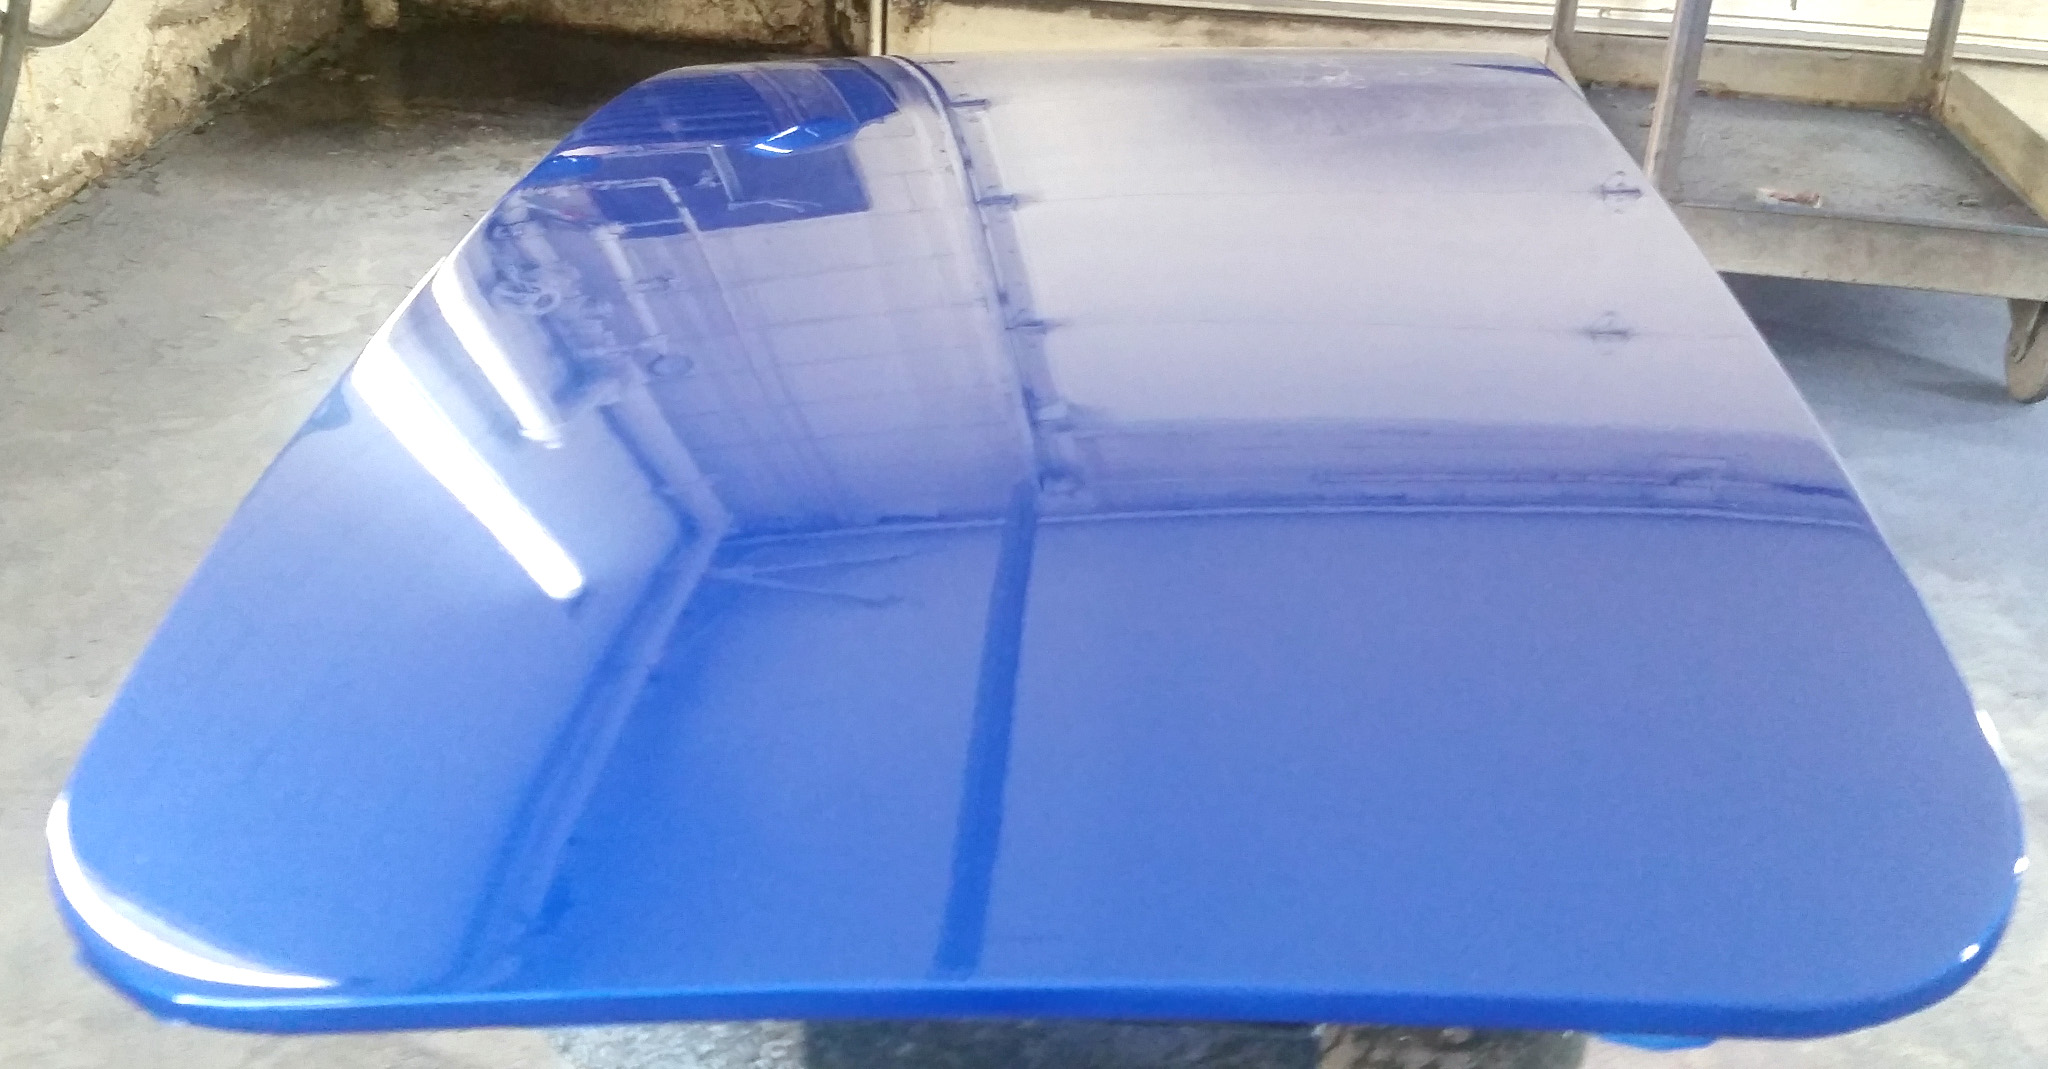
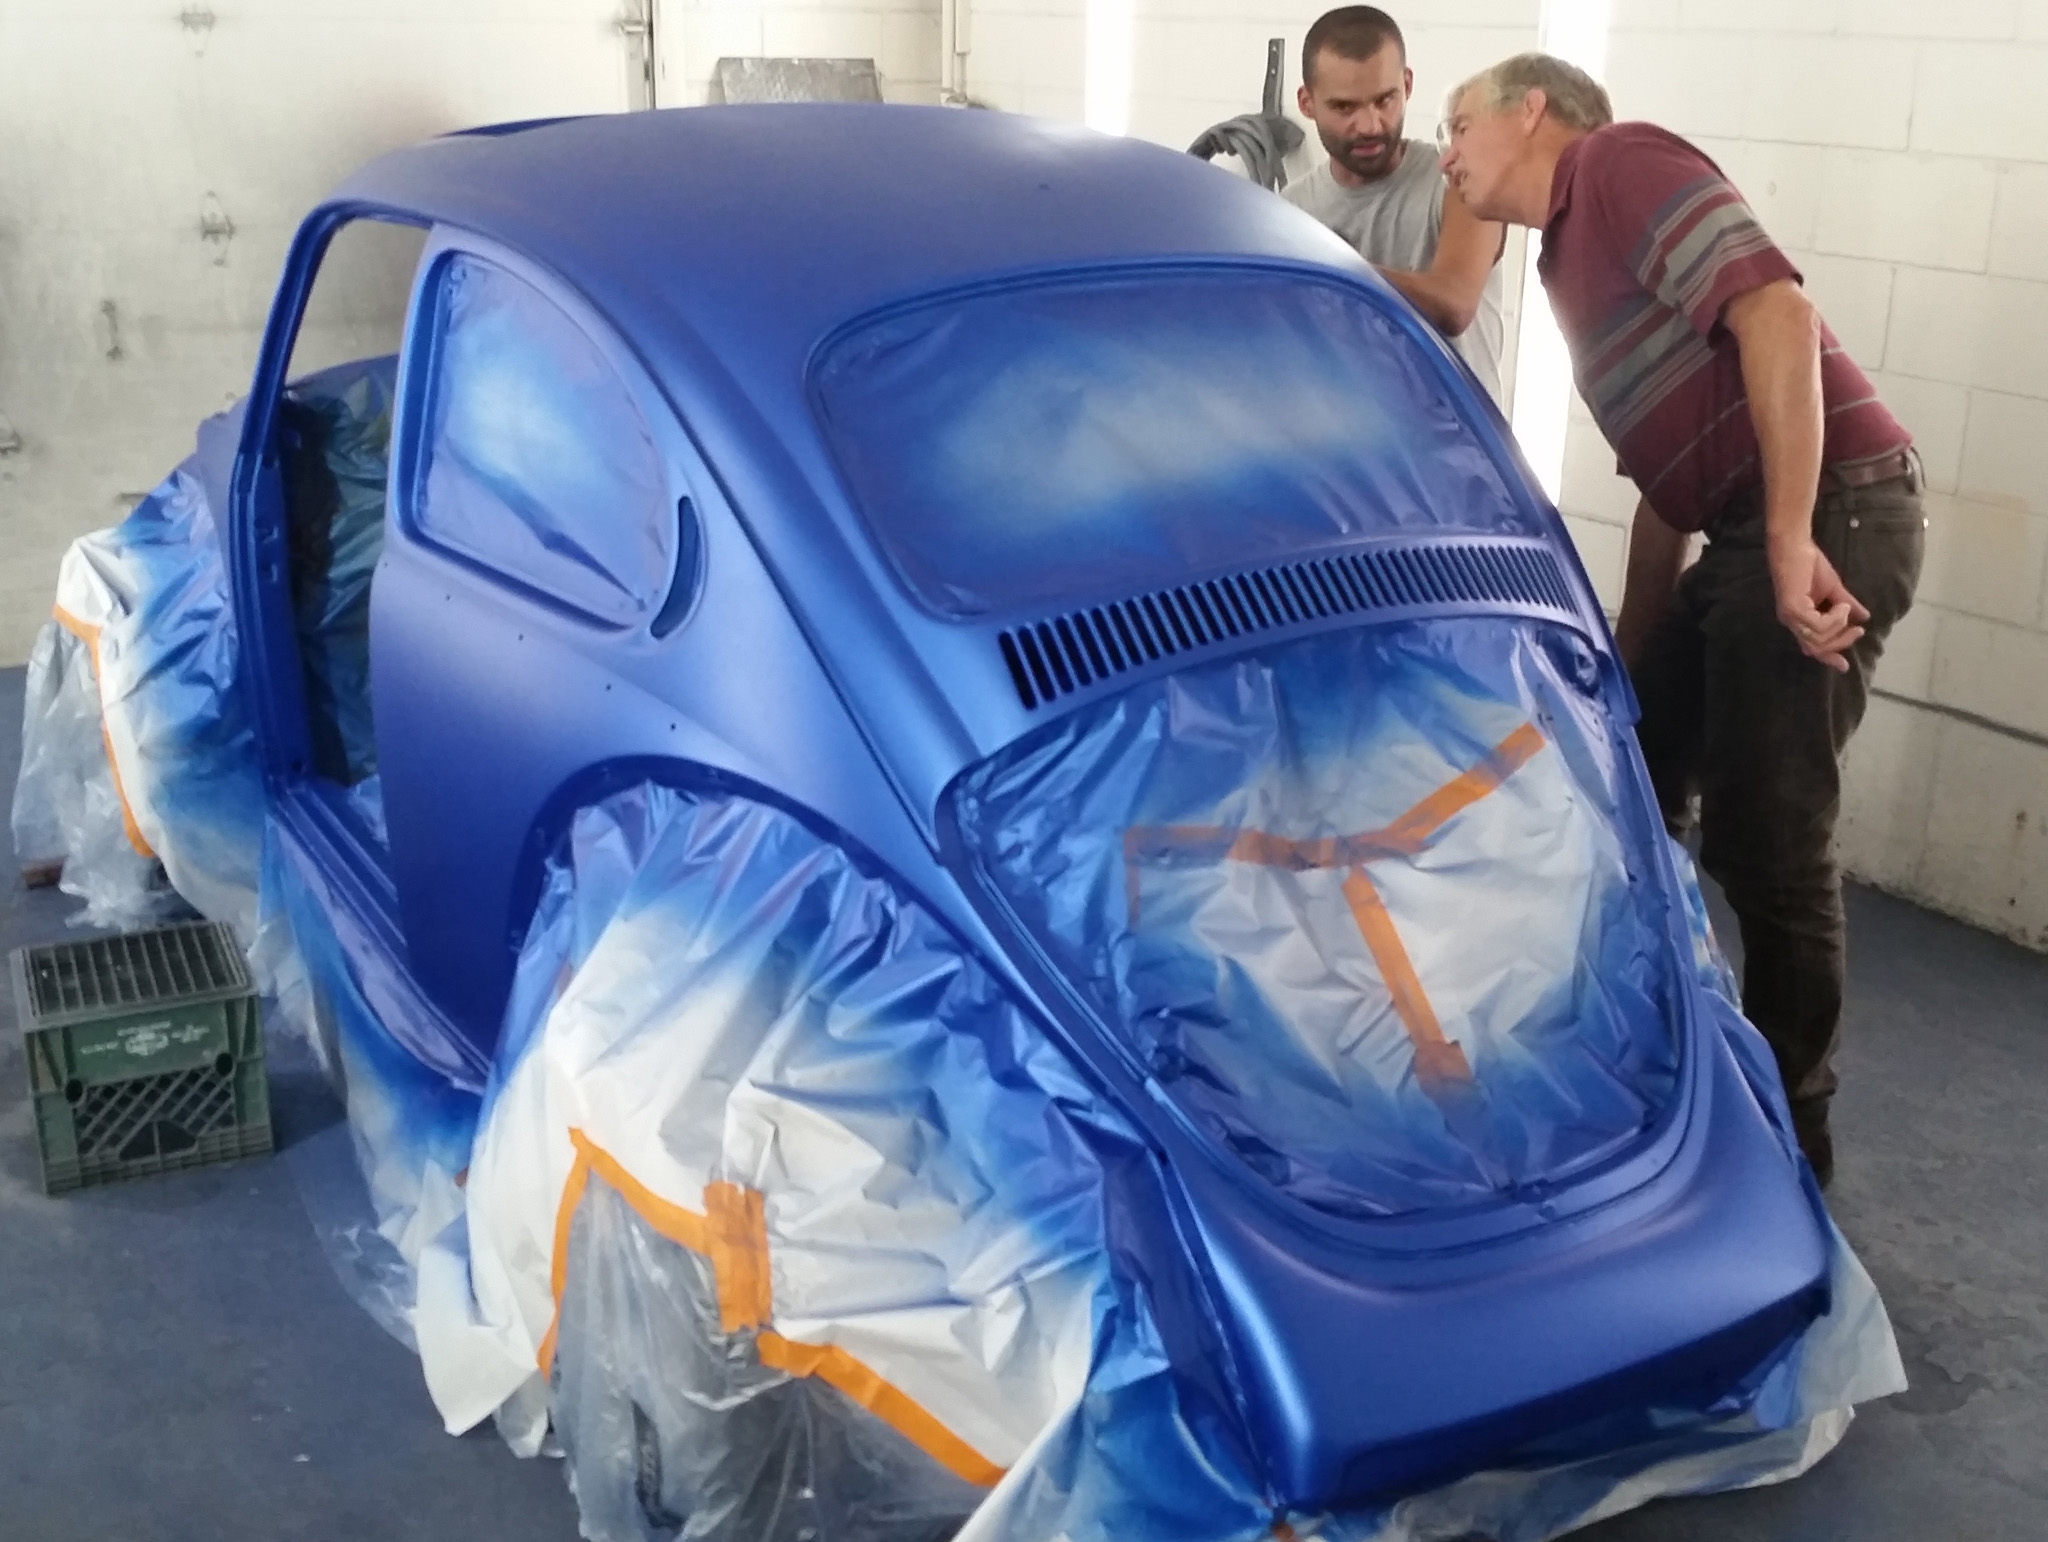
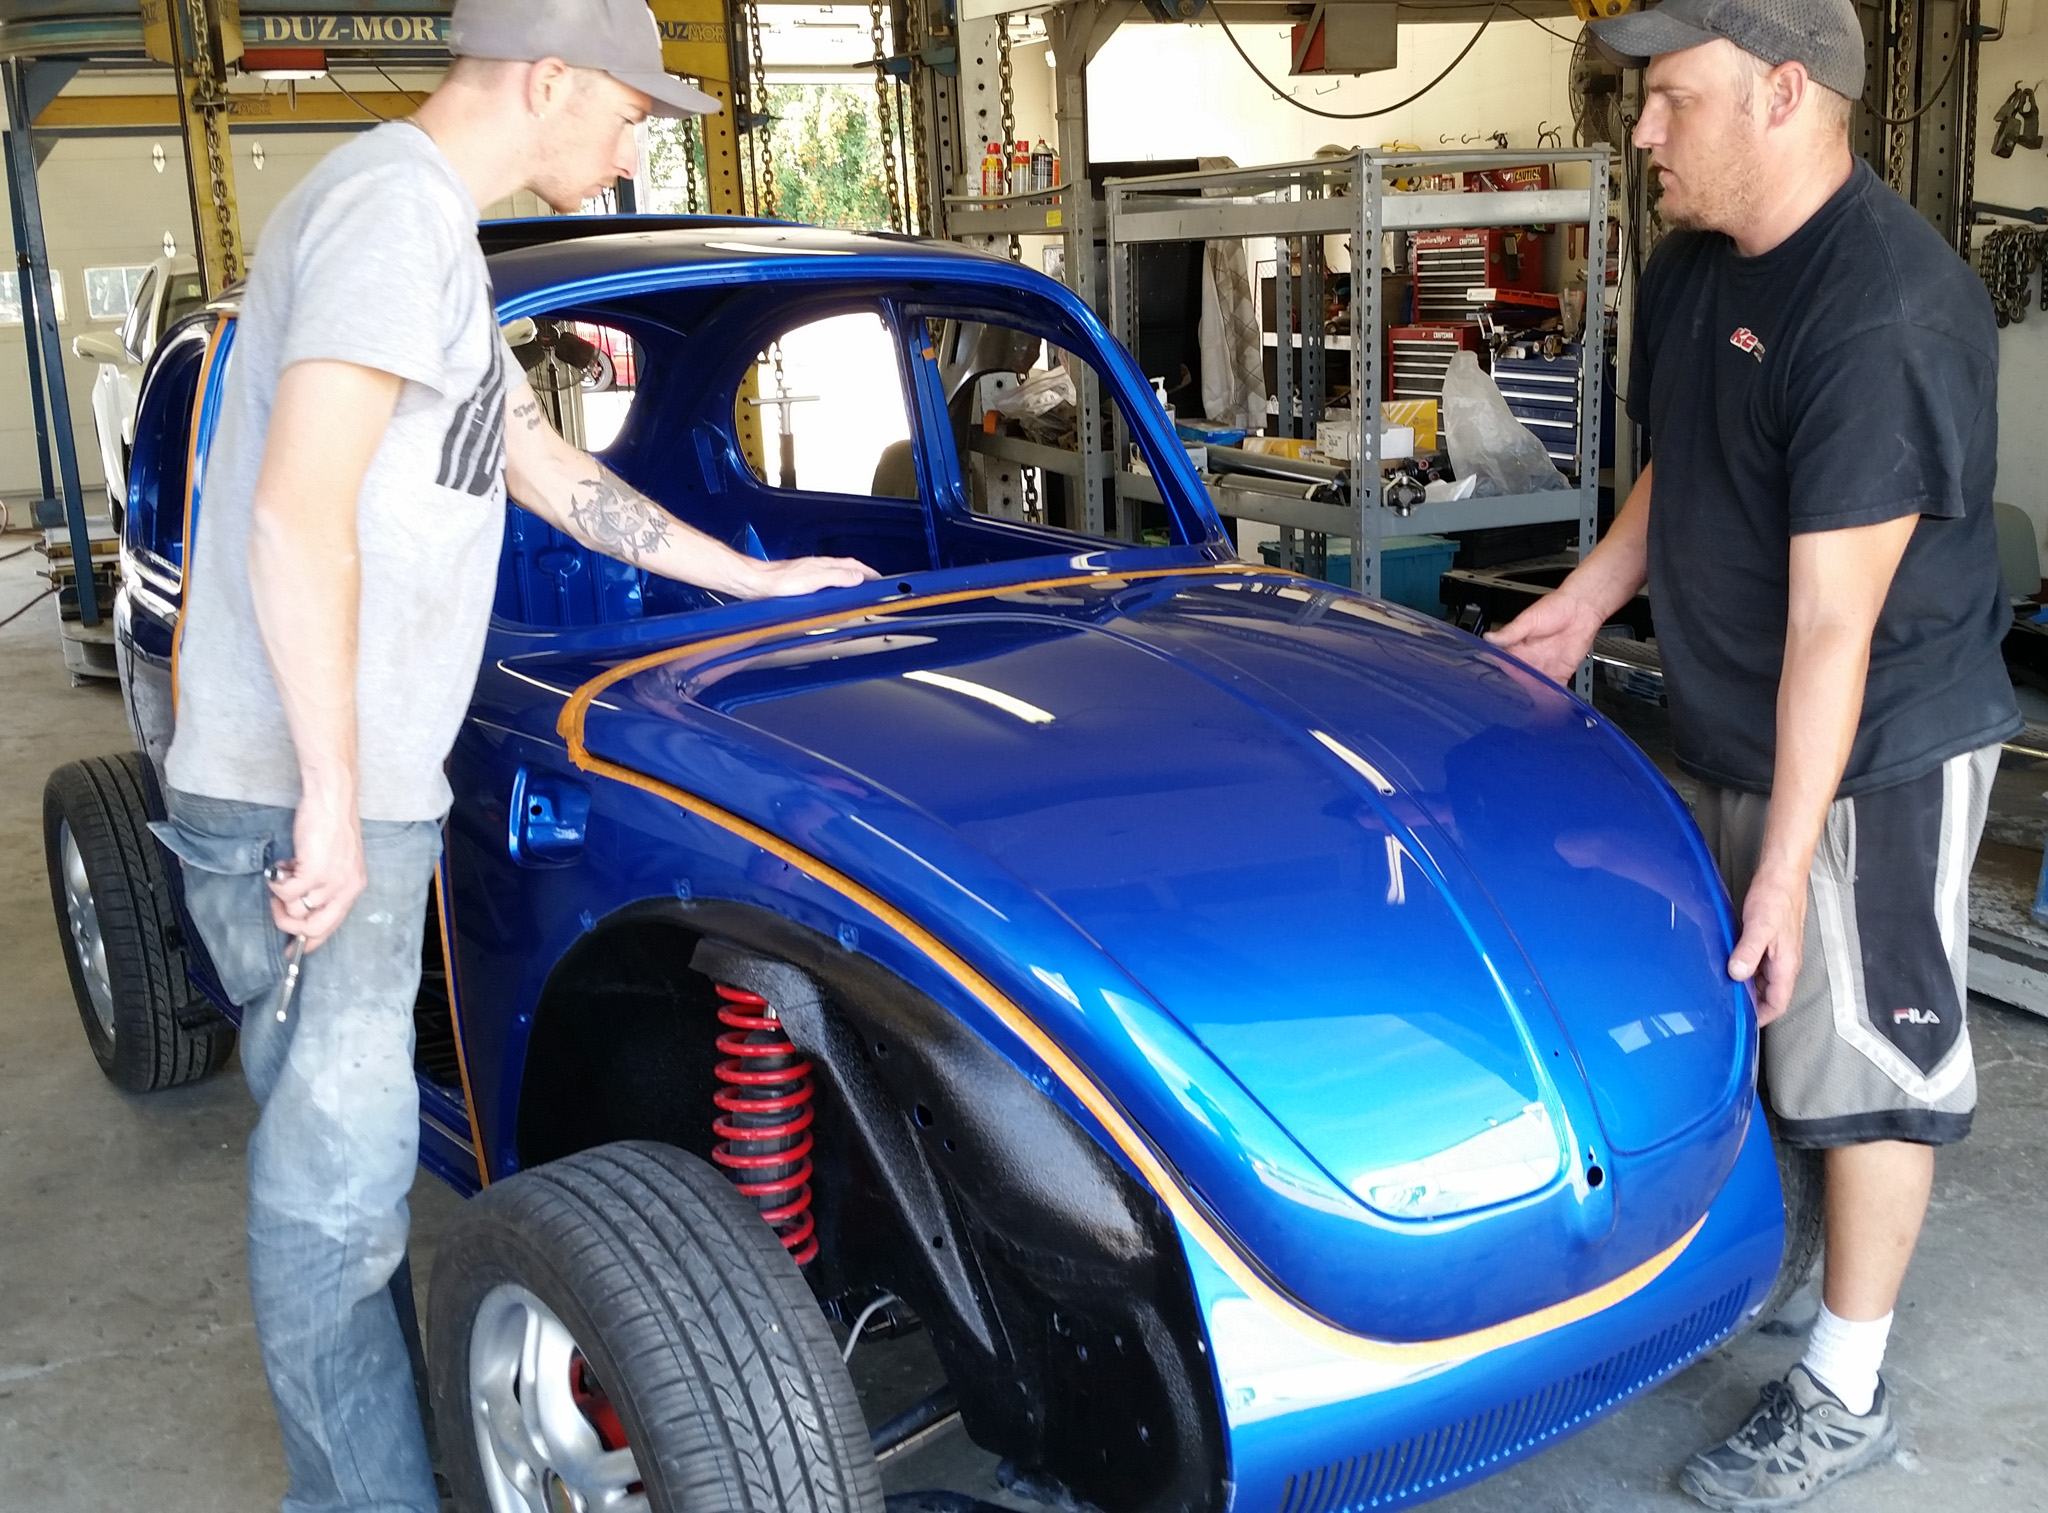
Here are some random in-progress pictures, generally in chronological order.
Test fit of hood and doors:
Wet sanding hood primer:
Doors & Fenders, still in the booth:
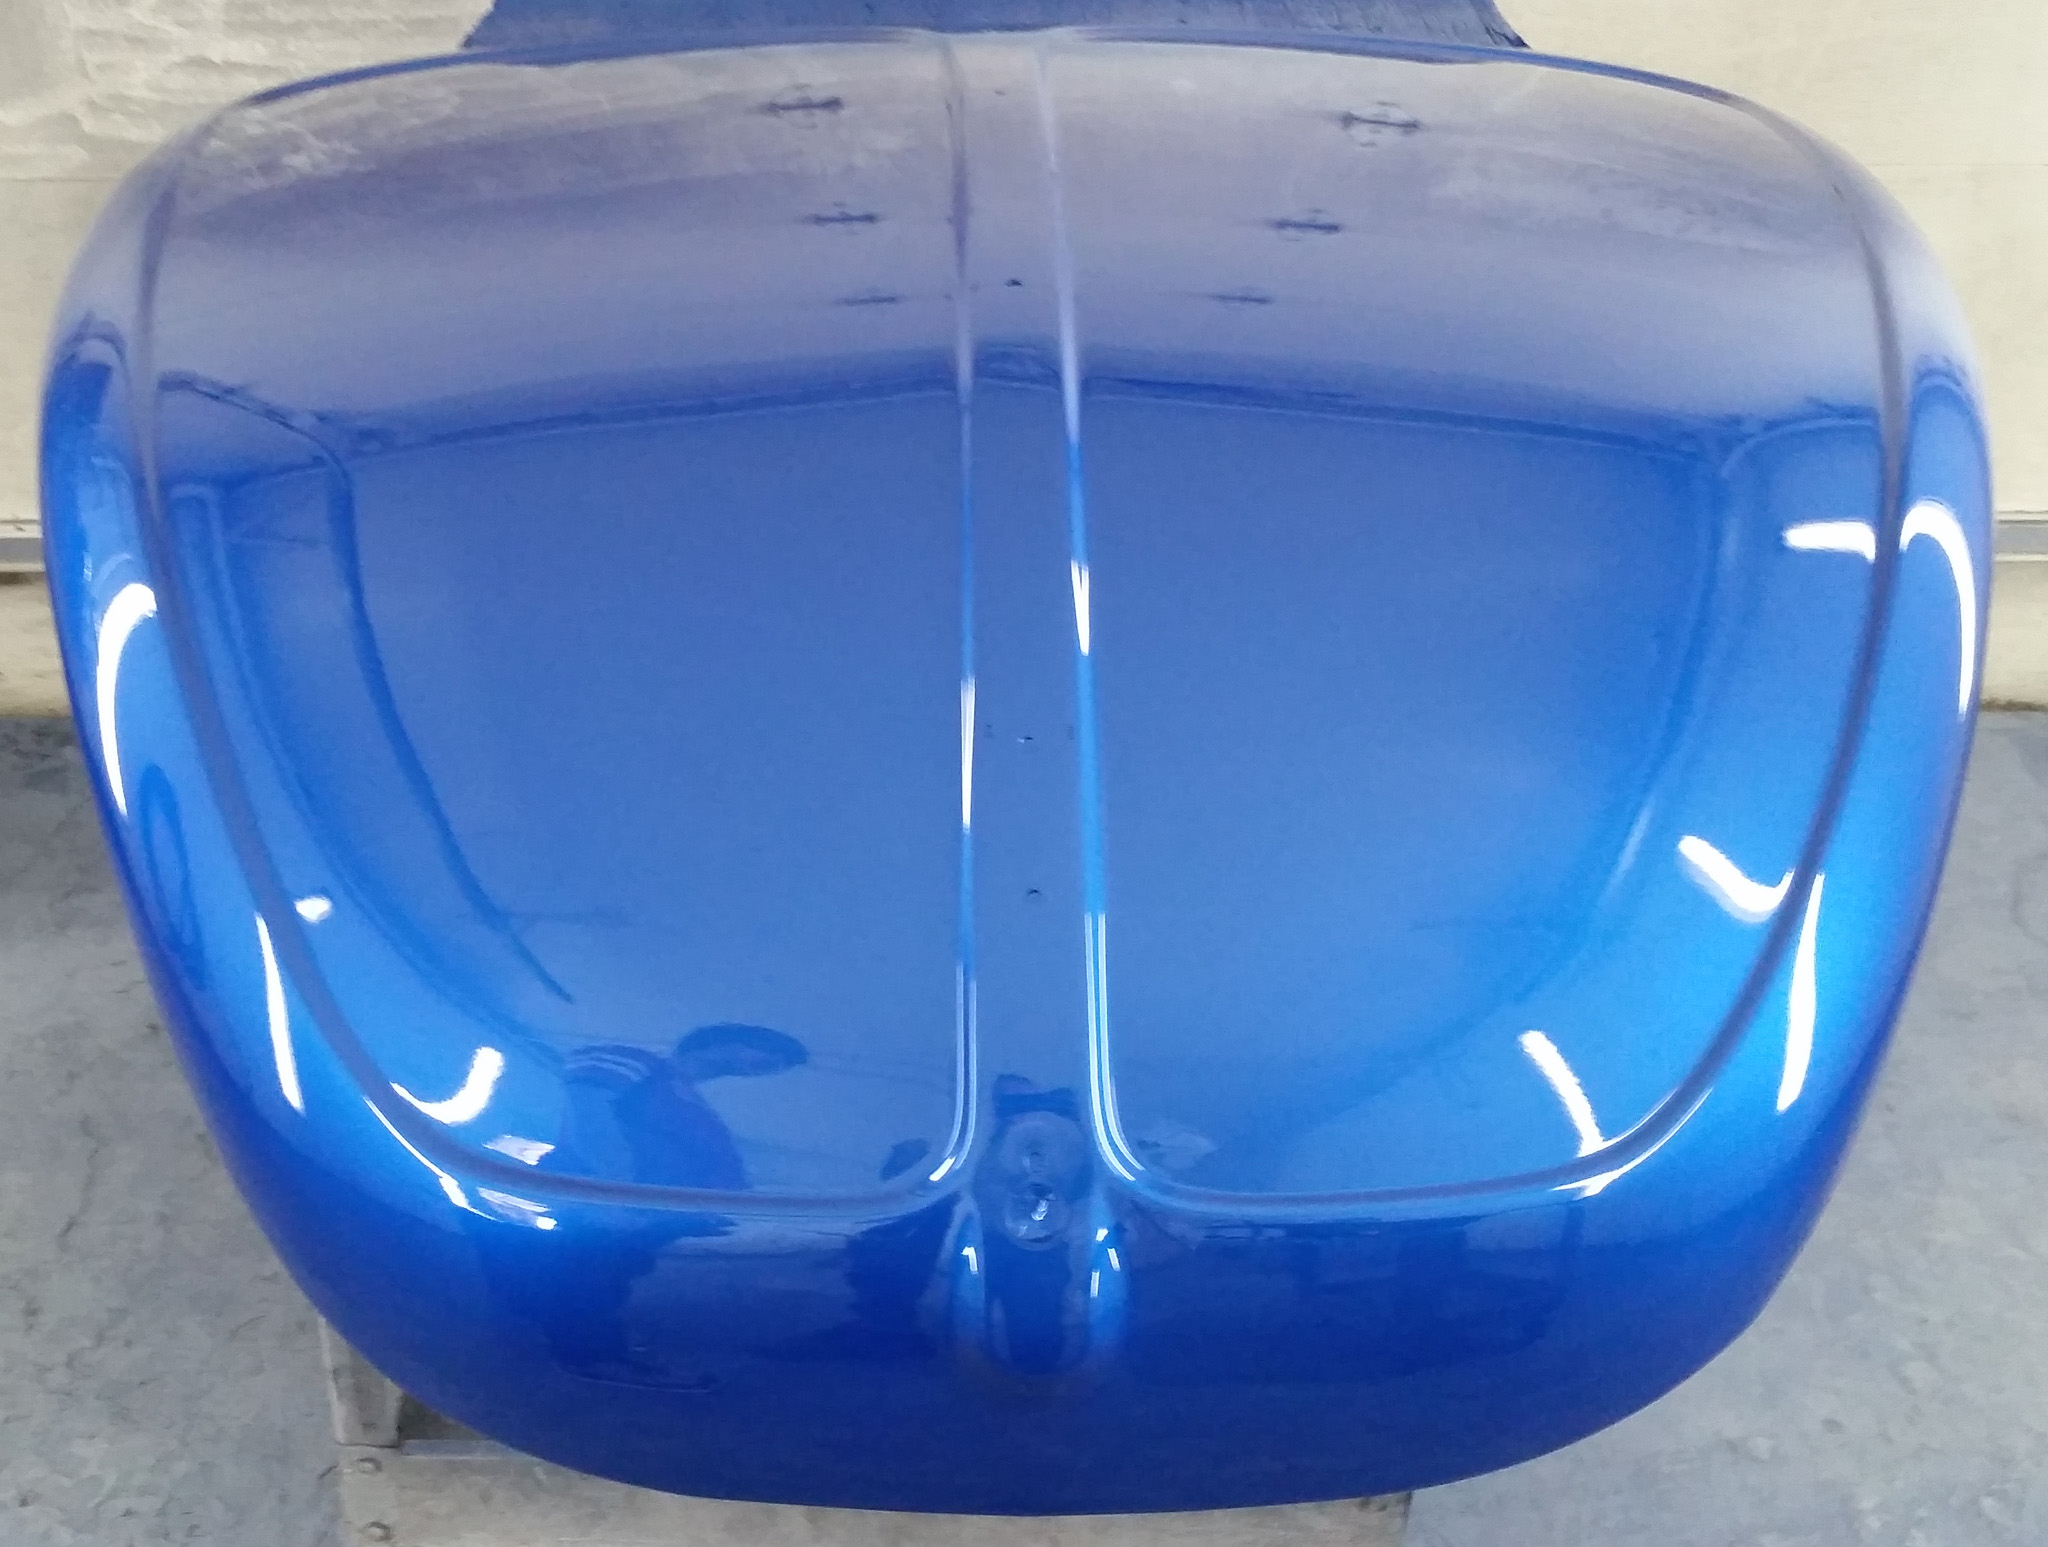
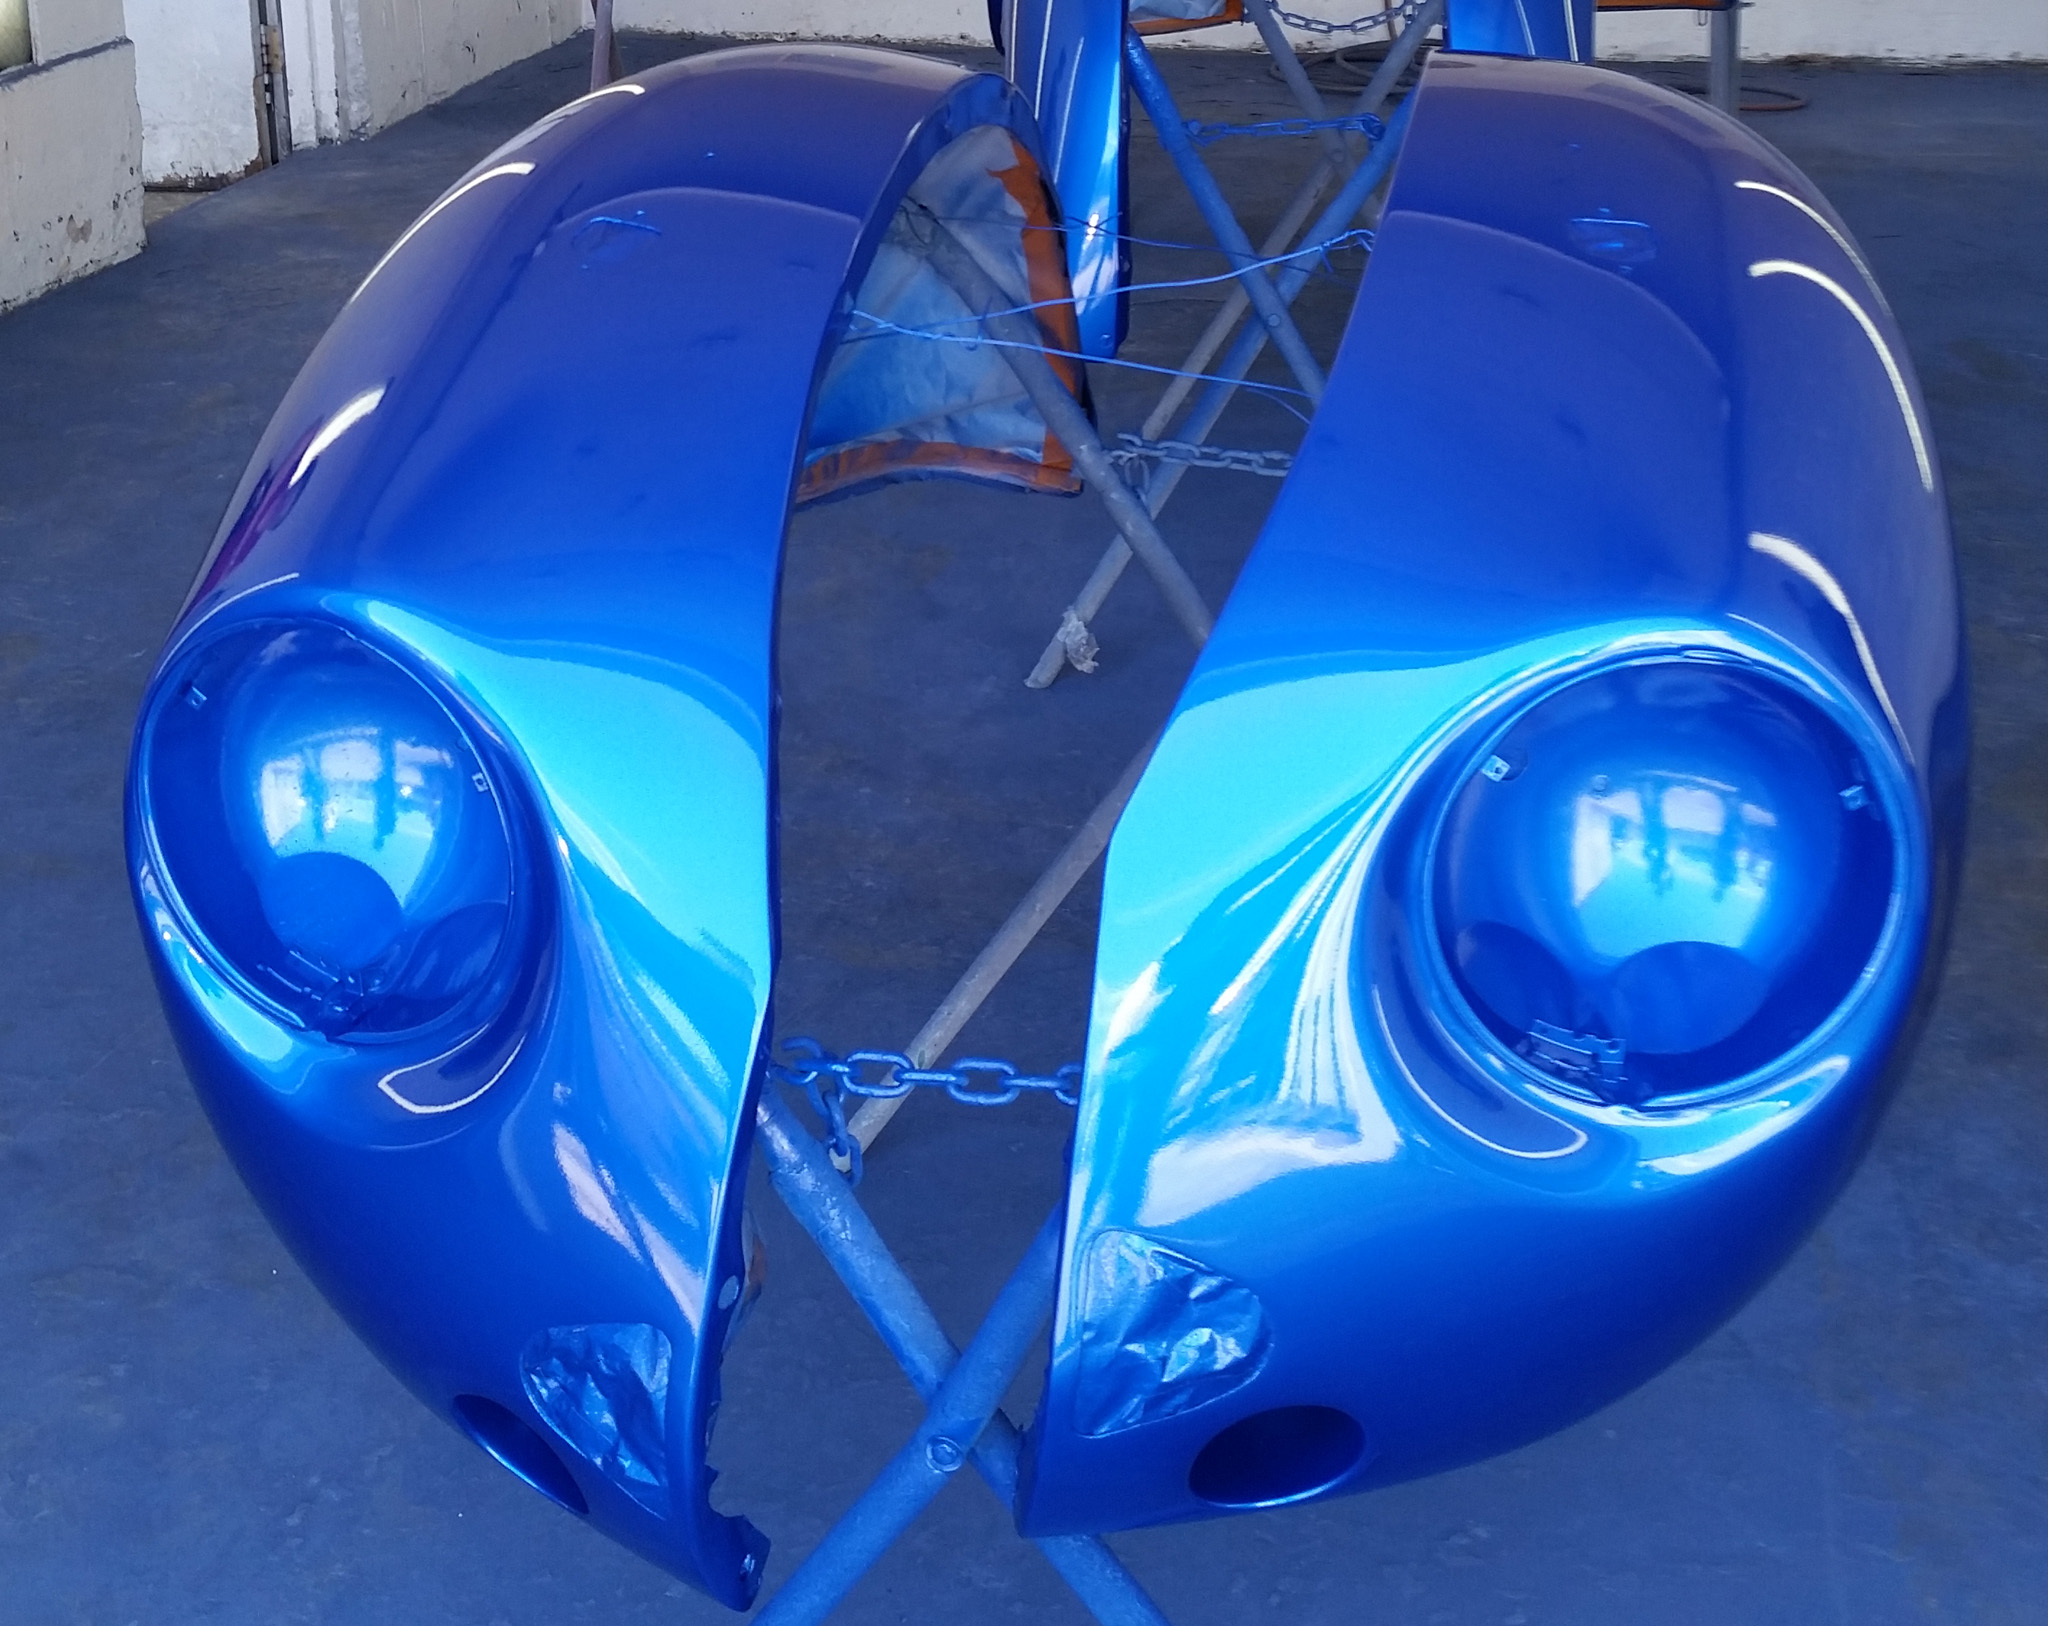
Body in the booth, before the clear:
Body out of the booth:
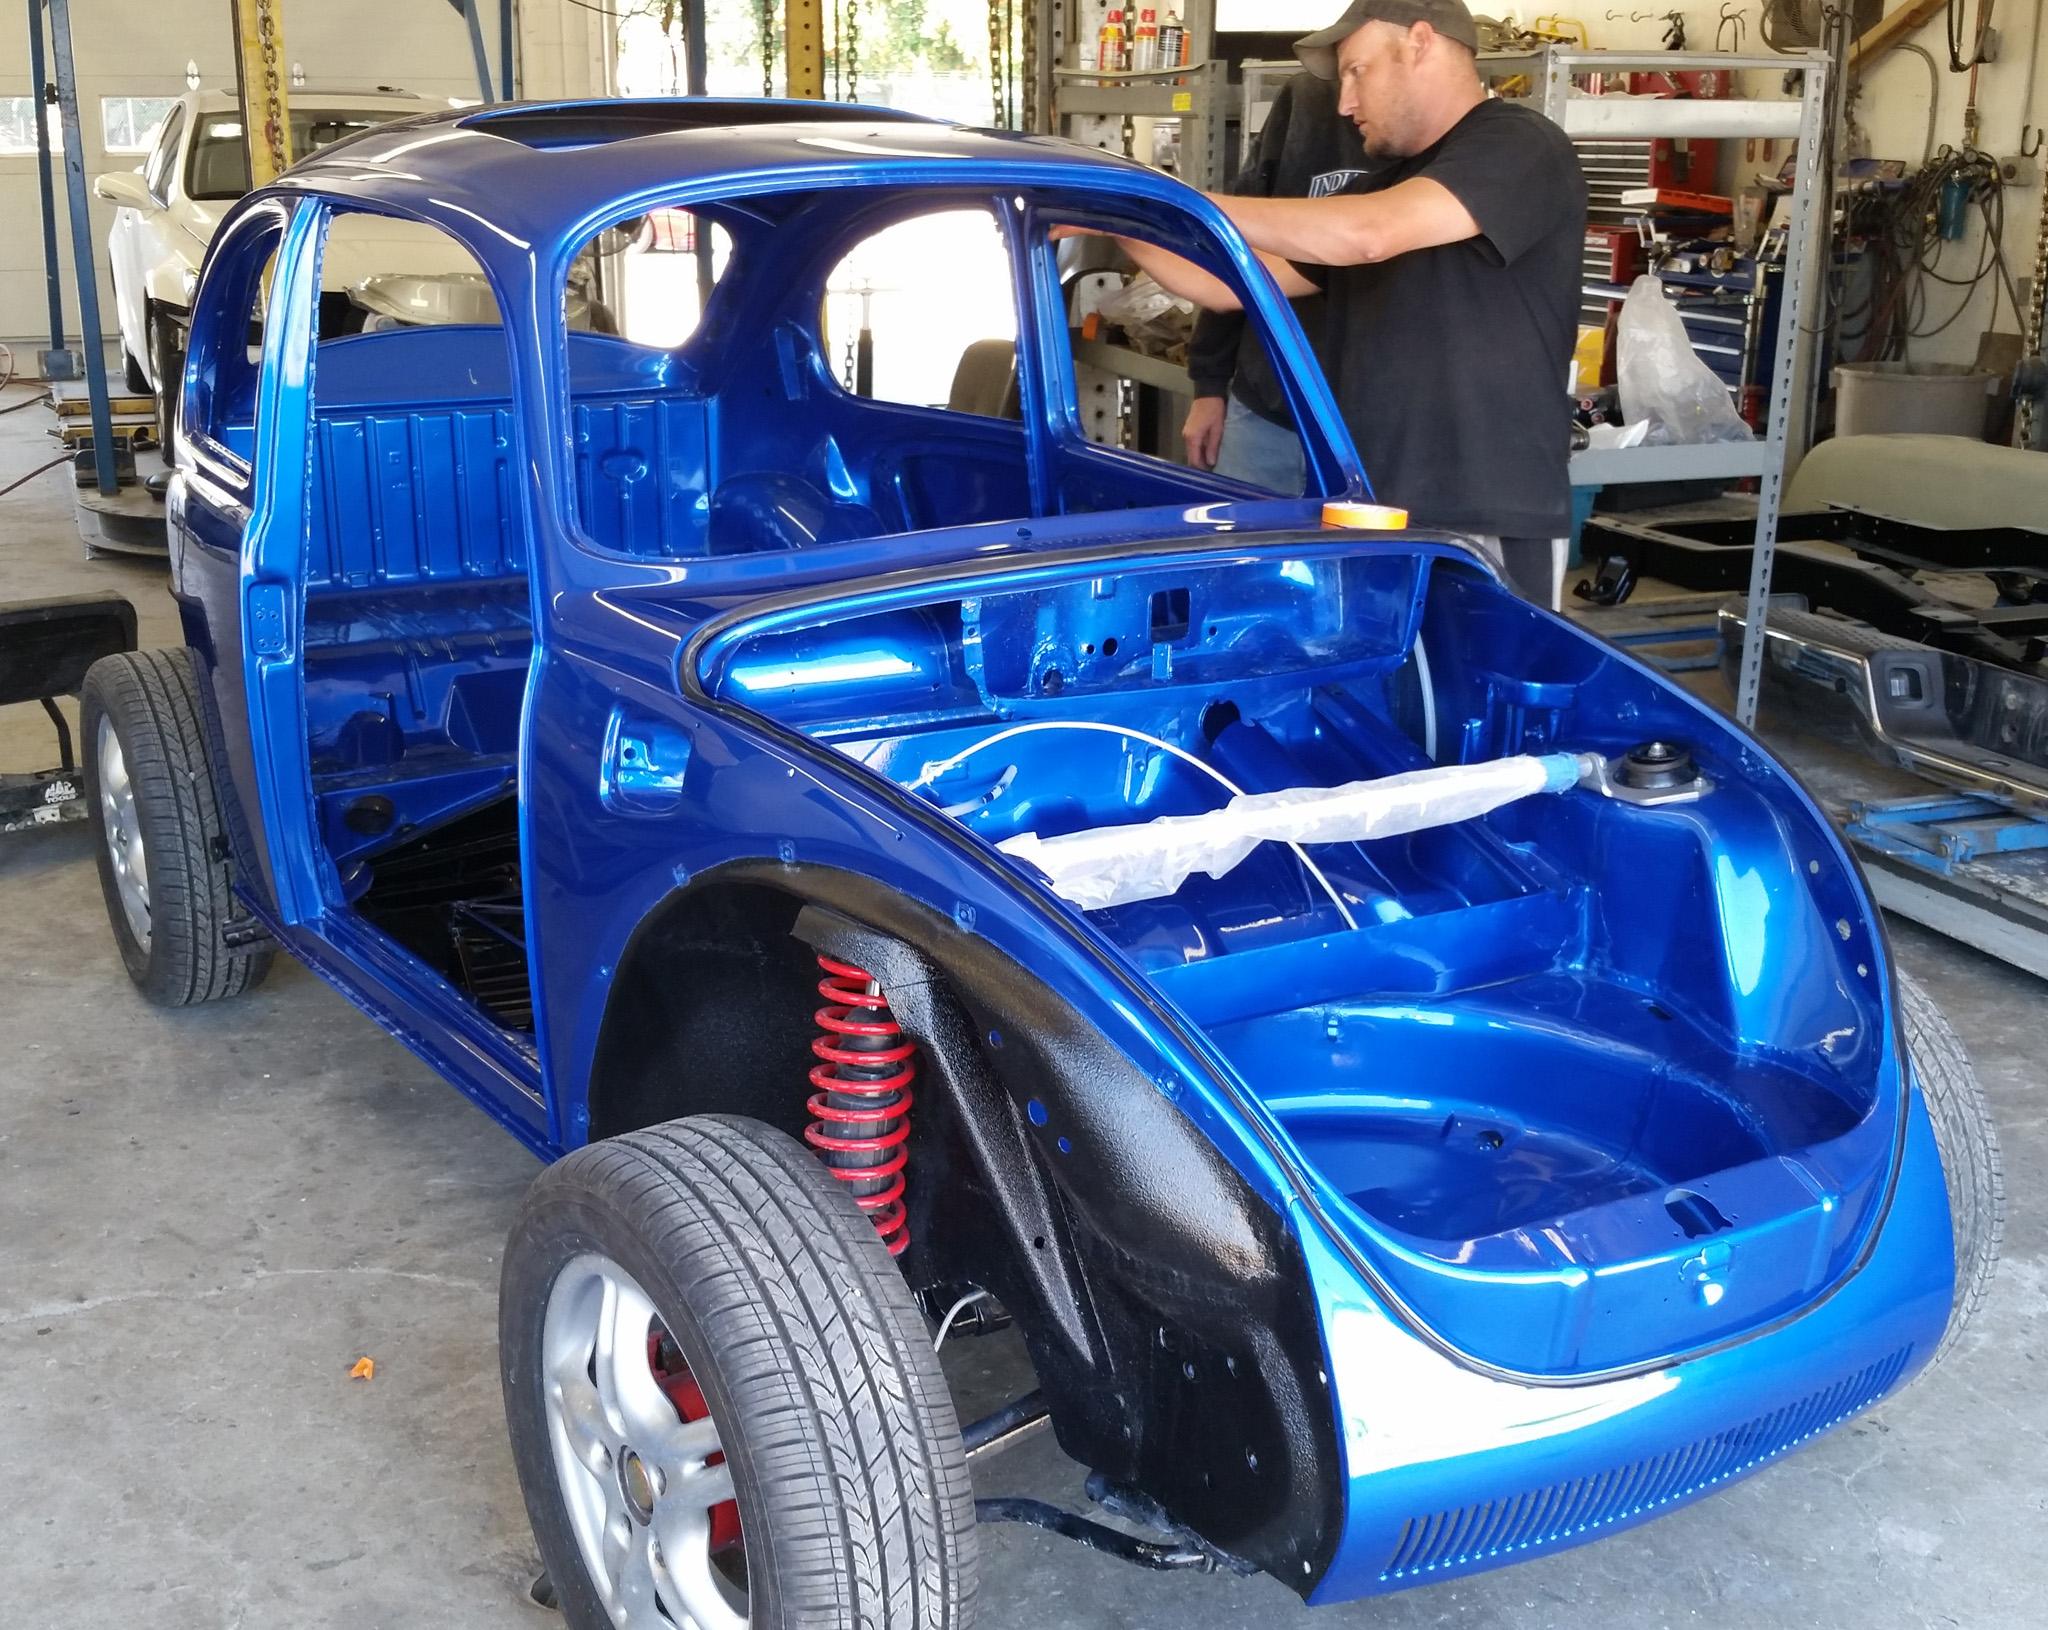
Hood Front Fenders And Doors On:
 |
|
| Back to top |
|
 |
Troy Hobbs

Joined: 05 Aug 2003
Posts: 766
|
| Posted: Sat Sep 06, 2014 7:17 am Post subject: 1975 Super Beetle Project |
|
|
Color looks better on the beetle than the Subaru! Came out great, bummed you blacked out the fender wells after you cleaned them up so nice and painted them. They chip guard will hold up much better on a driver though! When is the upholstery shop get it?
_________________
TROY
current RCVW club Pres
ARR #3 |
|
| Back to top |
|
|
Baxsie
Joined: 12 Apr 2012
Posts: 253
|
| Posted: Sat Sep 06, 2014 8:50 pm Post subject: Upholstery: Door Panels and Rear Seats |
|
|
Troy: Dexter offered to mix up a colored bed liner to go in the fender wells, but every VW I remember seeing always had black undercoating in there, so that is what we went with.
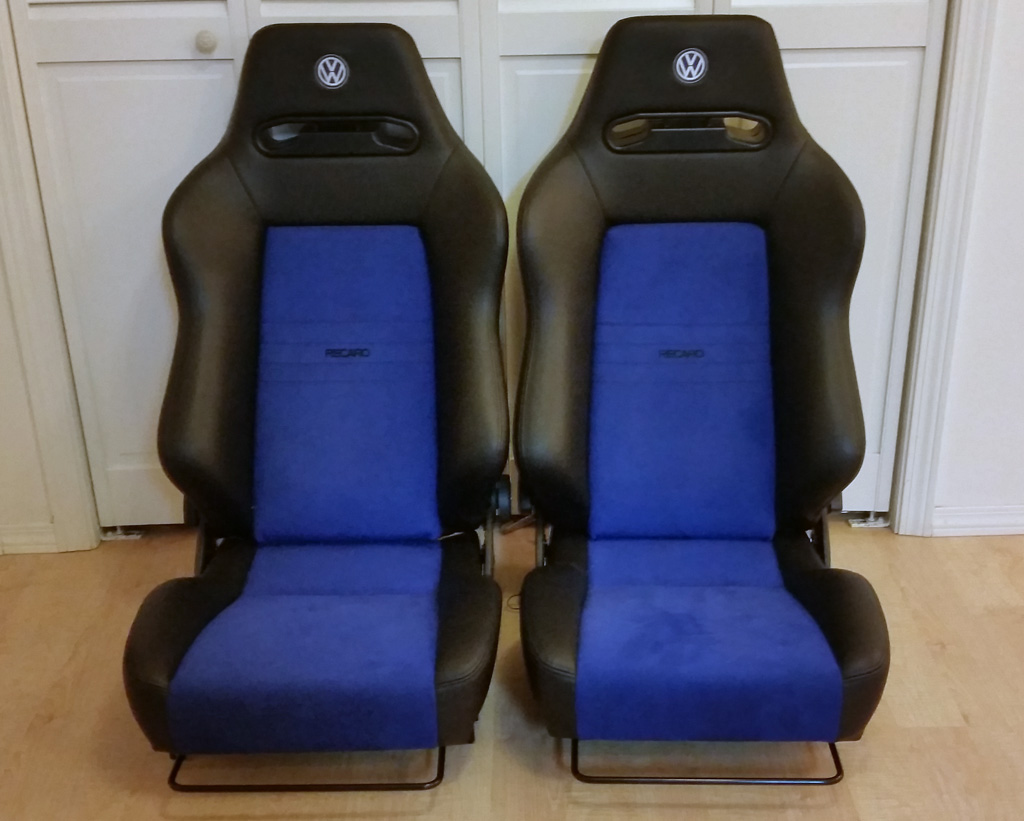
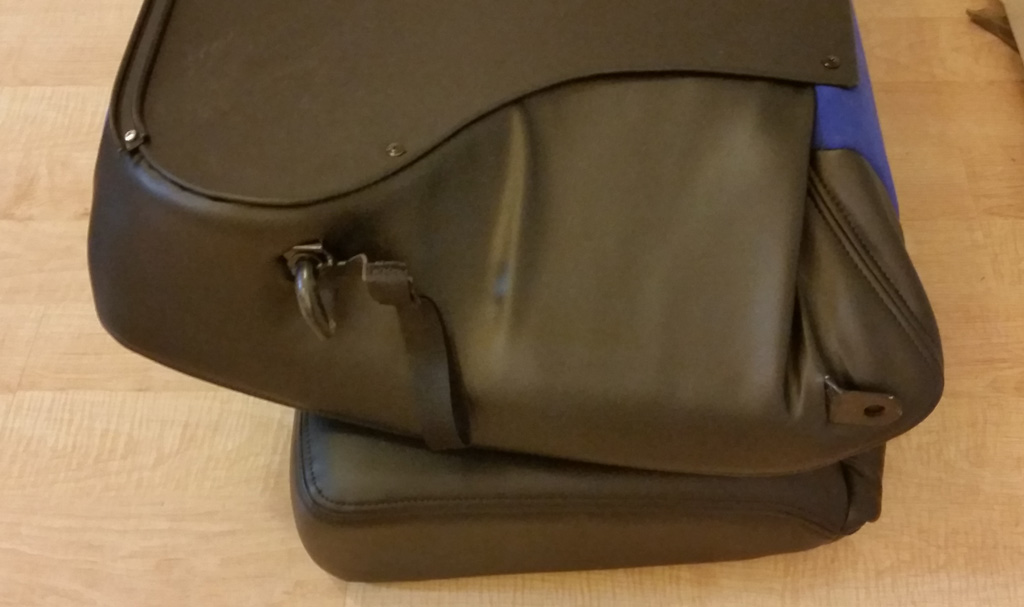
A few weeks ago, Mild Too Wild Upholstery completed the back seat and the door panels. We have had the Recaro Speed S seats for some time, but they recently put seat heaters in them. Nothing to see really, just a reference pic for the other photos following:
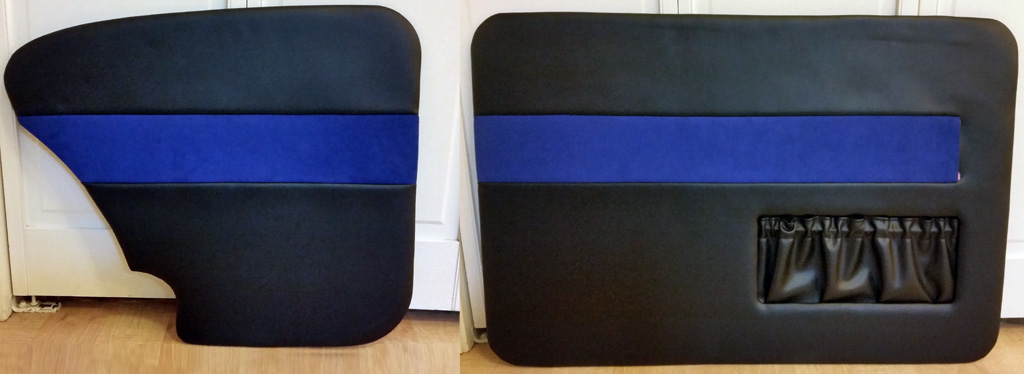
The door panels are upholstered in matching black and the micro-suede blue. We need to cut out for the speakers, and the door handle:

They made an entirely new back seat bottom and back, building and sculpting it from foam to a more modern "bucket" look, The stitching matches the front seats:
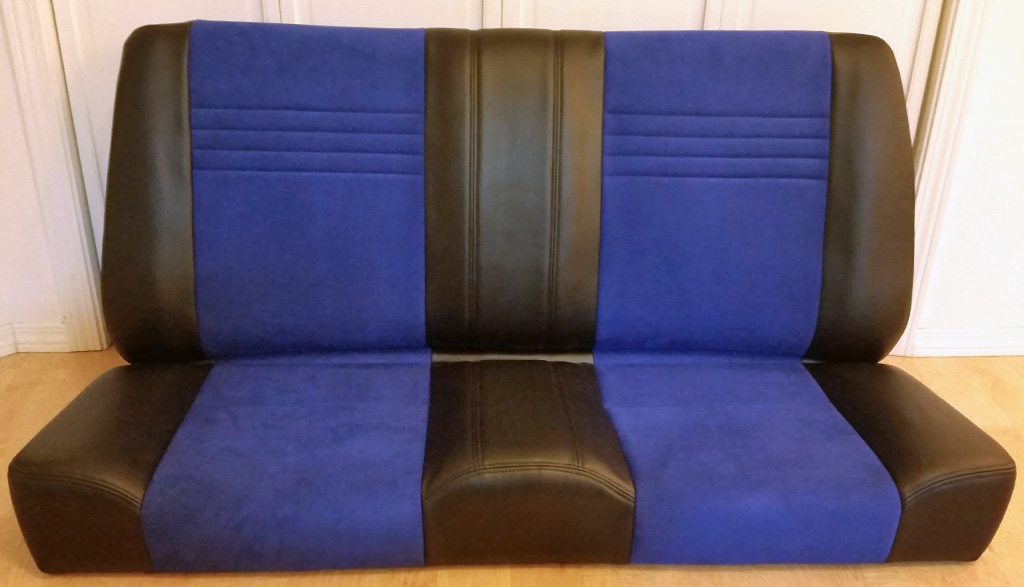
They reused the frame, latch and hinges. The back is an ABS panel. Once we have sorted out the rear speakers, we will decide if there will be a sliding panel for when the seat is down:
 |
|
| Back to top |
|
|
Baxsie
Joined: 12 Apr 2012
Posts: 253
|
| Posted: Thu Sep 18, 2014 7:39 pm Post subject: Chroming the aluminum "FUEL INJECTION" Deck Badge |
|
|
We had a local shop (Tripleplate Chrome) polish and chrome the "FUEL INJECTION" deck lid badge:
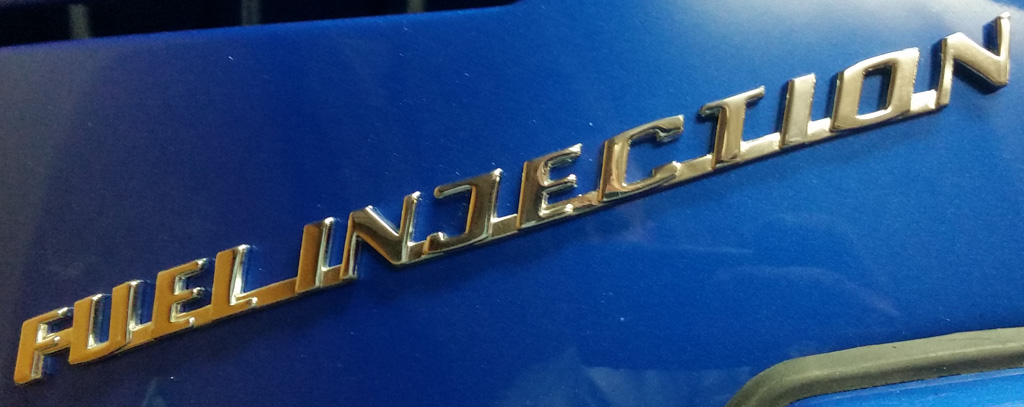
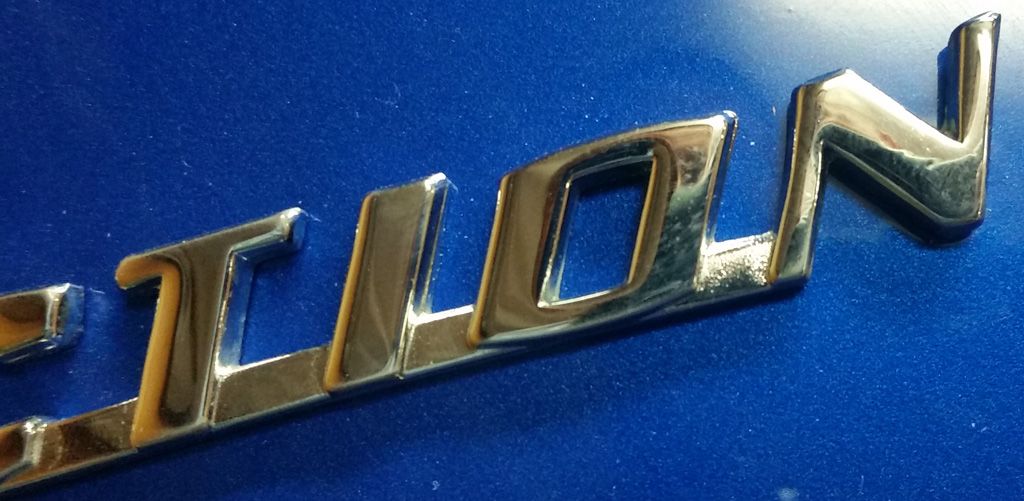
Really, the picture does not do it justice, it looks really great. |
|
| Back to top |
|
|
Baxsie
Joined: 12 Apr 2012
Posts: 253
|
| Posted: Thu Sep 18, 2014 7:40 pm Post subject: Vent Wing Divider Bar: Both Stainless & Aluminum kinds? |
|
|
I am working on the vent wing windows.
I decided to get the aluminum chromed, after having some success chroming the aluminum "FUEL INJECTION" badge.
I grabbed a passenger-side bar, and a driver side bar, and headed down to the chrome shop. The guy there says "oh, stainless". I'm like "whaaaa?"
I have 8 wing windows, 4 passenger, 4 driver.
All four driver's side bars are all aluminum.
Three of the four passenger side bars are stainless, the last one is aluminum.
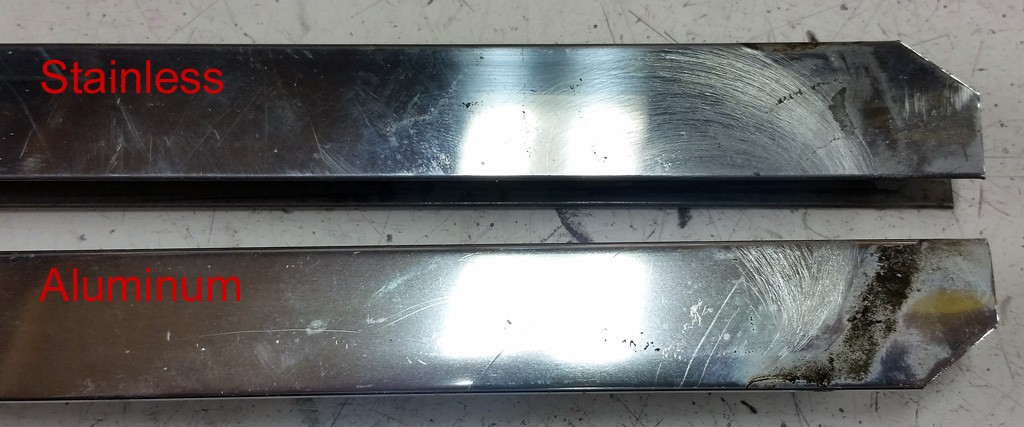
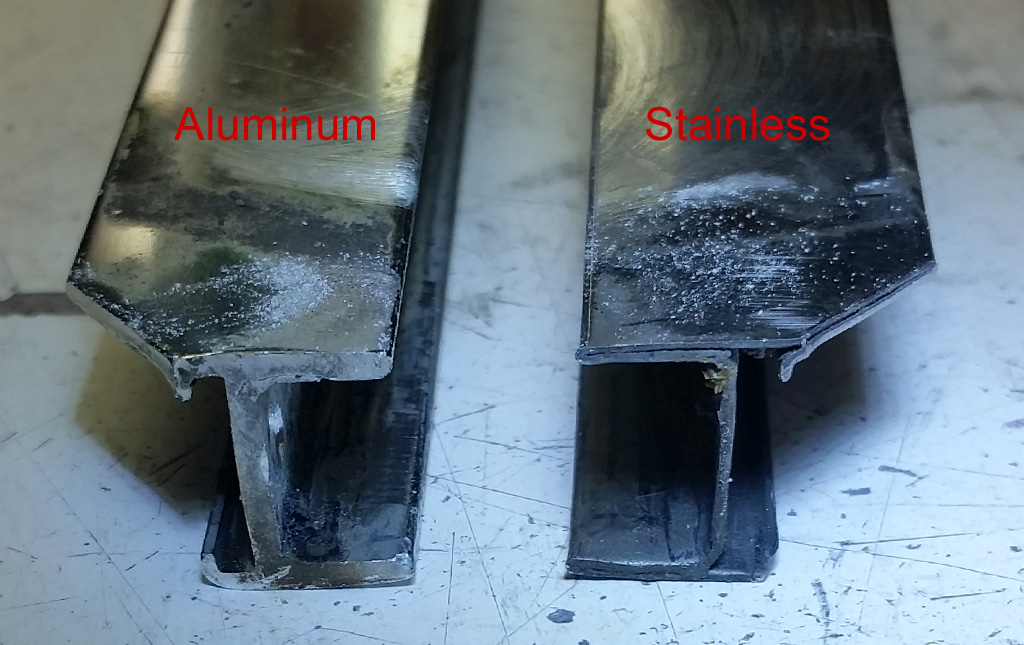
The only matching set is aluminum, so I am back to the chrome shop tomorrow to get a matching set of the extruded aluminum bars chromed.
Who would have guessed that there would be such an odd mix? |
|
| Back to top |
|
|
Baxsie
Joined: 12 Apr 2012
Posts: 253
|
| Posted: Thu Sep 25, 2014 4:48 pm Post subject: Door Assembly: Dynapad,rattletrap,power locks,puddle lights |
|
|
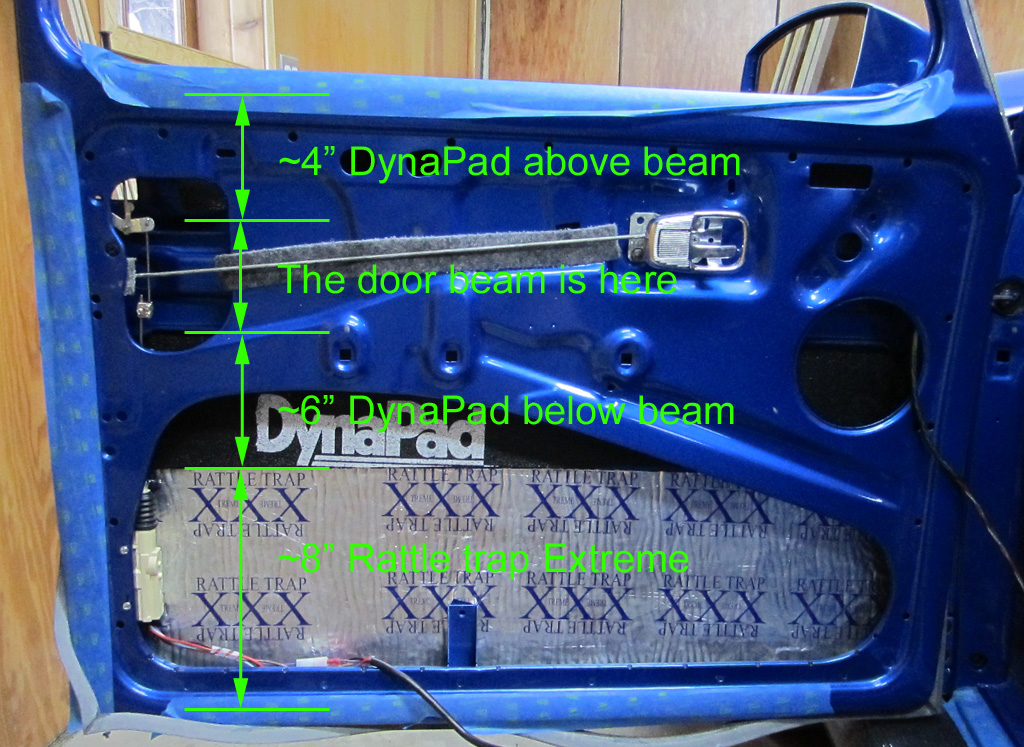
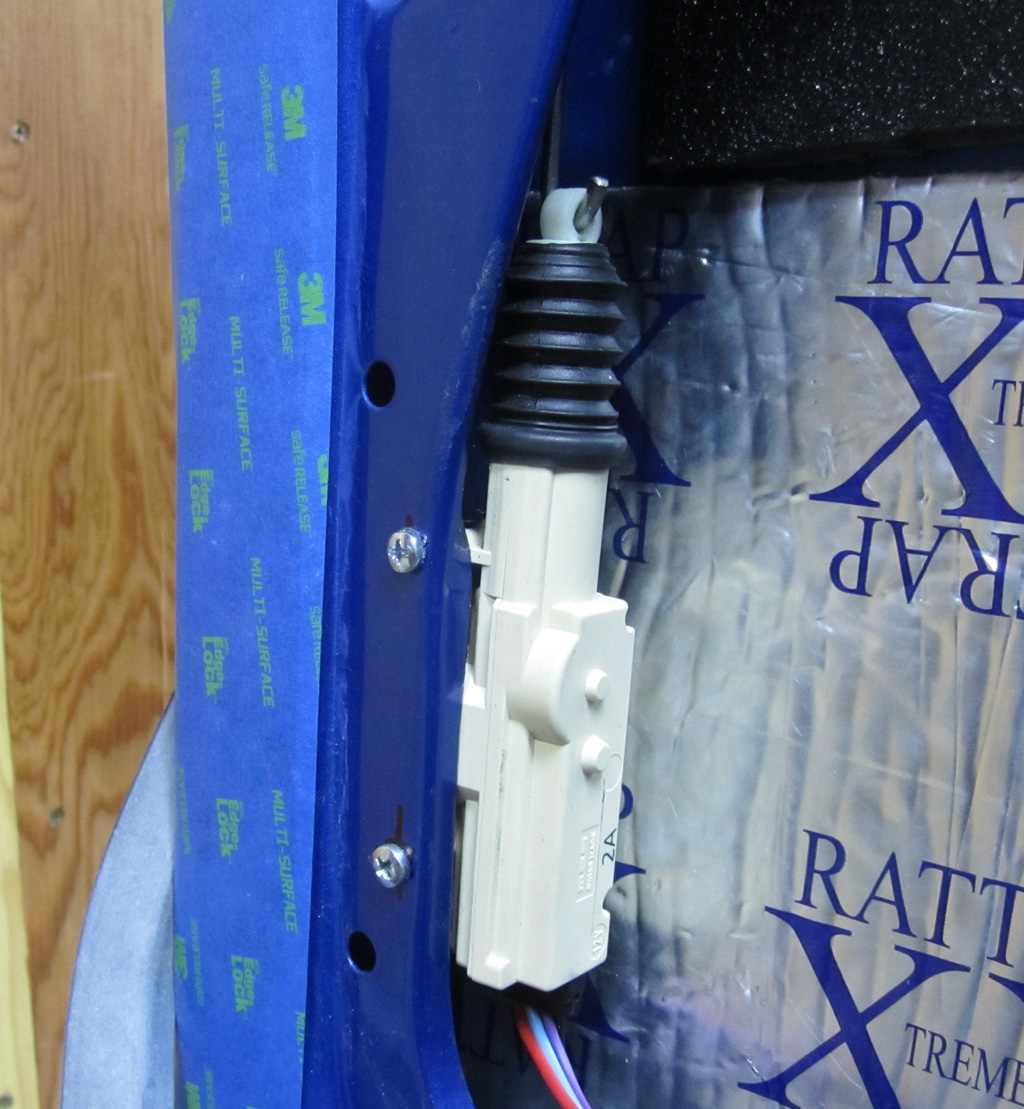
We have been working on the doors. We used DynaPad for thermal and acoustic insulation above and below the beam, where we were pretty sure it would not interfere with the window. DynaPad is a vinyl mass loaded acoustic barrier foam, basically 1/4 inch foam, heavy vinyl, then another 1/4 inch foam. The DynaPad is installed with 3M 90 adhesive. Lower on the door we use RattleTrap, which is basically a thick (~0.070) rubber (tar?) pad with pressure sensitive adhesive on one side and foil on the other. And we used some chrome inner door handles, because they rock:
We installed the power lock actuators directly to the door, using 5mm screws, locknuts and a spacer to back it away from the flange:
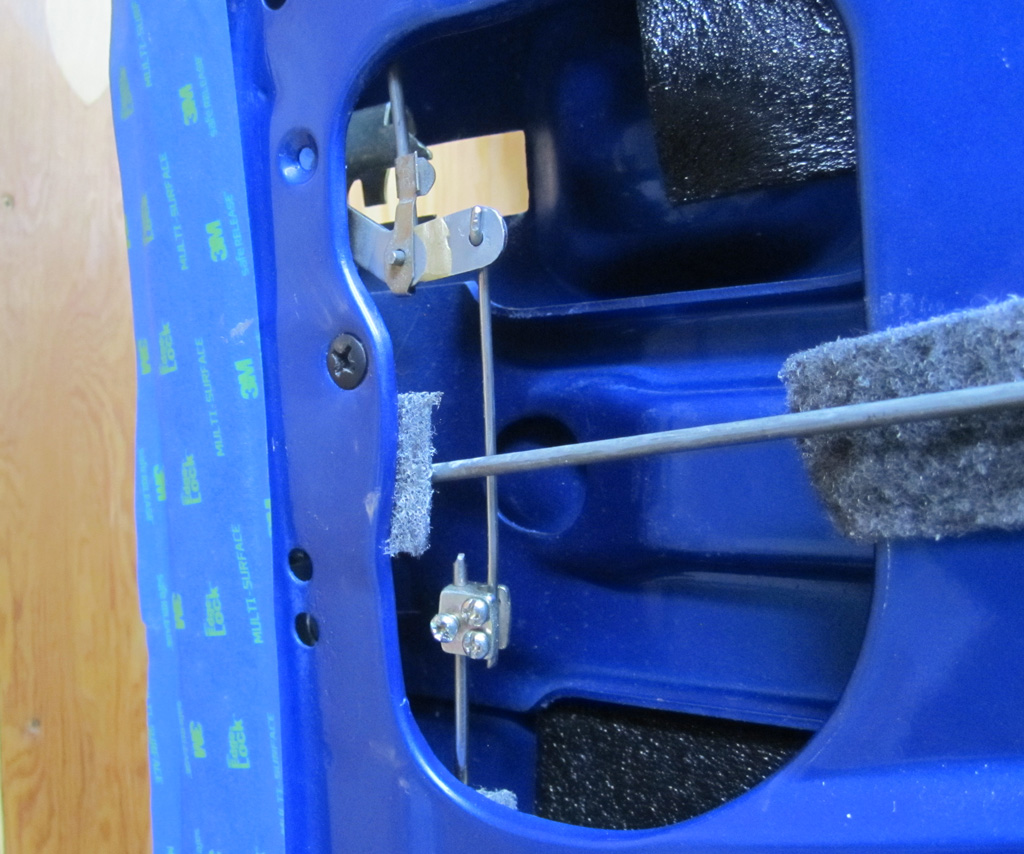
To make the most of the power lock actuator's travel, we extended the lock arm a bit. This will give the actuator more authority over the lock mechanism. The upper (smaller) rod is a Z-bend in 3/32" stainless welding rod. The lower (larger) rod is 1/8" stainless welding rod, with a J bend at the actuator. The clamp is part of the lock kit.
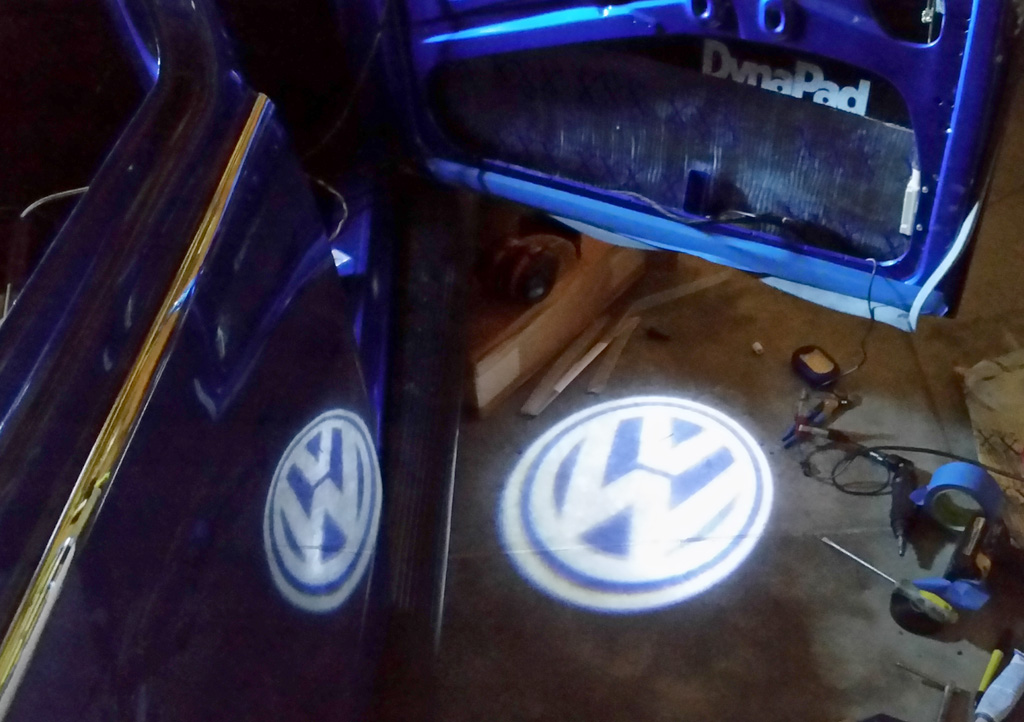
Never one to pass by an opportunity for cheesy bling, we installed some "Ghost Shadow VW Logo Projector Lights". Keep in mind that the picture is taken in HDR mode in low light, so it is very flattering, but in anything but bright lighting, these look hella cool:
The projector lights are surprisingly complicated inside. Well, if they fail it just means there is another drain in the door, right?
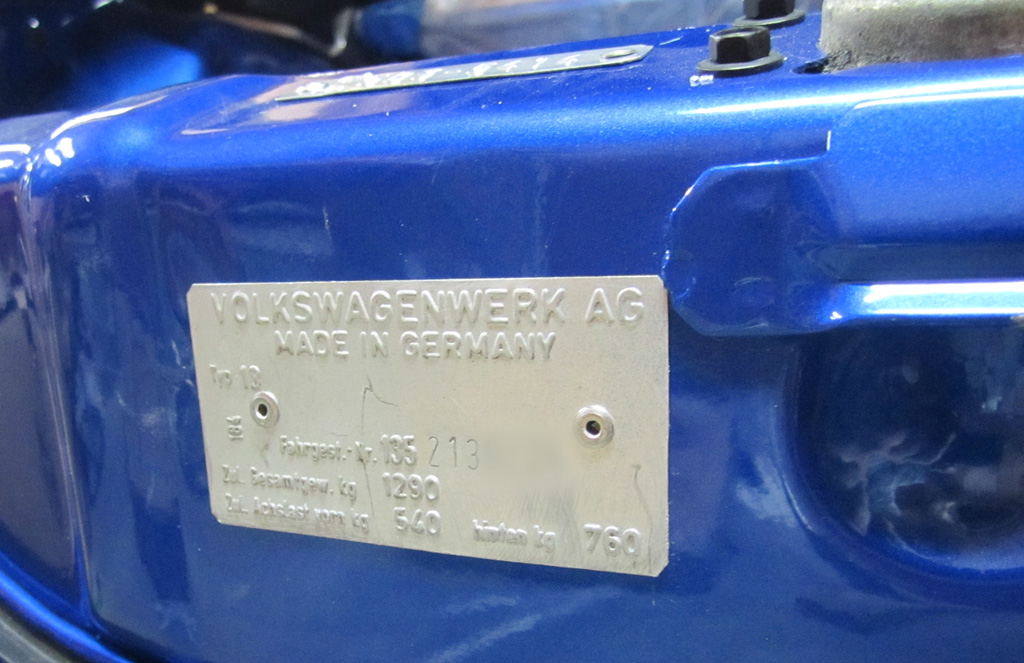
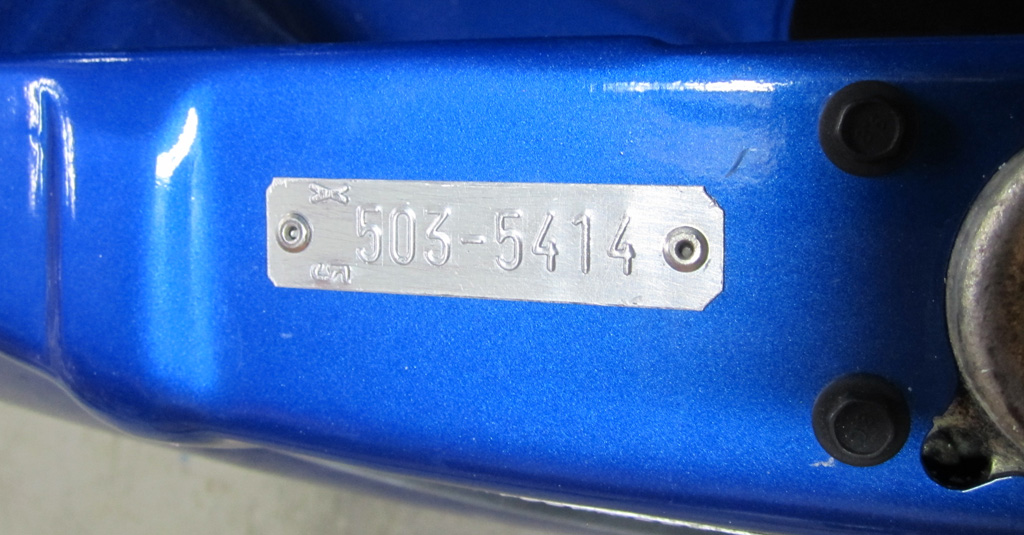
In the "Any progress is some progress department", we installed the number plates. I have no idea what is encoded on the small one, but we got the paint off it, brushed it, hit it with some clear and riveted it on with some stainless rivets:
Hopefully the wing window bars will be done soon at the chrome shop, so we can complete the remainder of the door project. |
|
| Back to top |
|
|
Baxsie
Joined: 12 Apr 2012
Posts: 253
|
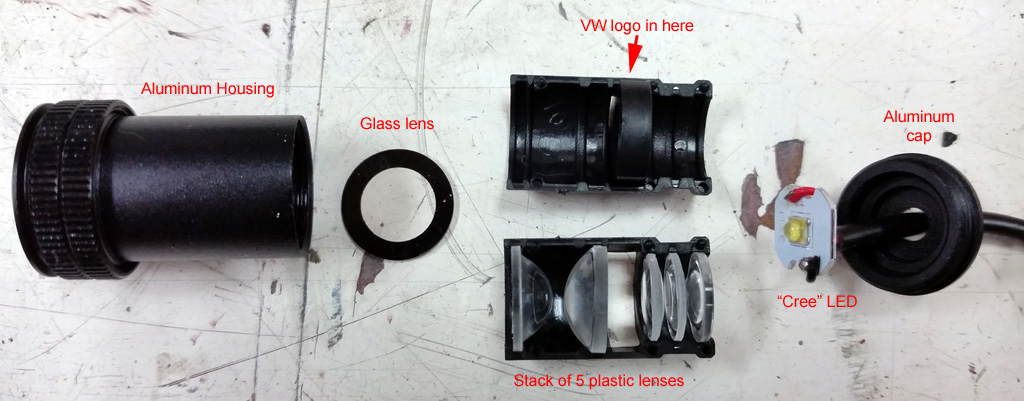
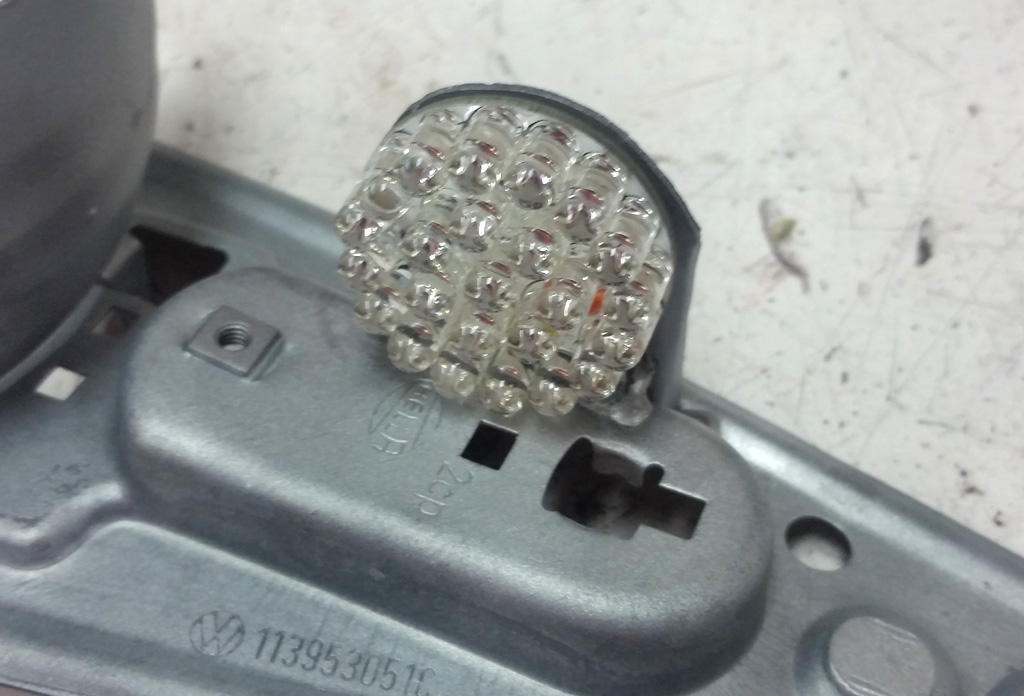
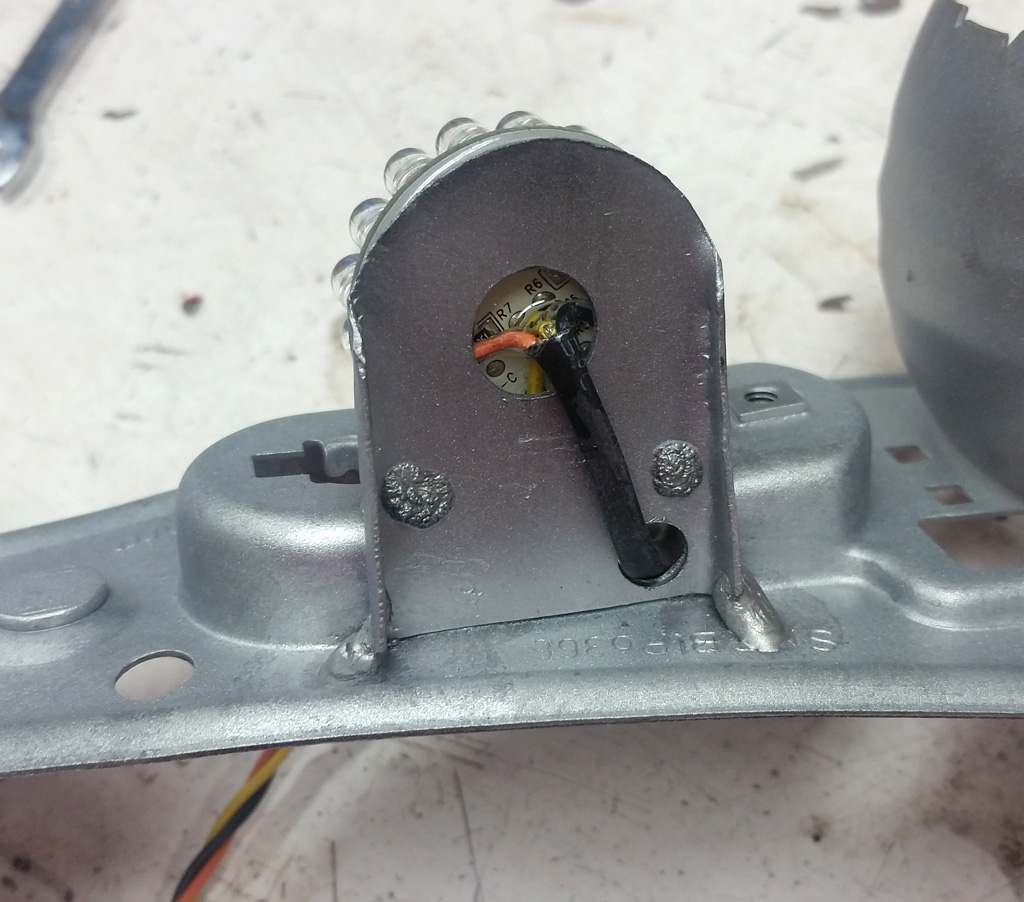
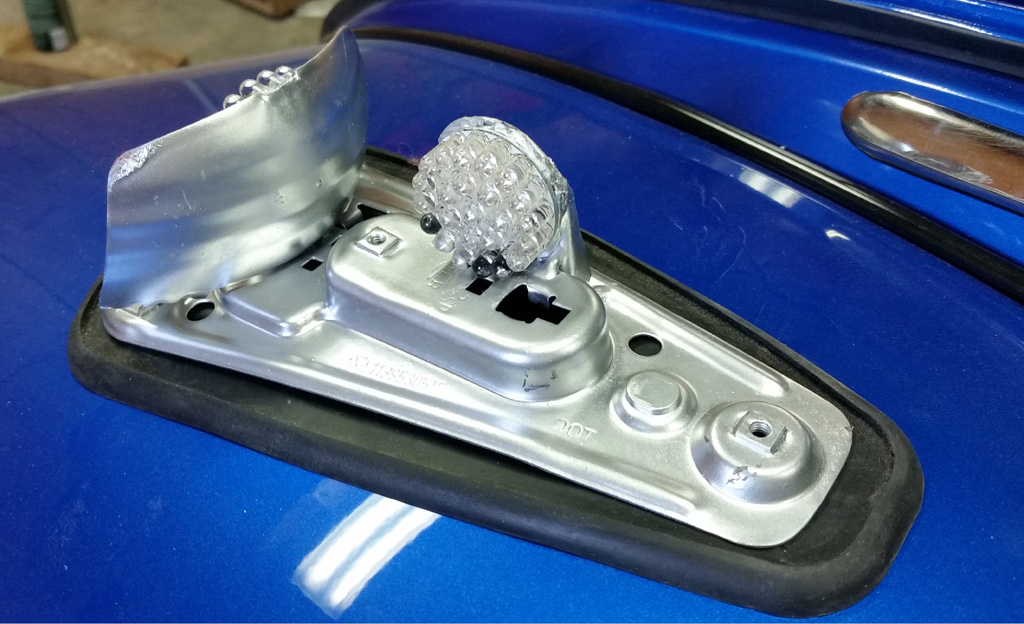
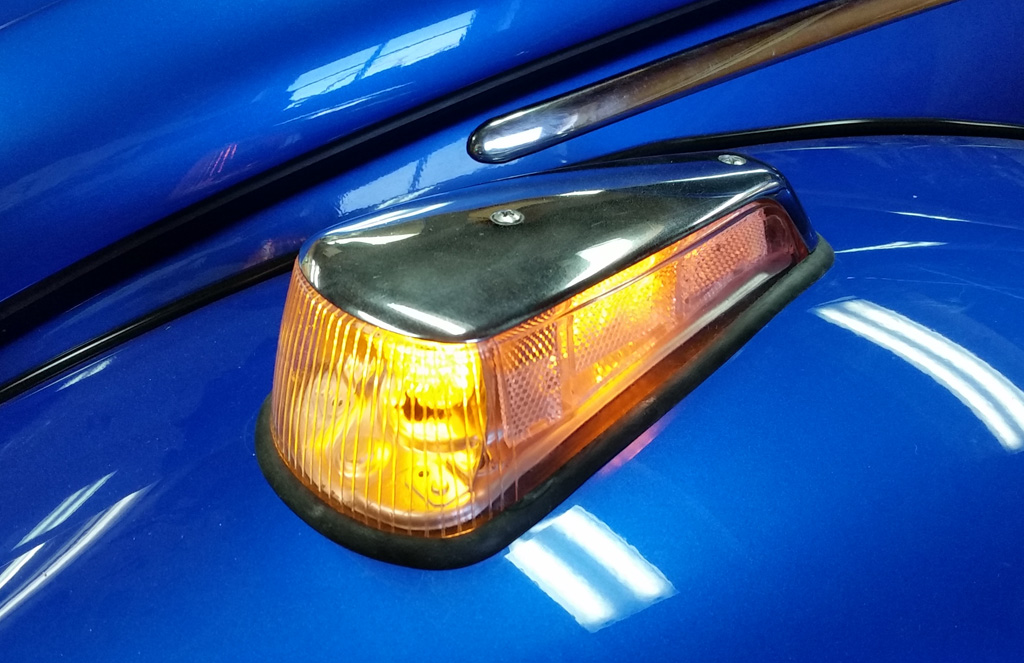
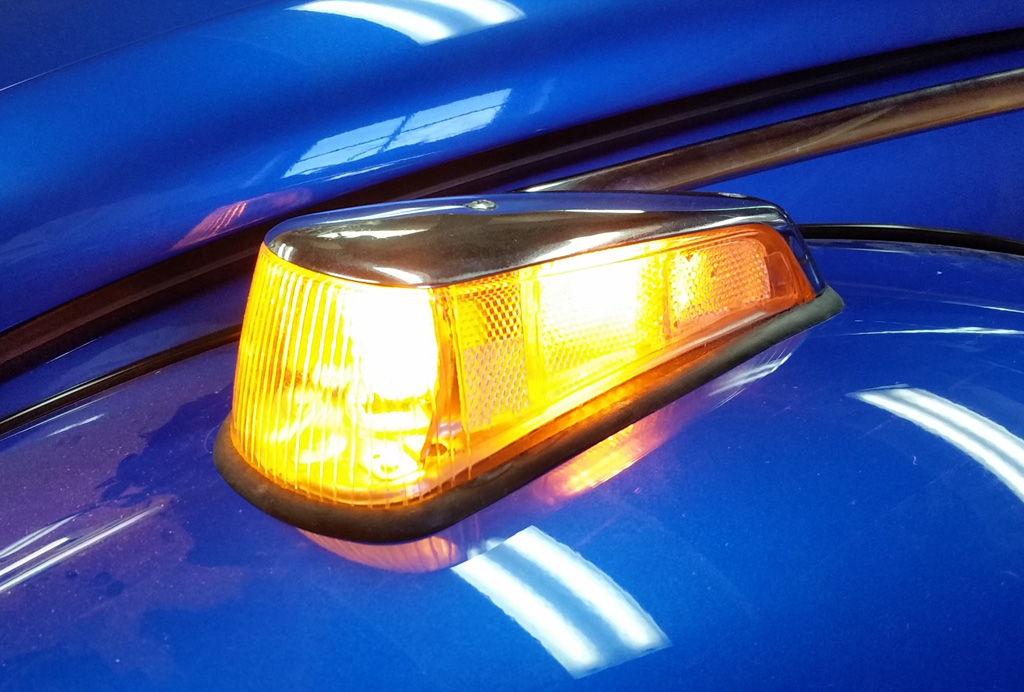
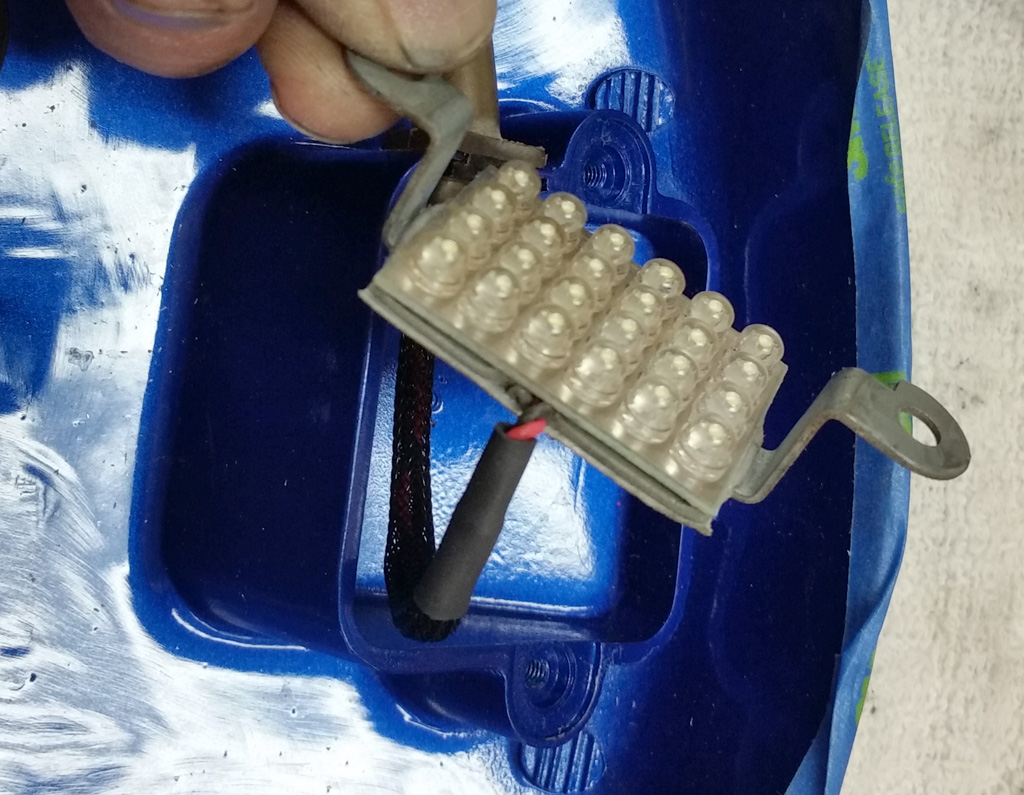
| Posted: Sat Sep 27, 2014 7:38 pm Post subject: Front Blinkers: LEDs with Clear Lens |
|
|
We got some good quality LED assemblies from http://www.customdynamics.com I am so sorry for sending you to a site that is a visual assault on the senses, but if you can stand the horrible web design, their LED assemblies ate top notch. I use the "Dynamic Cluster 1.25 inch Amber" and the "Dynamic Cluster 2 inch Amber". In theory you can order them from this page:
http://www.customdynamics.com/motorcycle_led_bulbs.htm
First off, we made some brackets and spot welded them to the turn signal base:
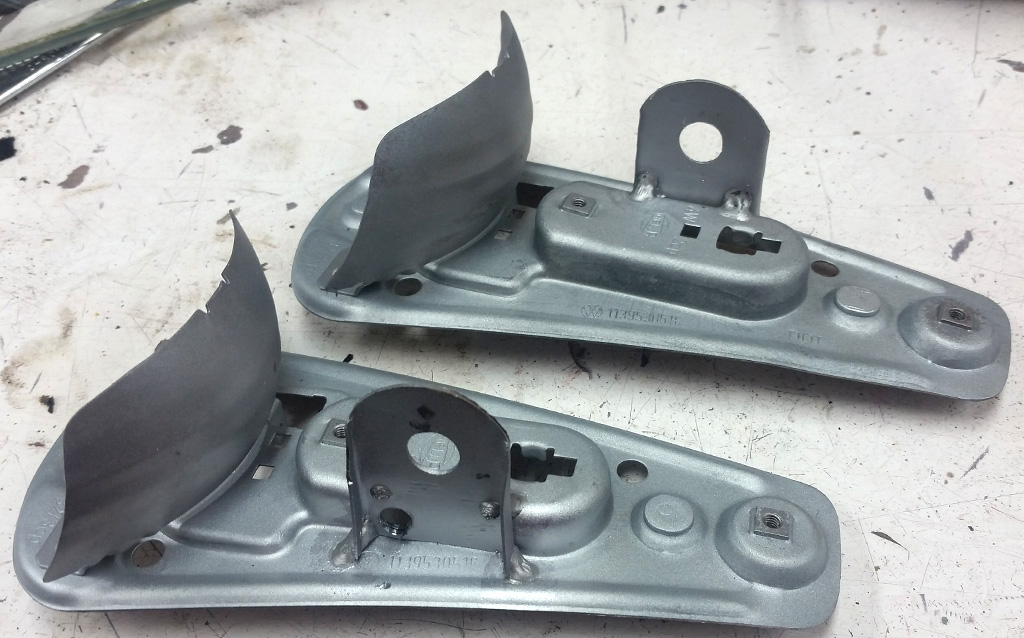
A test fit of the cluster from the front:
and the back:
We used the sealer to mount the LED pucks to the blinker chassis:
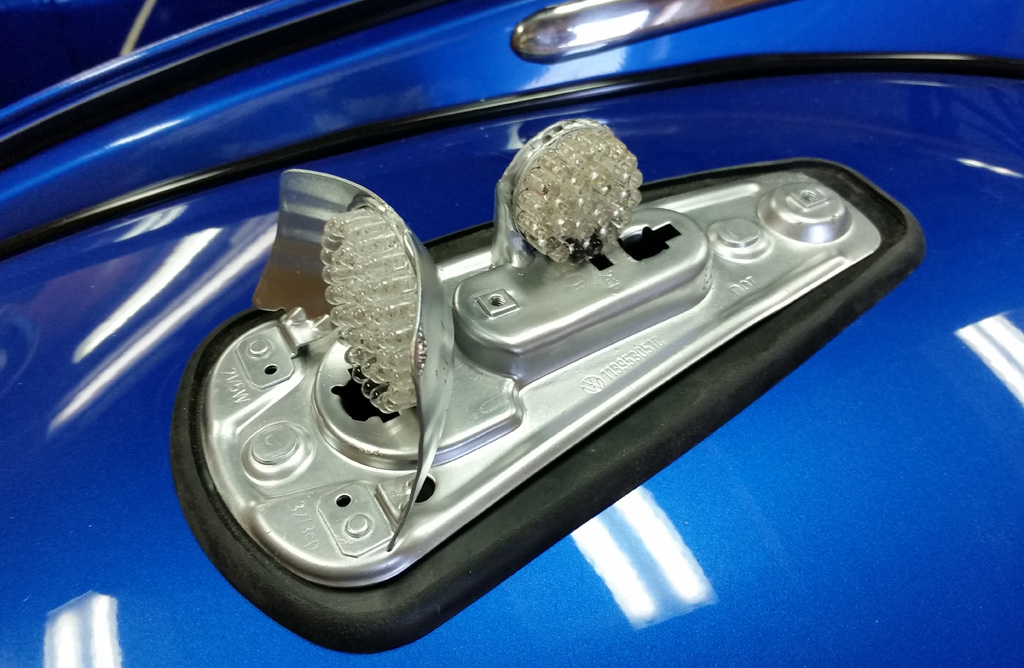
The clear lens has a really nice "neutral" color when the LEDs are off. It is not a "real" Hella lens, so the fit is not fantastic, but it is OK:

There is one "half brightness" wire for running lights:
And the "full brightness" for the blinker. It is pretty hard to stare into the full brightness:
Last edited by Baxsie on Sat Jan 03, 2015 9:53 pm; edited 1 time in total |
|
| Back to top |
|
|
project_dog
Joined: 21 Apr 2014
Posts: 33
|
| Posted: Mon Sep 29, 2014 11:08 pm Post subject: |
|
|
| wow very nice. What about some night pictures |
|
| Back to top |
|
|
SB1303S
Joined: 13 Aug 2014
Posts: 2
Location: COLOMBIA
|
| Posted: Fri Oct 03, 2014 7:05 am Post subject: WHAT A GREAT JOB |
|
|
Congrats to all...
What a great job you are doing guys... Please keep loading new pictures...
Regards from Colombia...
Luis

_________________
VW is a family... |
|
| Back to top |
|
|
Baxsie
Joined: 12 Apr 2012
Posts: 253
|
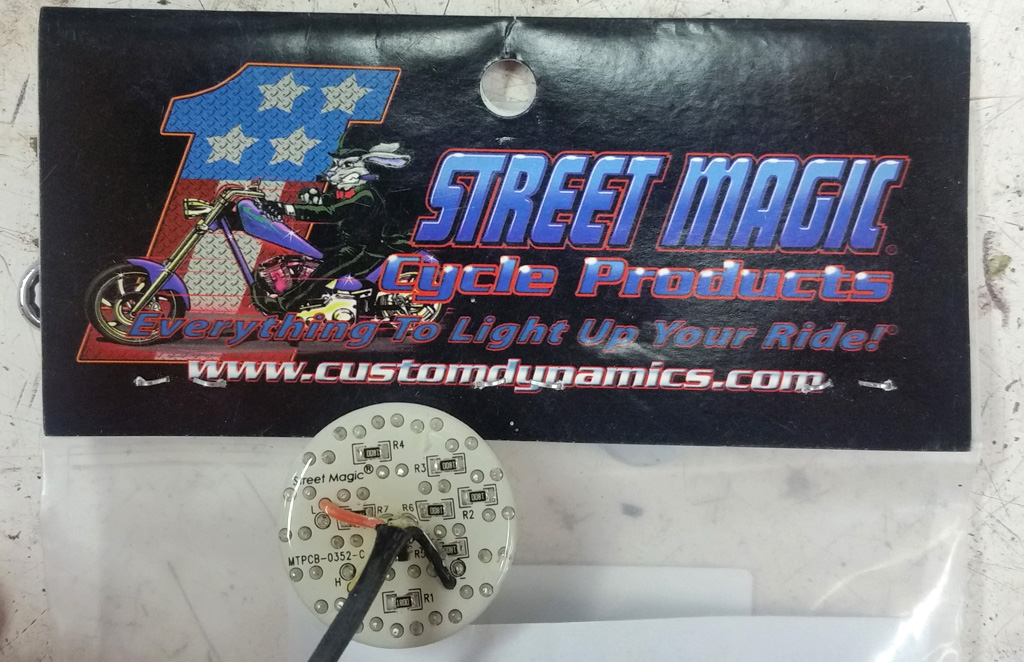
| Posted: Sun Nov 02, 2014 10:10 pm Post subject: LED Rear License Plate Illumination |
|
|
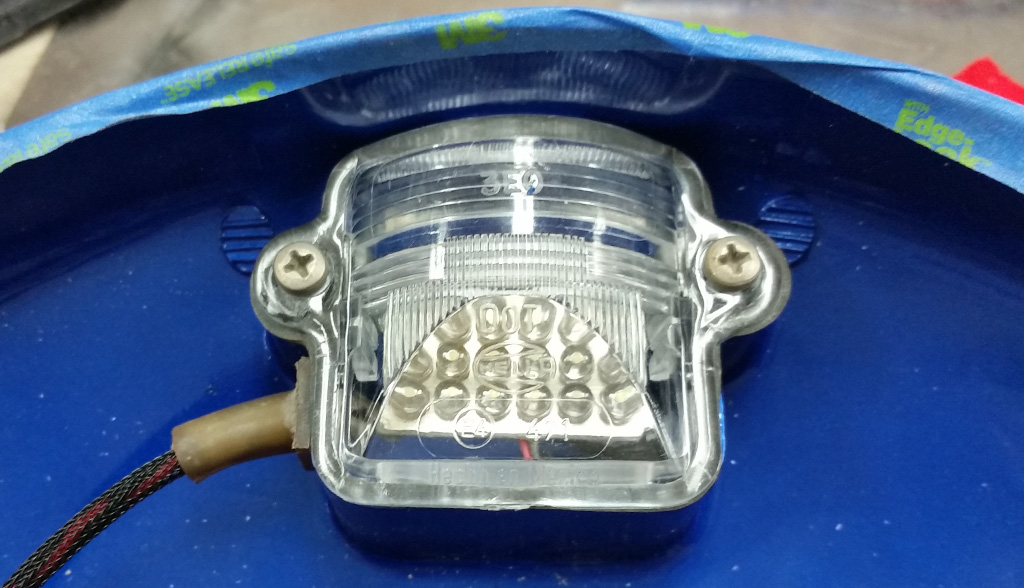
We used a white LED array, mounted to a modified bulb bracket to convert the license plate light to LED.
 |
|
| Back to top |
|
|
Baxsie
Joined: 12 Apr 2012
Posts: 253
|
| Posted: Sun Nov 02, 2014 10:10 pm Post subject: Headlight Install and Wiring (relays + fuses) |
|
|
The wiring for the headlights starts with the connector supplied in the Bus Depot Bosch H4 kit:
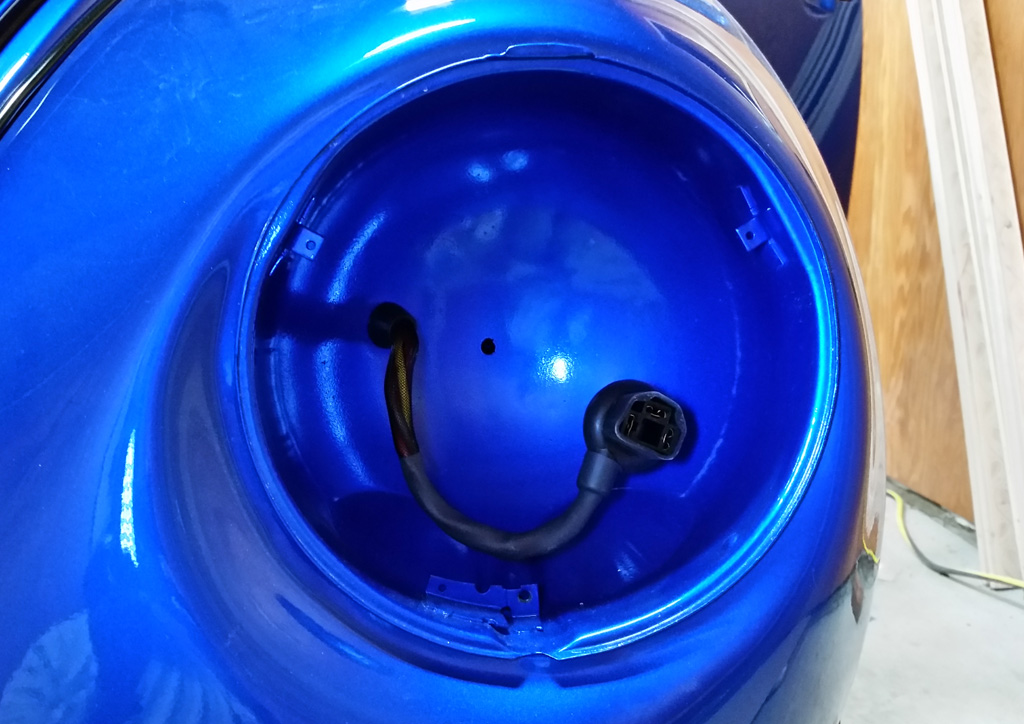
All the headlight buckets we had were pretty hashed, with stripped holes, etc, so we got a "good" set from e-bay. After cleaning/painting/priming we were ready to install:
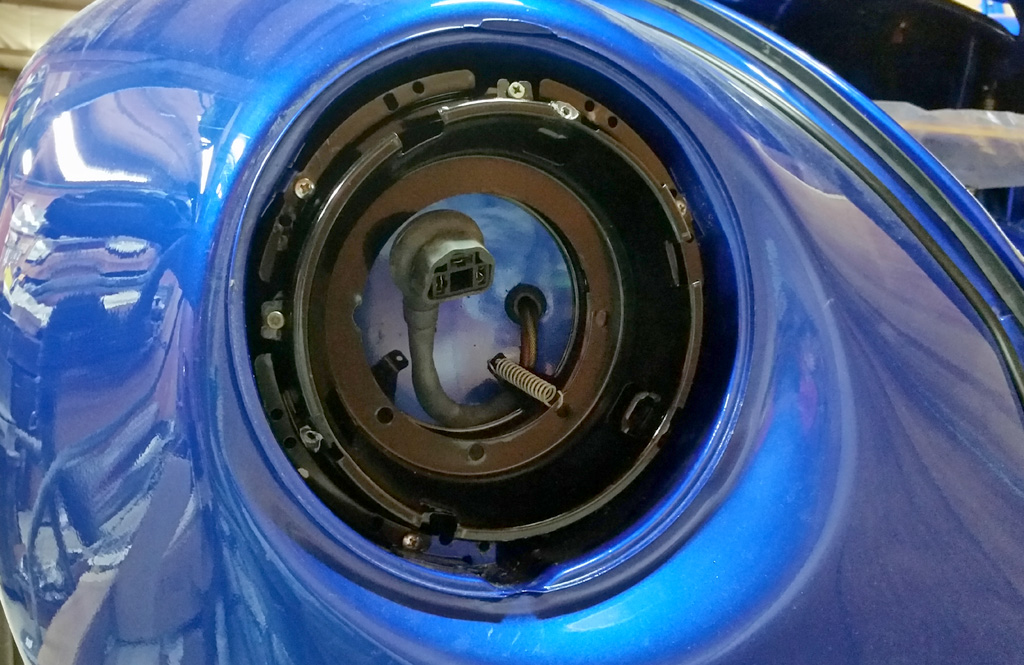
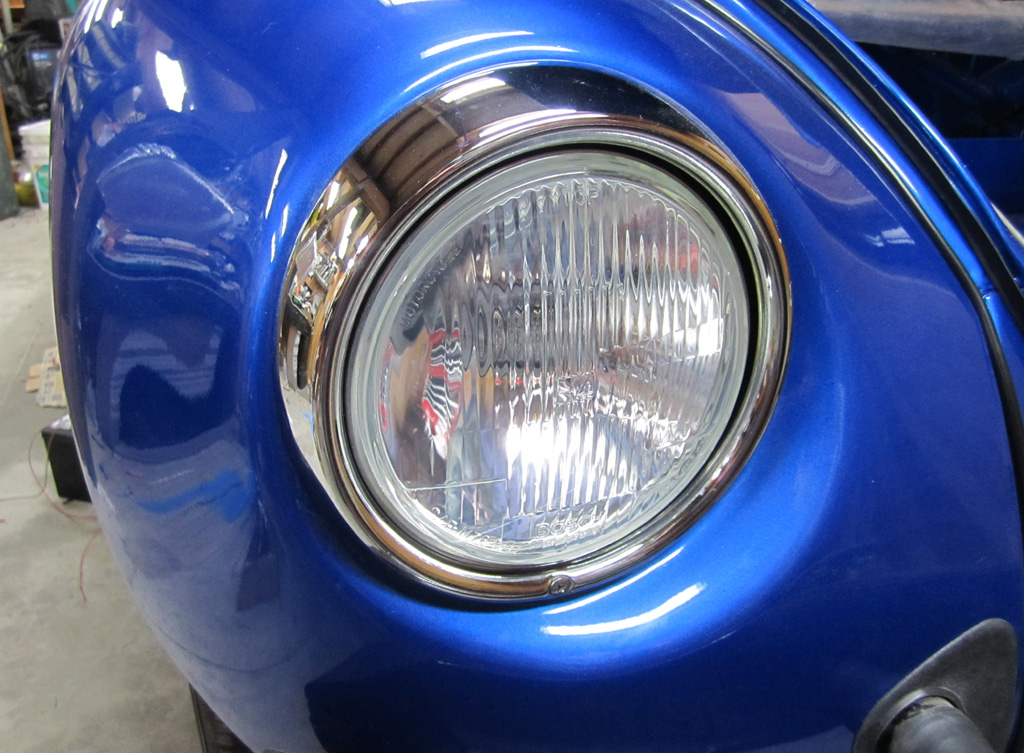
Th H4 lights and new rings from Wolfsburg West finish it off.
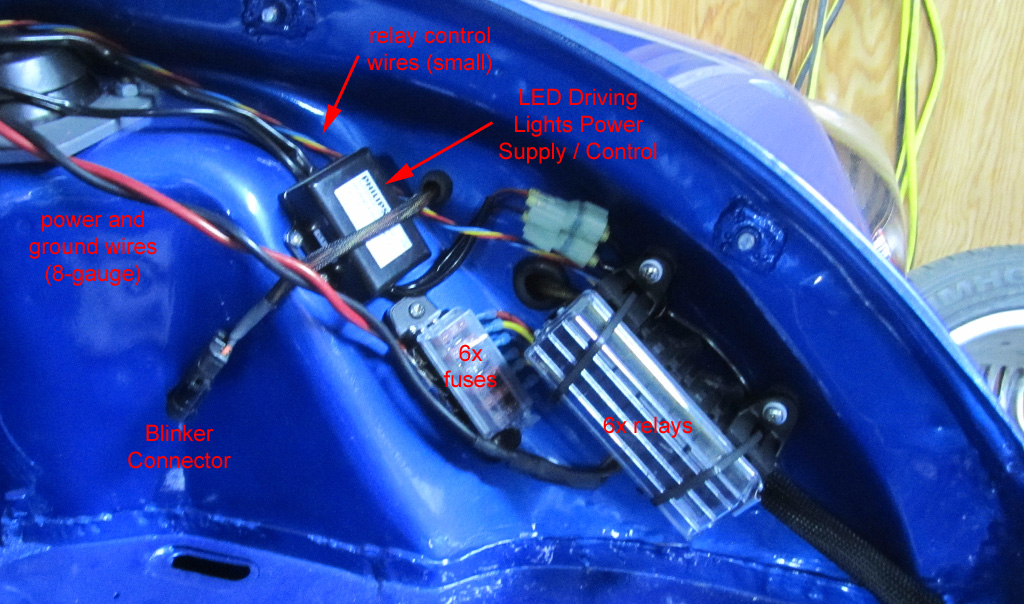
We tucked a small fuse box and micro-relay box in the front. There are seperate fuses and relays for each of the high-power lights: High-beam (R+L), Low-beam (R+L), Fog (R+L). The LED driving light control box is mounted there too.
By using relays, we will only have to run the small wires to the switches, and still have minimal voltage drop since there are huge power wires.
 |
|
| Back to top |
|
|
Baxsie
Joined: 12 Apr 2012
Posts: 253
|
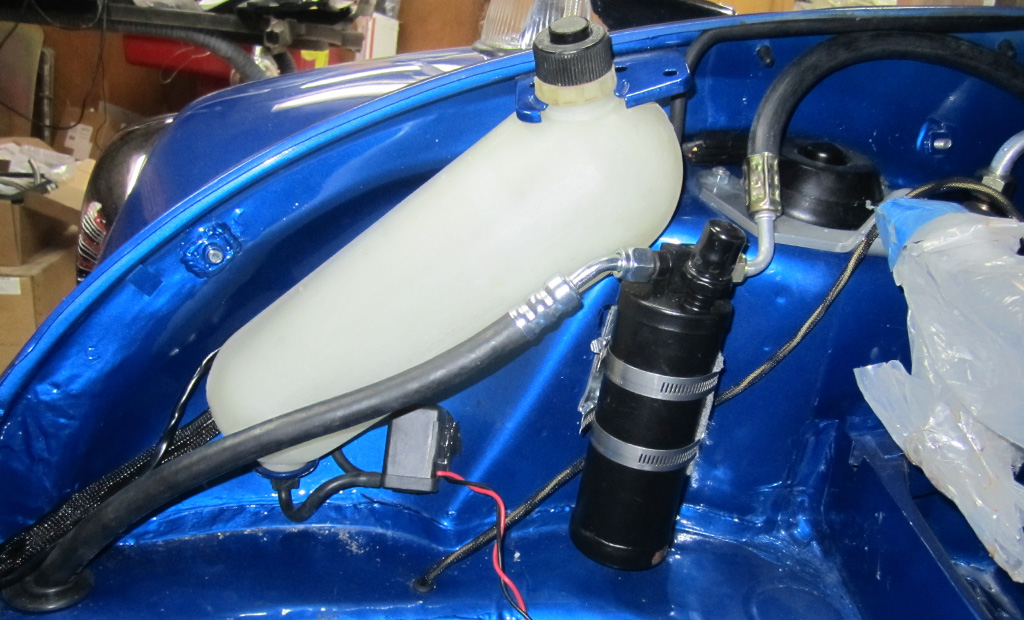
| Posted: Sun Nov 02, 2014 10:11 pm Post subject: Electric Windshield Washer Pump, reusing old tank |
|
|
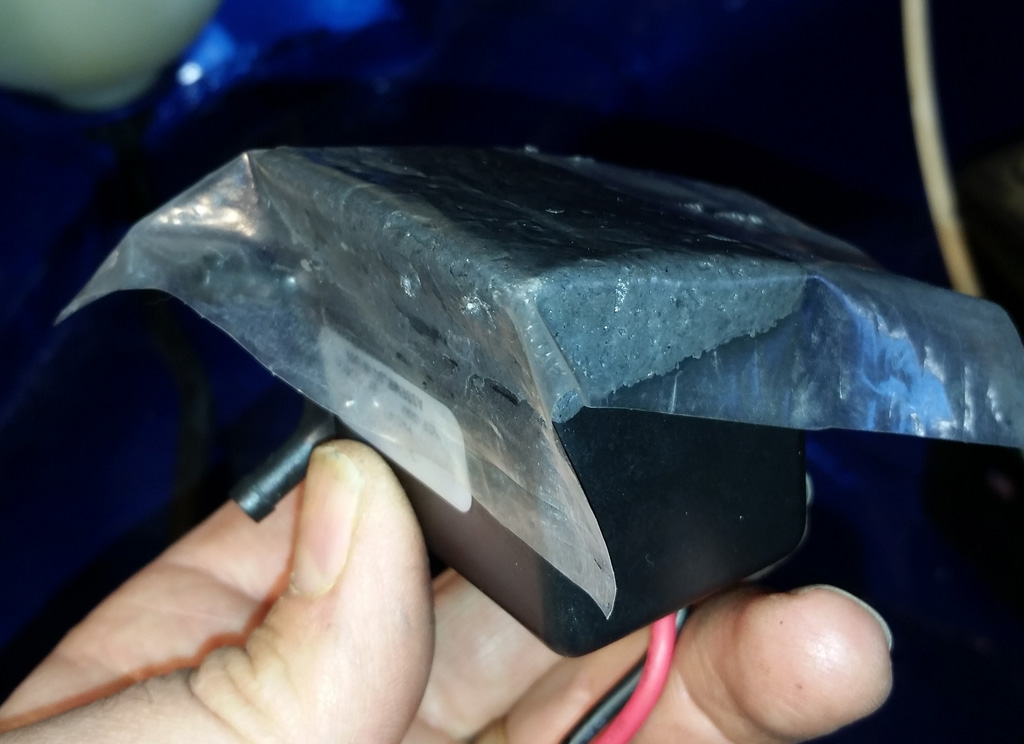
There is no way we are going to mess with that sad "flat spare" windshield washer spray setup. We grabbed a generic pump from NAPA, and found a likely place to mount it:
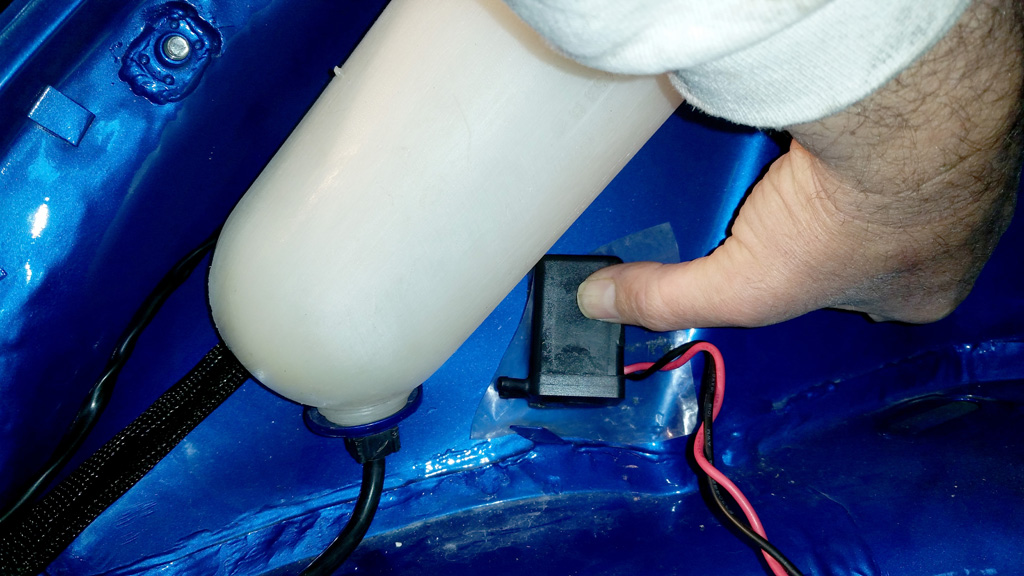
Used some of that formable clay epoxy stuff to make a mounting ramp:
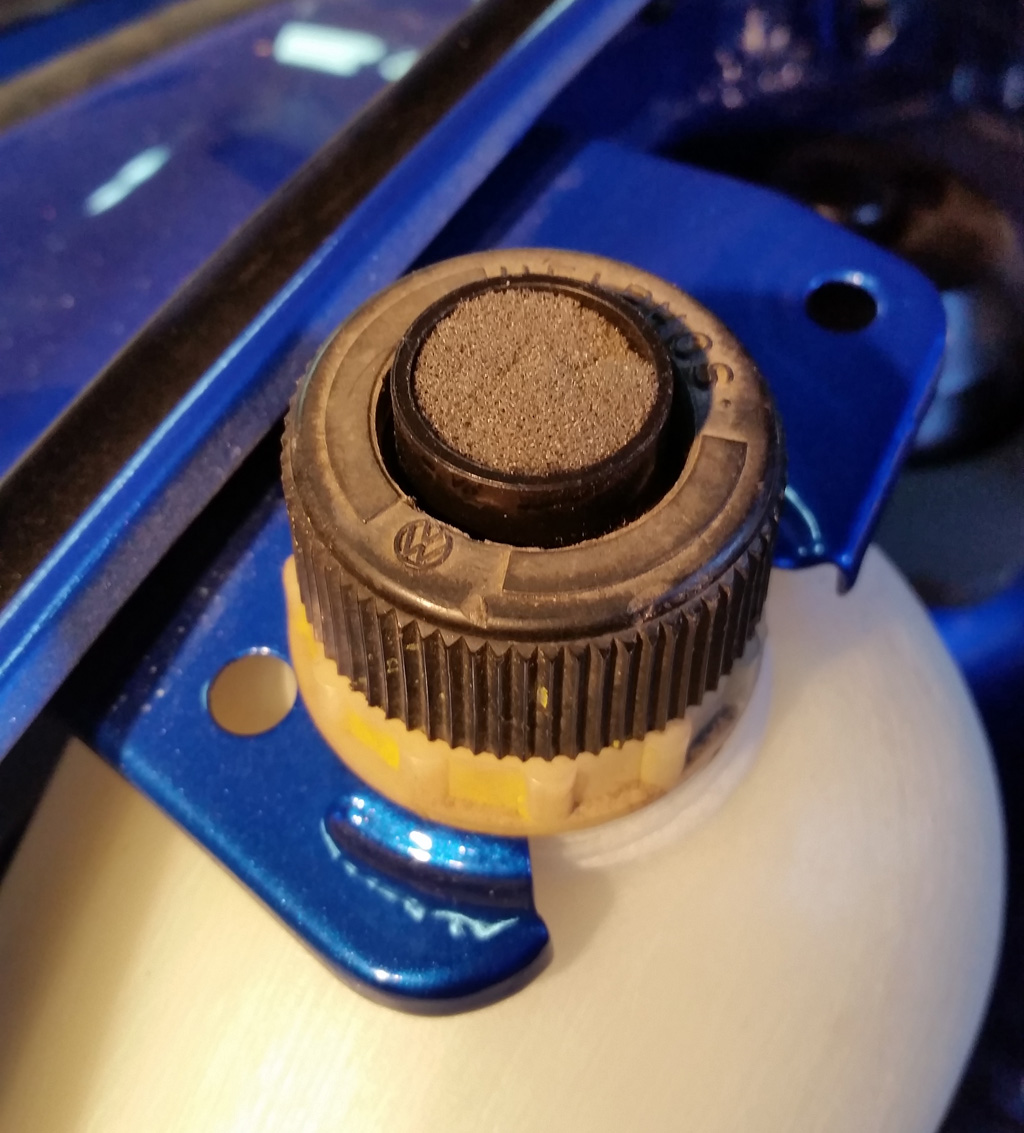
Modified the lid to have a vent:
Here is the overall setup. Not so bad, I think:
 |
|
| Back to top |
|
|
Baxsie
Joined: 12 Apr 2012
Posts: 253
|
| Posted: Sun Nov 02, 2014 10:11 pm Post subject: Front ICE AC Air Conditioner Install |
|
|
We got the front/main condenser from the ICE AC kit installed. In the end, it goes together fairly well. The instructions are a horrible photocopied mess though.
Here is a shot before the cover is placed:
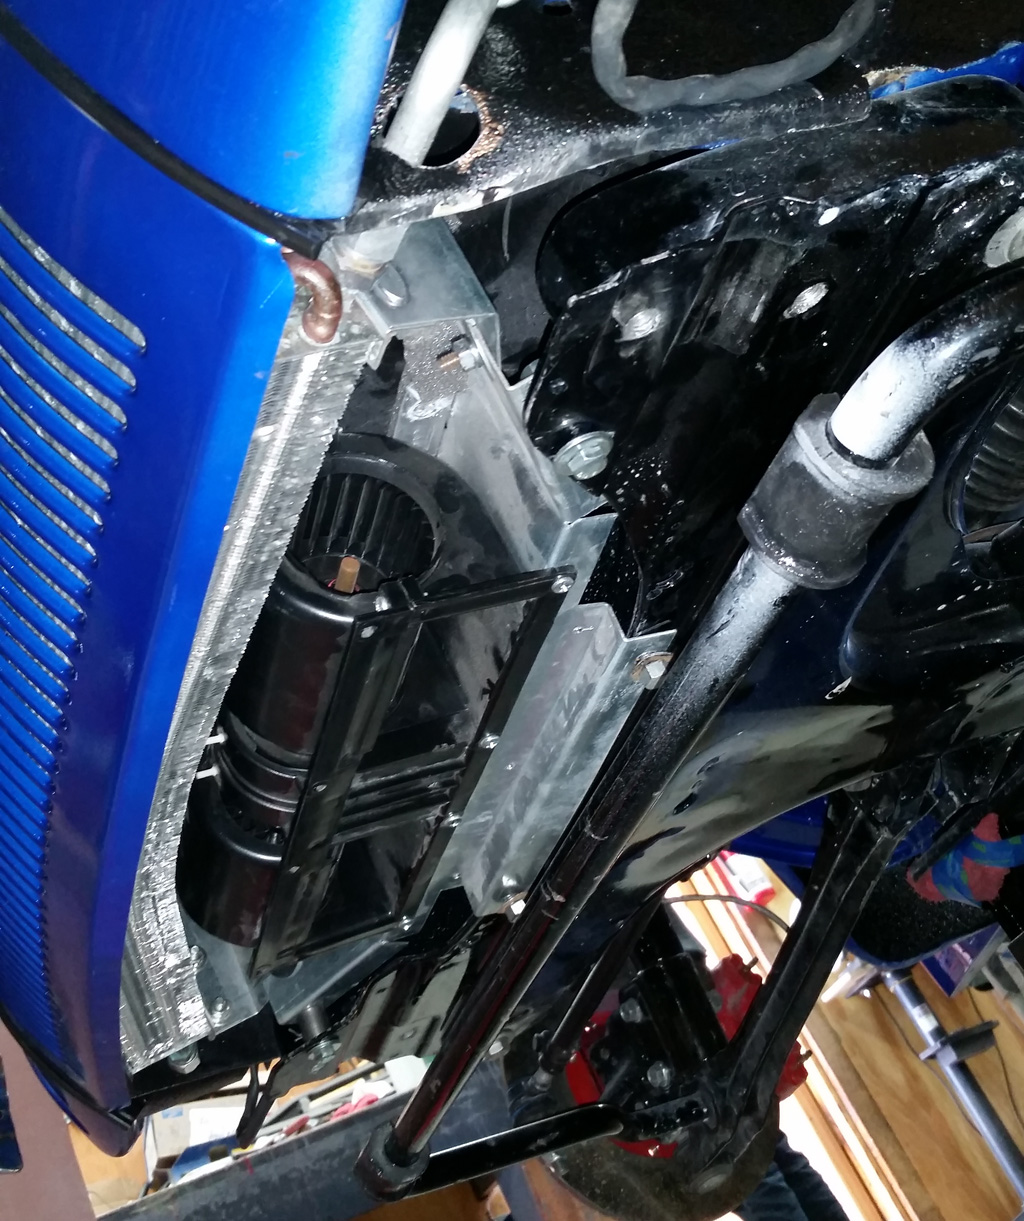
At each end of the condenser, there are plates to form an air chamber. The fan sucks air out of this chamber, and blows it on the ground (should be good on a dirt road!). The replacement air is drawn in from the front gril and through the condenser.
The seal on the passenger side:
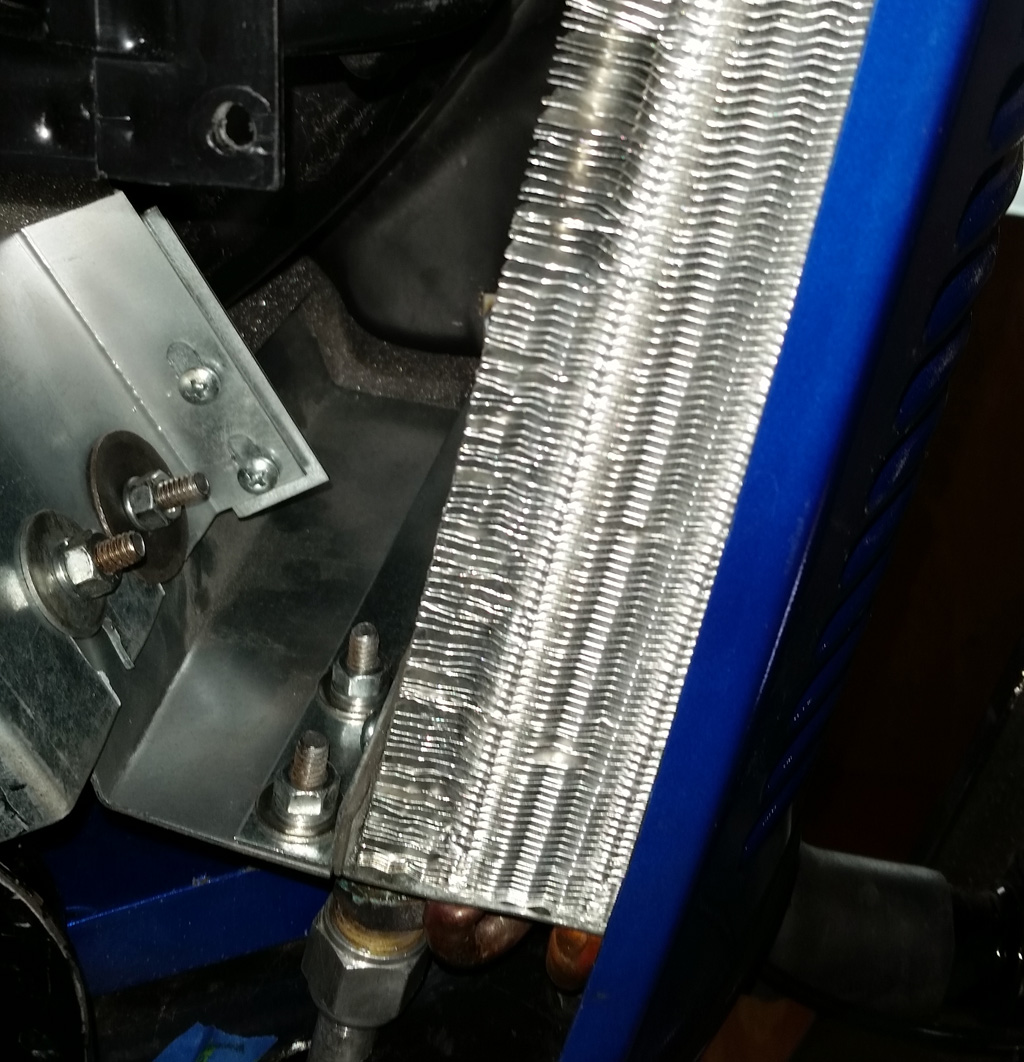
The seal on the driver side, and the connection:
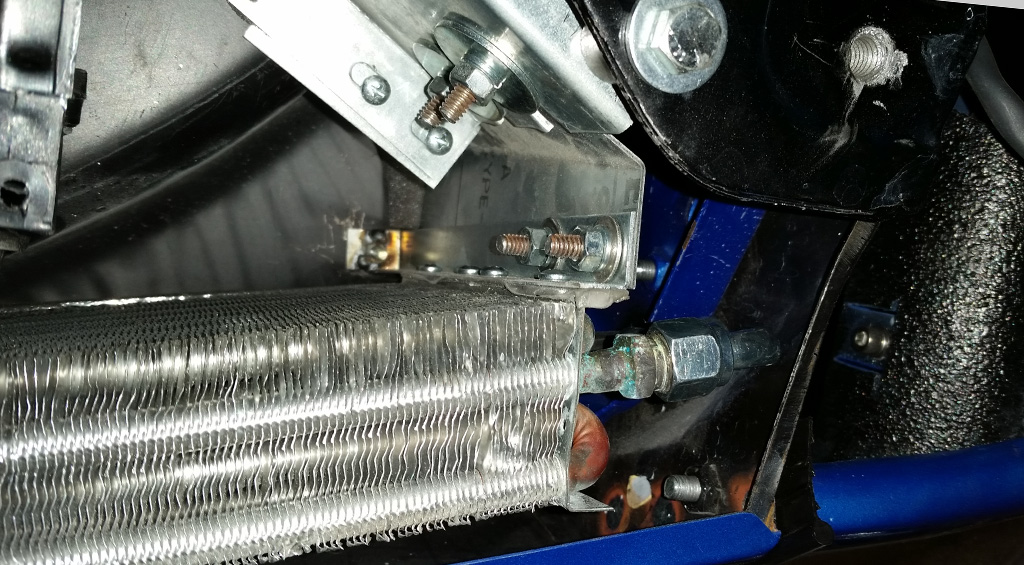
After all that is sorted, there is a blow-molded cover that finishes the seal and tidys everything up:
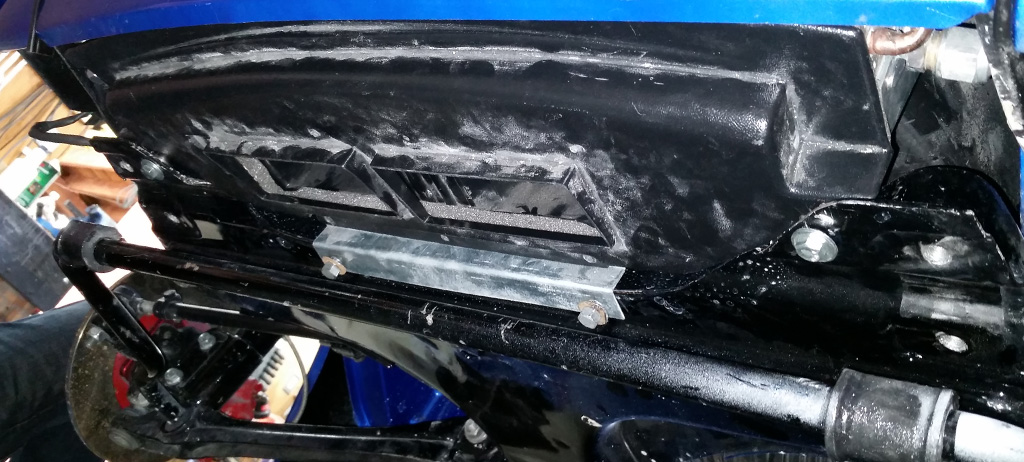
Since we had not installed the large access plug in the spare wheel well, we could access the wiring through that:
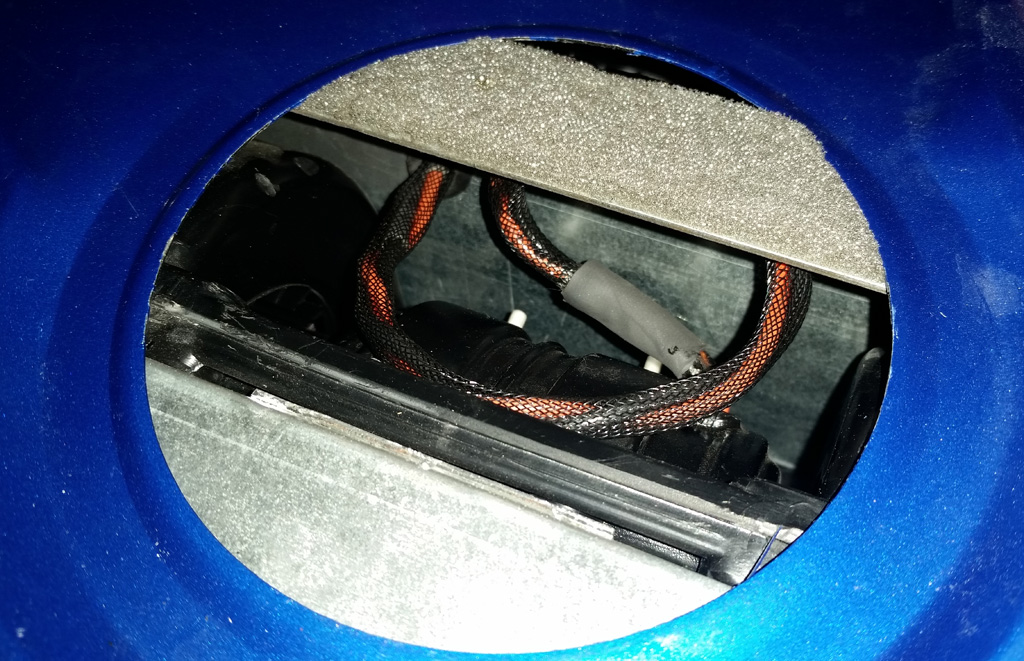
The plans call for putting the receiver/dryer under the fender, but that sounded dumb to me, so we put it inside the trunk. You can also see the wire for the condenser fan coming up through a grommet near the bottom of the receiver/dryer:
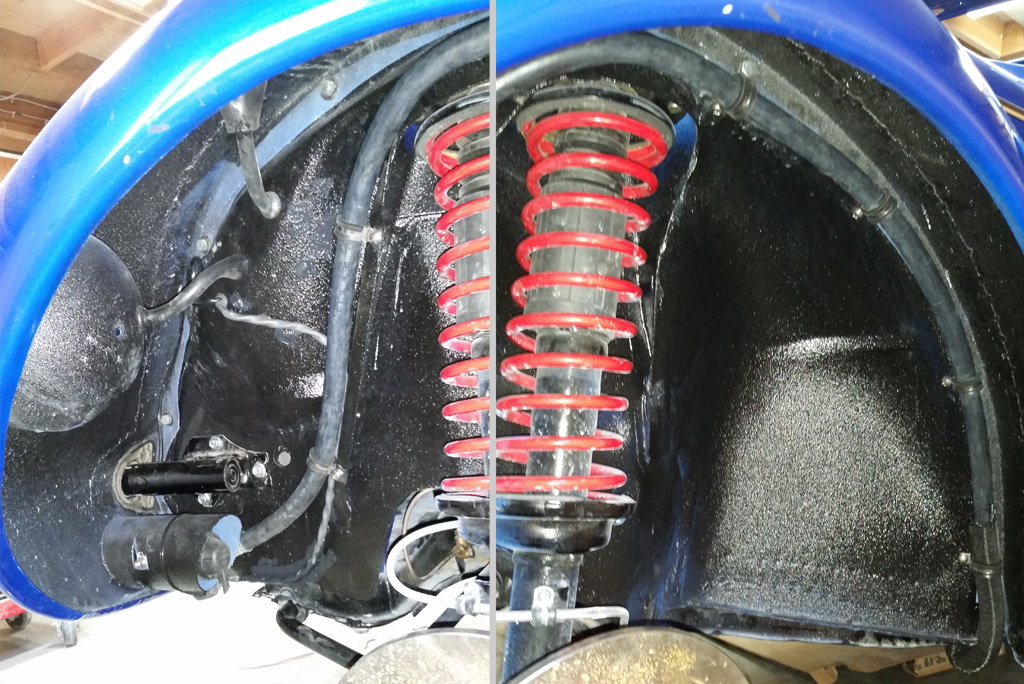
Here is what is going on under the fenders. Wiring and A/C tubing. Passenger side:
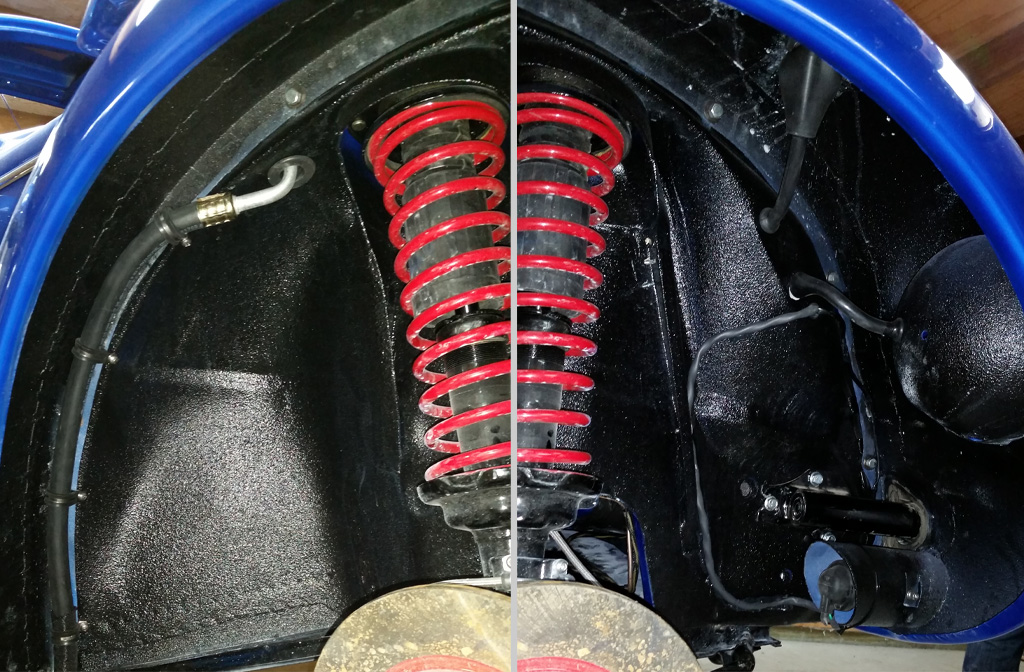
Driver side:
 |
|
| Back to top |
|
|
Baxsie
Joined: 12 Apr 2012
Posts: 253
|
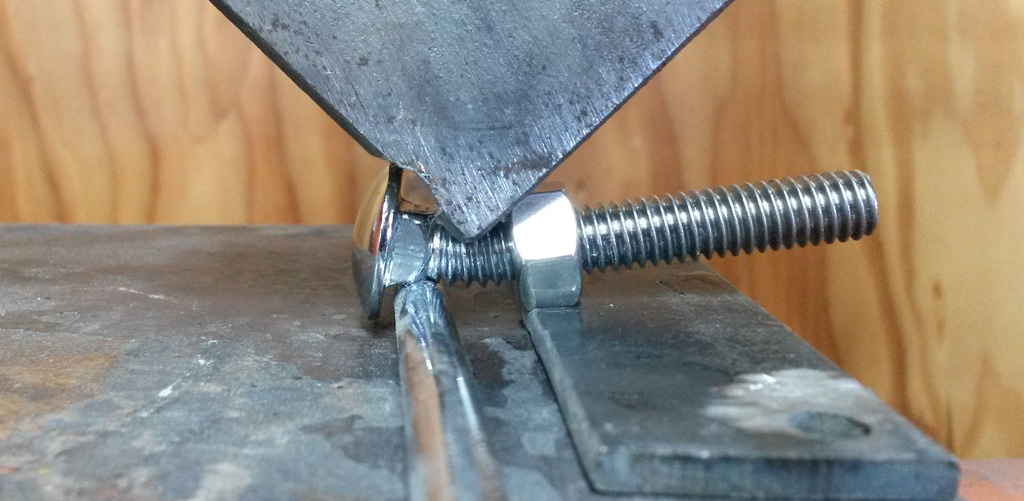
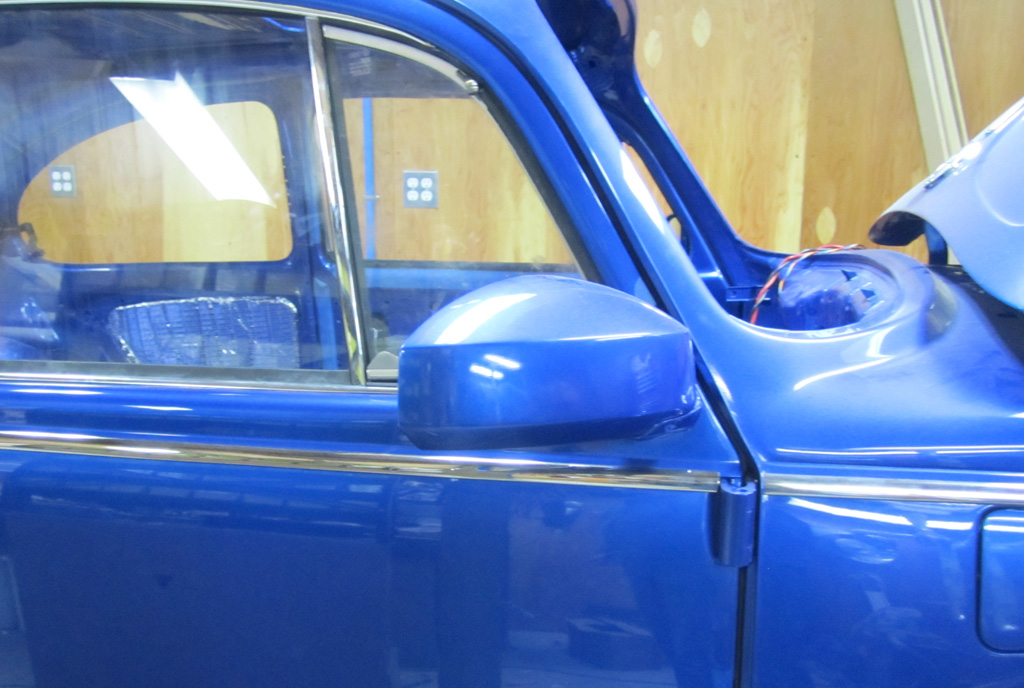
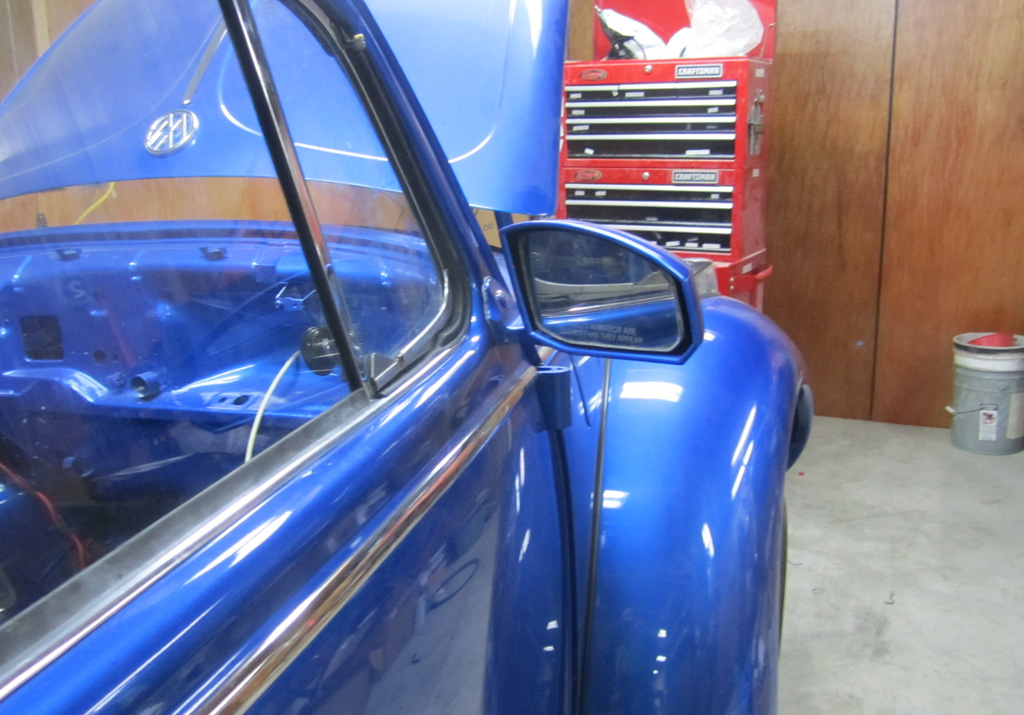
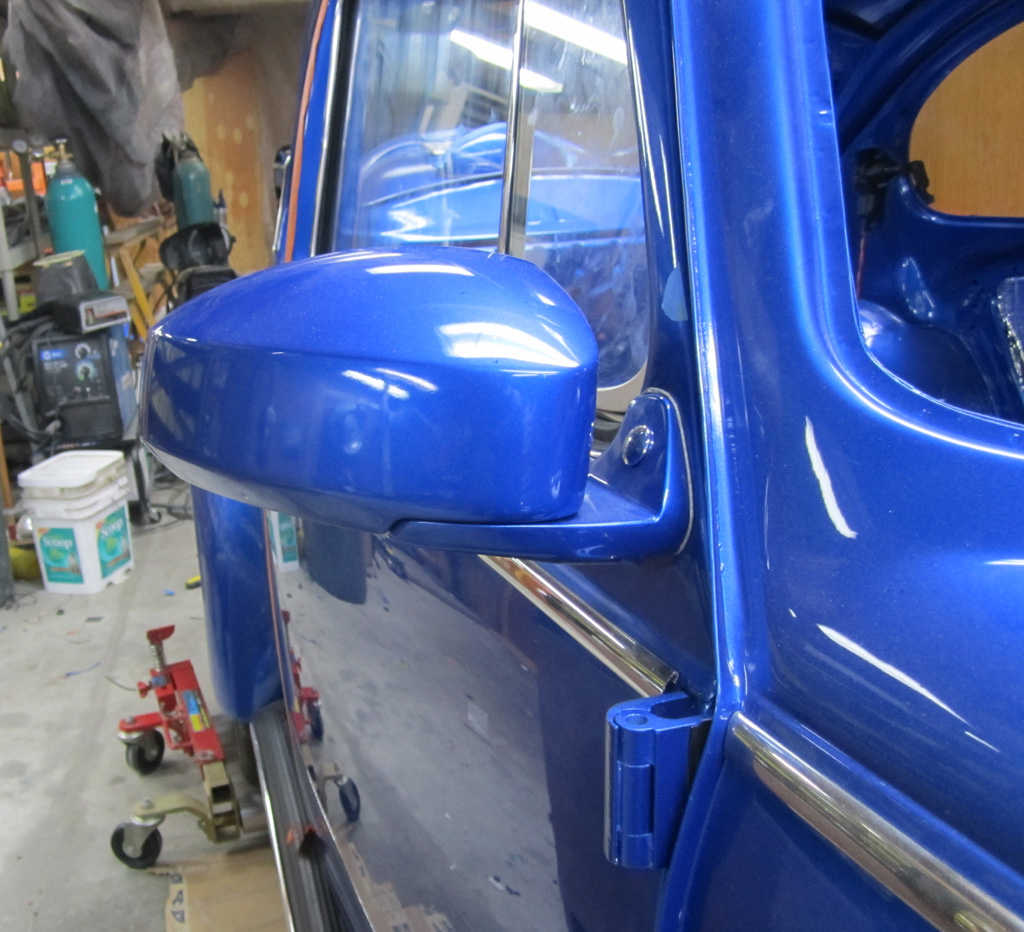
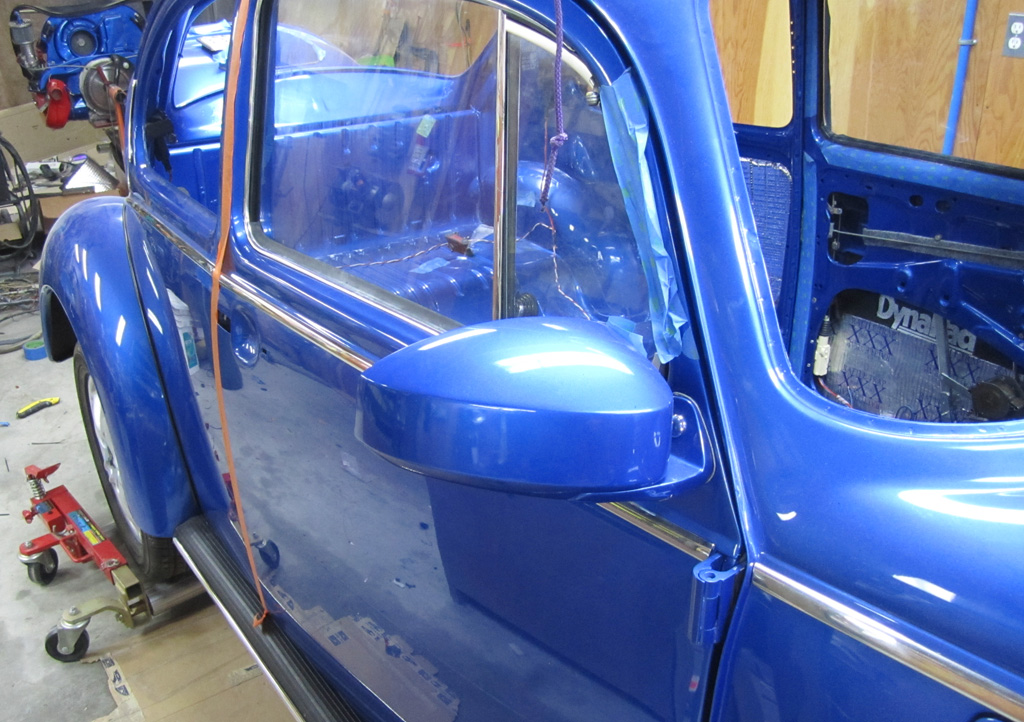
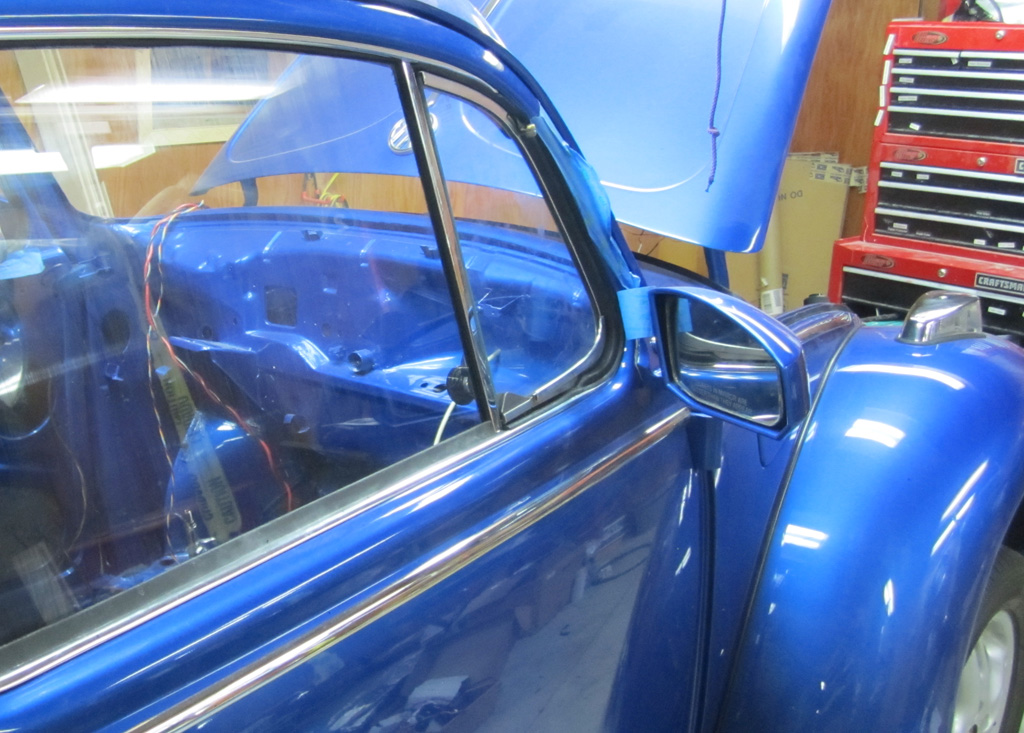
| Posted: Sun Nov 02, 2014 10:12 pm Post subject: Power / Heated Mirrors from a 350Z: Painted |
|
|
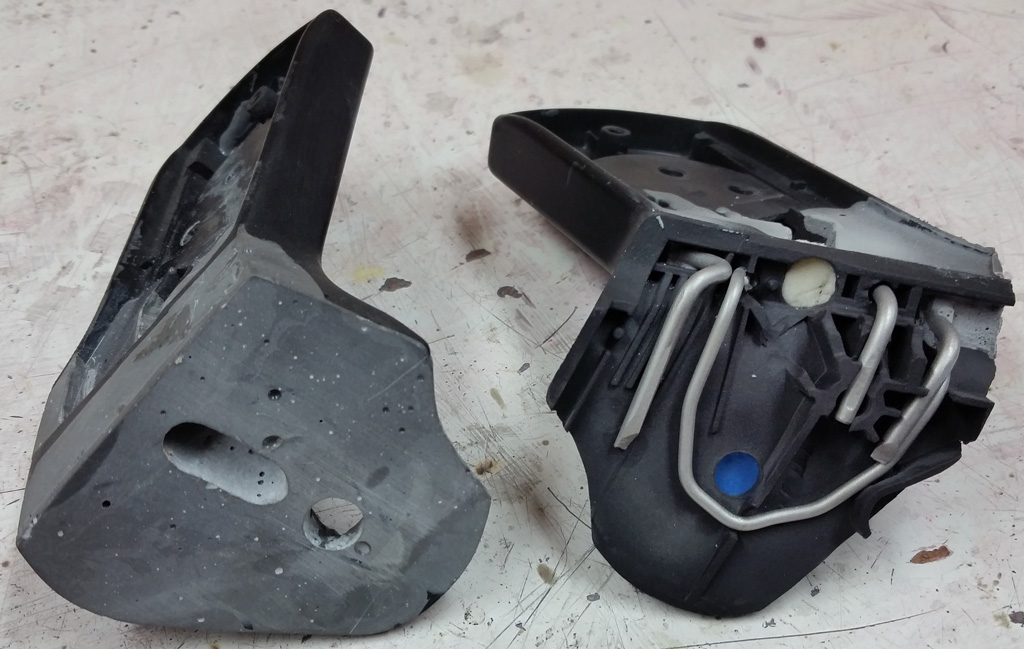
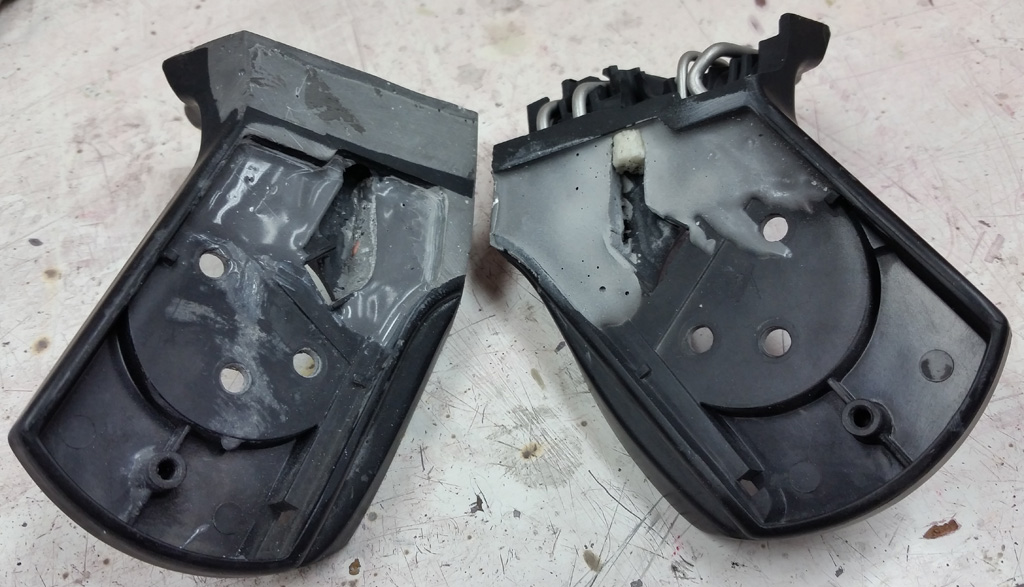
We took a set of mirrors from a 350Z, and modified the brackets so they could be used with the bug's original mirror mounting holes. We used welding rods to add strength:
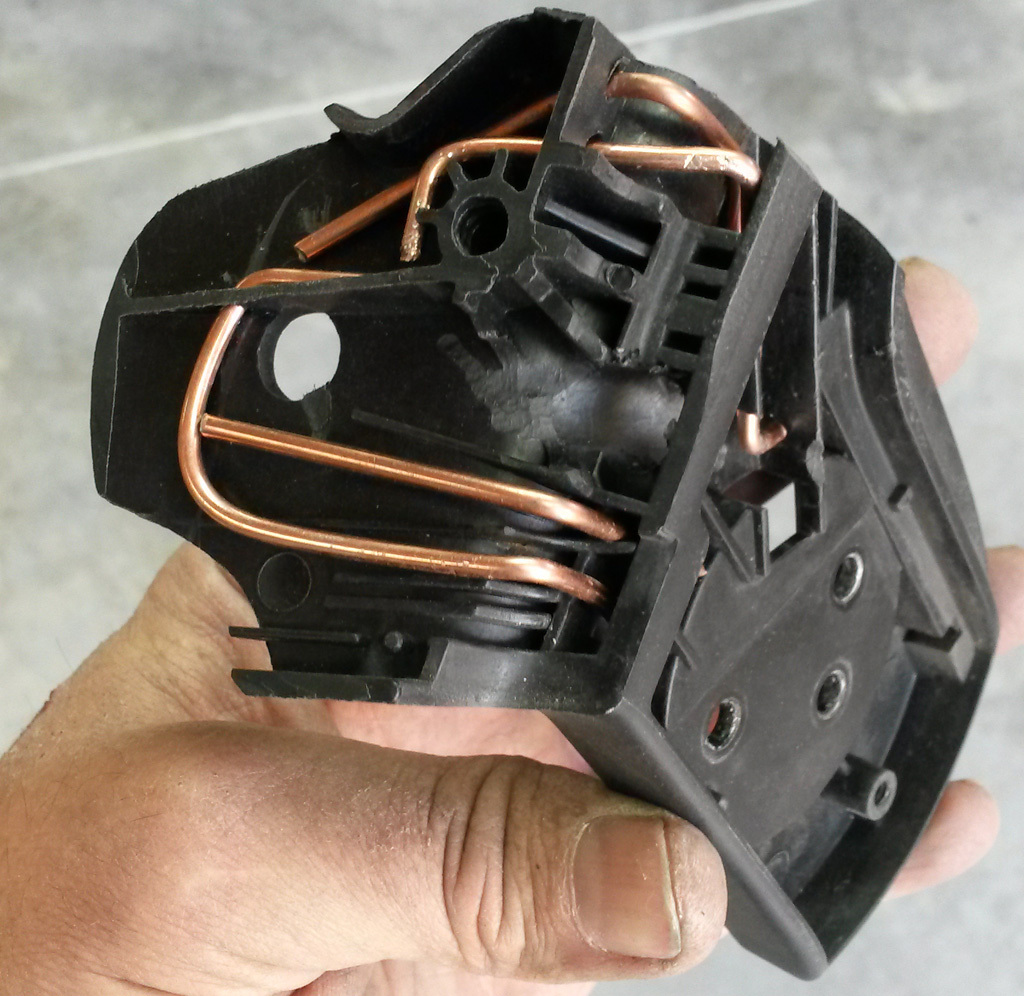
Then poured in JB-Weld, which is a pretty darn good epoxy:
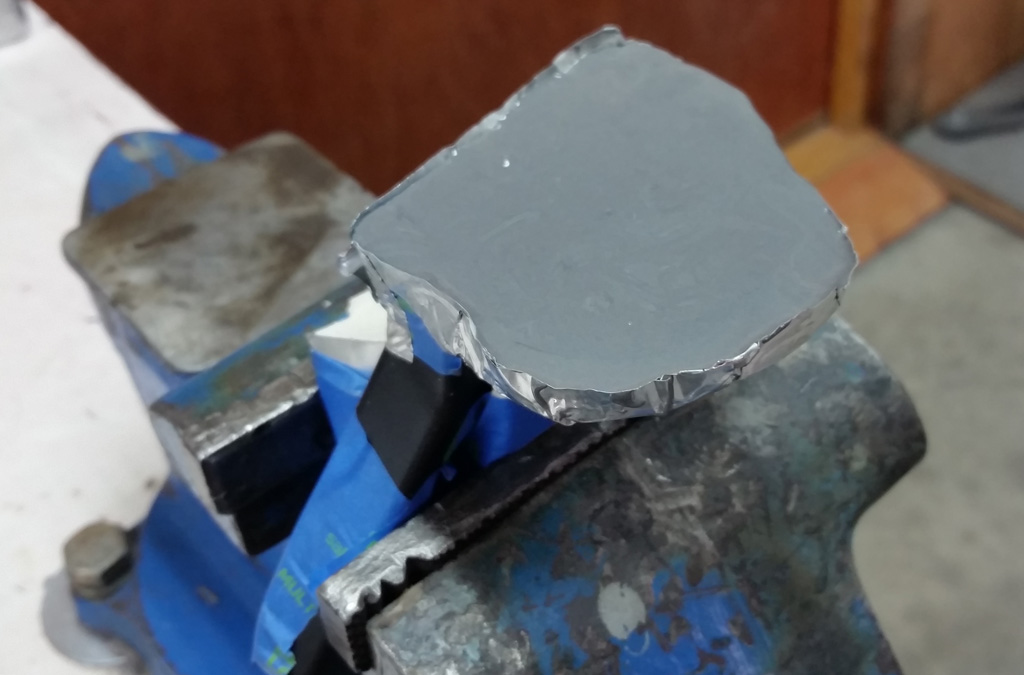
We used a chrome-plated carriage-head bolt in combination with a notched washer so we could mount the new mirror base to the door using only the original mounting hole. Since the mirror base is a bit sloped, we needed to kink the bolt a bit:
[img]http://baxsie.com/images/forum/bug/white_75/Mirrors_Power_Heated_350z/Wire_And_Bolt_Through_Original Hole.jpg[/img]
I do not think they look that bad:
 |
|
| Back to top |
|
|
Troy Hobbs
Joined: 05 Aug 2003
Posts: 766
|
| Posted: Mon Nov 10, 2014 2:50 pm Post subject: 1975 Super Beetle Project |
|
|
Looking good! Home stretch now.
_________________
TROY
current RCVW club Pres
ARR #3 |
|
| Back to top |
|
|
|
|
You cannot post new topics in this forum
You cannot reply to topics in this forum
You cannot edit your posts in this forum
You cannot delete your posts in this forum
You cannot vote in polls in this forum
You cannot attach files in this forum
You can download files in this forum
|
|


