| View previous topic :: View next topic |
| Author |
Message |
Baxsie
Joined: 12 Apr 2012
Posts: 253
|
 Posted: Fri Oct 19, 2012 6:21 am Post subject: Posted: Fri Oct 19, 2012 6:21 am Post subject: |
 |
|
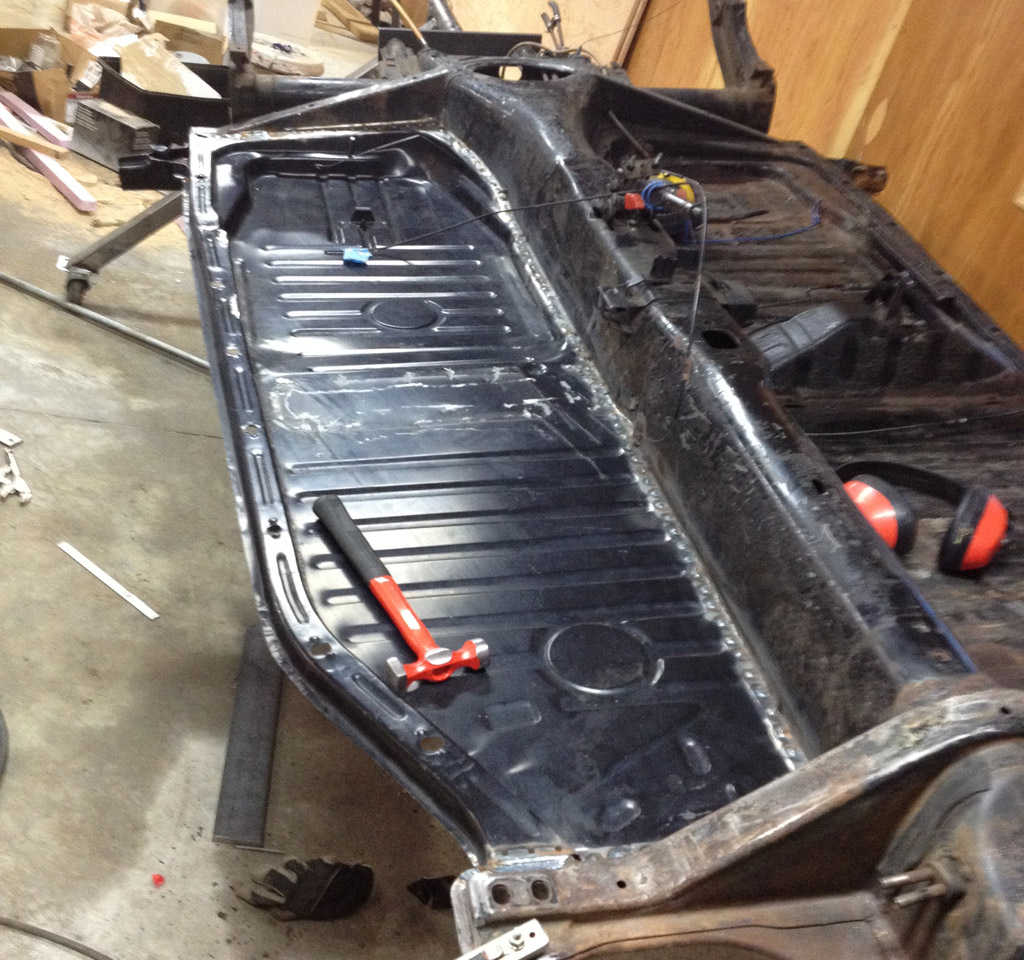
My son finished cutting the floor pan out. We got a cheapo Harbor Freight air chisel which (somewhat surprisingly) worked very well for cleaning off the spot welds:
After he gave it a bit with a wire brush on the drill it is looking pretty good:

The new pan has the rear support arm as part of the pan. Our support is in good shape, so we plan on removing the new support from the new pan and anchoring the new pan to the it to the existing support arm. Is that the right way to go about it? Removing the support from the backbone tunnel and suspension seems like it would be a big, critical operation and and very easy to get wrong.
The new pan also has a nice reinforcement for the jack point. Hopefully we can save that:
In the end, it looks like the pan I ordered might not have been the ideal part for this repair. I think a simpler pan might have been a better match. Oh well, live and learn.
Last edited by Baxsie on Fri Aug 08, 2014 12:29 pm; edited 1 time in total |
|
| Back to top |
|
 |
ONEBADBUG

Joined: 25 Oct 2003
Posts: 440
Location: Spokane
|
| Posted: Sat Oct 20, 2012 7:01 am Post subject: |
|
|
"we plan on removing the new support from the new pan and anchoring the new pan to the existing support arm. Is that the right way to go about it? "
Don't think it matters either way. Just measure the position of the arm in 3d, or set the body back on to tack it in place. You can clearly handle it! |
|
| Back to top |
|
|
Baxsie
Joined: 12 Apr 2012
Posts: 253
|
| Posted: Tue Oct 23, 2012 9:03 pm Post subject: |
|
|
Been going a bit slow, but we got some more work done on the pan. In the rear, my son removed the support that was part of the pan. I think we figured out how to trim the jack point reinforcing plate to where it will not interfere and can be anchored to work with the factory support:
The new pan edge is prepped. He used a flange tool (cheaper here) to punch holes every ~inch along the edge ~90 places  ): ):
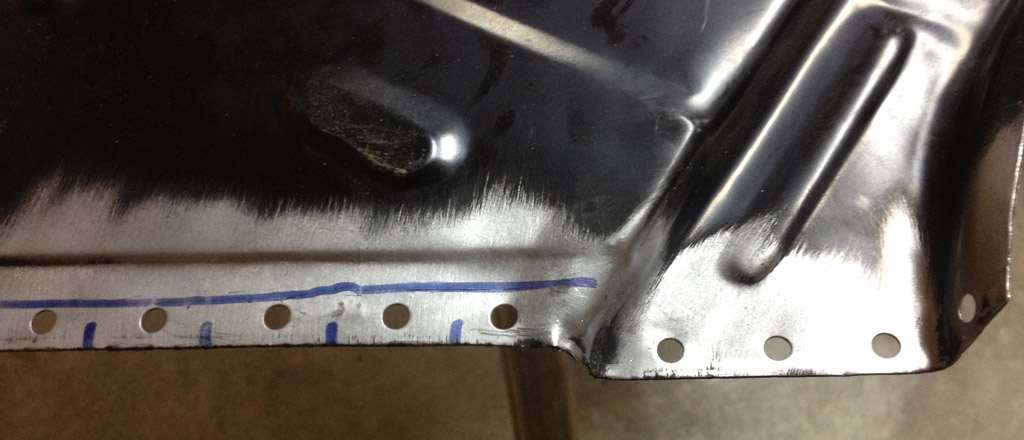
The idea will be to fill each of those perfectly with the MIG. I'm thinking he better practice a bit first.
The edge of the pan on the other side was pretty twanged, like someone had jacked the car in a couple of places and flattened the flange out some. We used hammers and buck-bars to do some farm-boy straightening of it.
Next up is for him to weld the pan in
Last edited by Baxsie on Fri Aug 08, 2014 12:29 pm; edited 1 time in total |
|
| Back to top |
|
|
Baxsie
Joined: 12 Apr 2012
Posts: 253
|
| Posted: Thu Oct 25, 2012 9:07 pm Post subject: |
|
|
The boy and I decided to do some practice welding before tackling the pan.
We played with the MIG for a bit, but it still tended to blow through the thin metal, even at the lowest setting.
// start goofy welding story
We then got brave and hooked up the TIG, which I had only used once, and he had not touched. What resulted was a frustrating hour of completely crappy and embarrassing welds. We had to re-profile the tip like 5 times. Blowing through the metal or the weld laying on top. Just complete garbage. I got frustrated and went back to working on the shop, thinking: "The kid is bright and will figure it out better than me anyway, I'm too old for this learning BS."
As I was working away from the welder on the shop and he was continuing to try to get something useful out of the TIG, I thought to myself: "Maybe the gas is not adjusted correctly, I don't remember setting that." I walked over to the regulator and saw that BOTH GAUGES READ ZERO. We had hooked up the gas but never actually opened the valve on the cylinder. D'oh!
// end goofy welding story
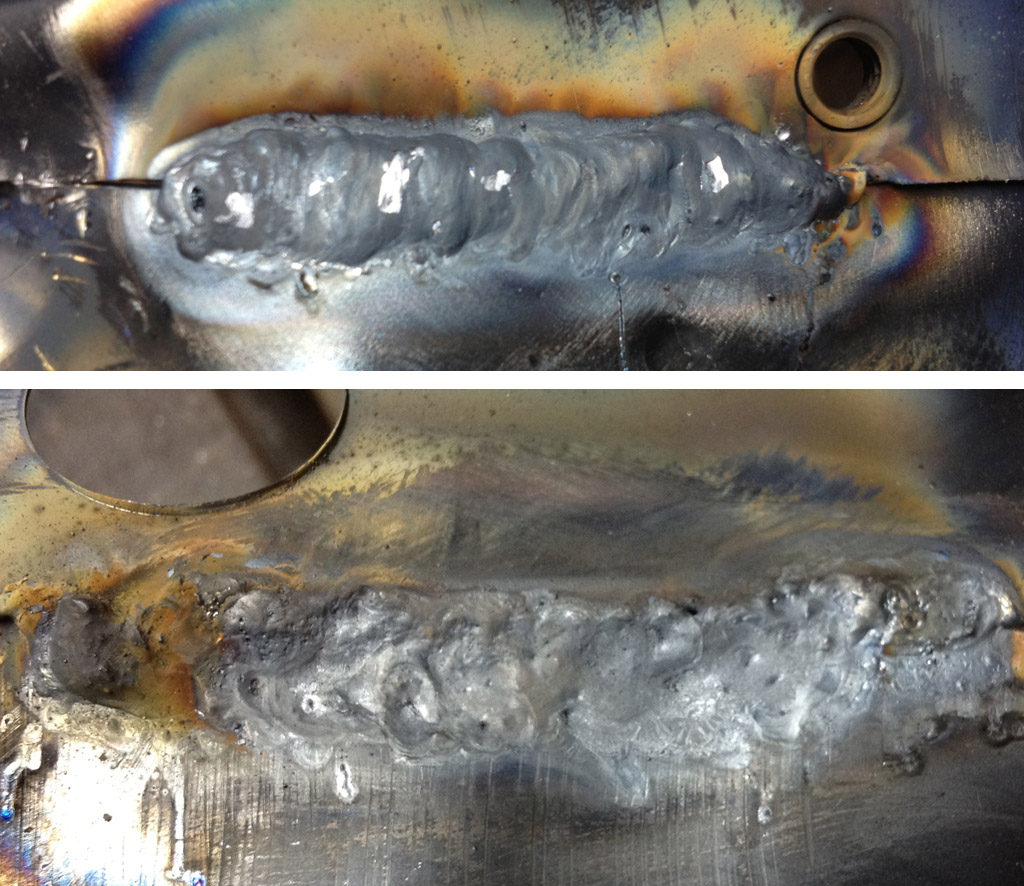
Once the gas was flowing things went much better. TIG is still much fussier than MIG or stick (MIG has to be the easiest) but after a few more tries we could at least join two pieces of relatively thin metal. This is still very far from saying that either of us can TIG weld, but at this point at least I think we can learn.
Here is a couple of our first butt welds using the TIG on the thin sheet metal:
Last edited by Baxsie on Fri Aug 08, 2014 12:30 pm; edited 1 time in total |
|
| Back to top |
|
|
Baxsie
Joined: 12 Apr 2012
Posts: 253
|
| Posted: Sun Oct 28, 2012 6:14 pm Post subject: |
|
|
After spending a couple of days looking at welding with the TIG we got ambitious this weekend with the MIG and got the pan installed.
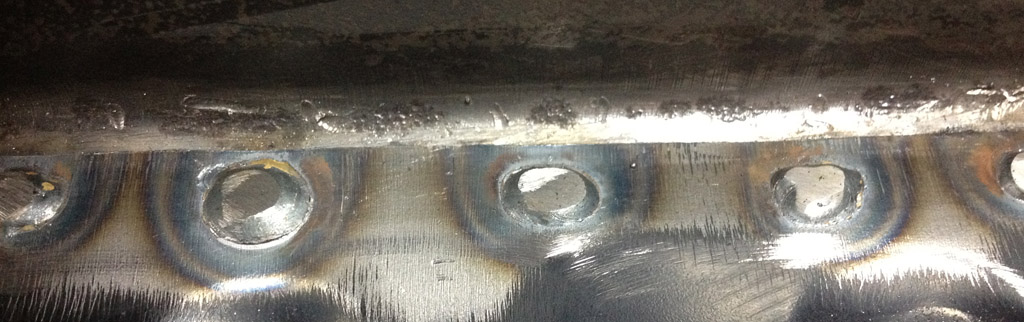
First off we got the 0.023 wire (down from the 0.035) for the MIG. We then spent some time fiddling with wire speed and voltage until that was close. After the welds were done, he used a sanding disc on the grinder to smooth all the welds out. Here are some of the nicer looking plug welds:
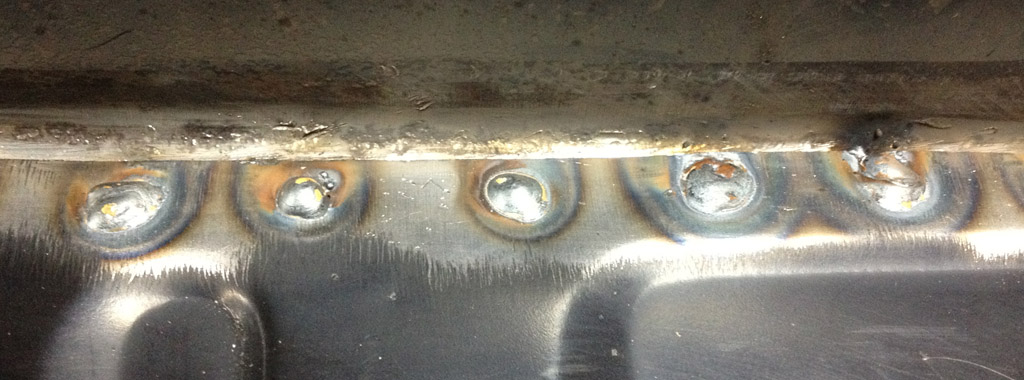
Smoothed a bit:
We used a bead weld at the front:
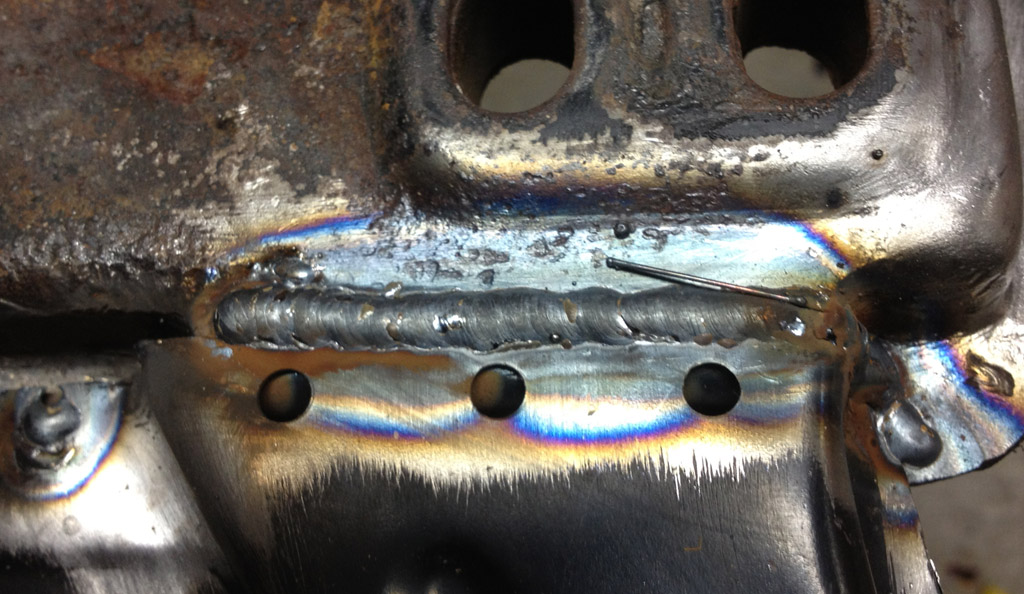
Smoothed a bit:
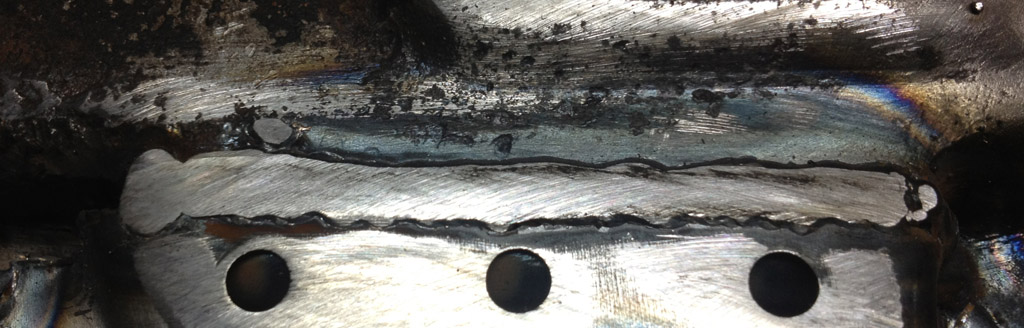
My son did most of the plug welds, the bead is my work. In the end, I think it will work:
Last edited by Baxsie on Fri Aug 08, 2014 12:30 pm; edited 1 time in total |
|
| Back to top |
|
|
Baxsie
Joined: 12 Apr 2012
Posts: 253
|
| Posted: Sat Nov 10, 2012 6:44 pm Post subject: |
|
|
There is a twist to this post that I am SO embarrassed about. Details at the end, see if you can catch it early.
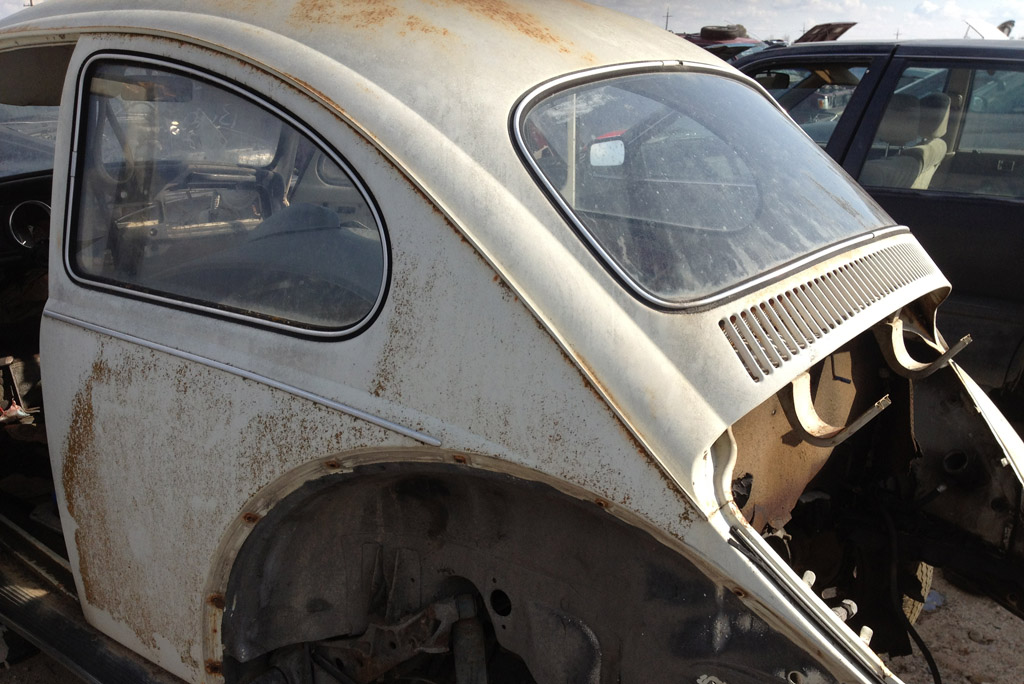
So the "foam of death" rust on the bug has continued to bother me, and I have continued to look for bugs that do not have rust in that area.
This weekend, I traveled to my brother's place (Boise) for "early Thanksgiving" and I called a local Pull & Save style place. They had a 68 bug and a 73 super, so went over to look at them. The 73 was rusted completely through in the foam of death area. The 68 (to my surprise) did have foam in it, but had no rust at all. The junkyard at home in Spokane will not allow power tools, so even though I have seen cars come through that do not have rust, I do not have a way of getting the sheet metal off them before they get sent out to the scrapper. Well, this place in Caldwell was fine to allow power tools in. And the 68 there had two perfect panels with no rust. So I conned my brother into going out there with me. We removed the windows (zero breakage ) and pulled the right rear fender off--a bit of a pain because the auto-stick tank is there in the way. Not a single fender bolt gave us trouble . . . they were not rusted at all. Amazing rust free bug.
It does give me great pain to cut these panels out, but I know that this car can only be months away from the crusher, so I am not going to cry too loudly.
I was feeling awesome as we whipped out the generator and sawzall to cut the perfect panels out of the bug.
So here is the bug as we first see it:
Here it is after the butchery with the sawzall:

And here are the prize panels, in perfect condition:

Have you seen my error yet? In my excitement to find rust free panels, I never noticed that these panels do no have the fresh air "moon" vents. How could I miss that? D'Oh! I still do not feel bad for rescuing the panels. But I am not as confident that I can use the panels as if they actually came from the same model car.
I do think that I can cut small sections from these new rust free panels, and do surgical replacement of just the smallest possible rusted areas on the 1975. I guess even if we only use the panels to avoid having to duplicate the complex curve of the rusted area it still will be worth it.
Dang, I was so excited to have the perfect solution to the rust. Sigh.
Last edited by Baxsie on Fri Aug 08, 2014 12:31 pm; edited 1 time in total |
|
| Back to top |
|
|
Baxsie
Joined: 12 Apr 2012
Posts: 253
|
| Posted: Sun Nov 18, 2012 7:53 pm Post subject: |
|
|
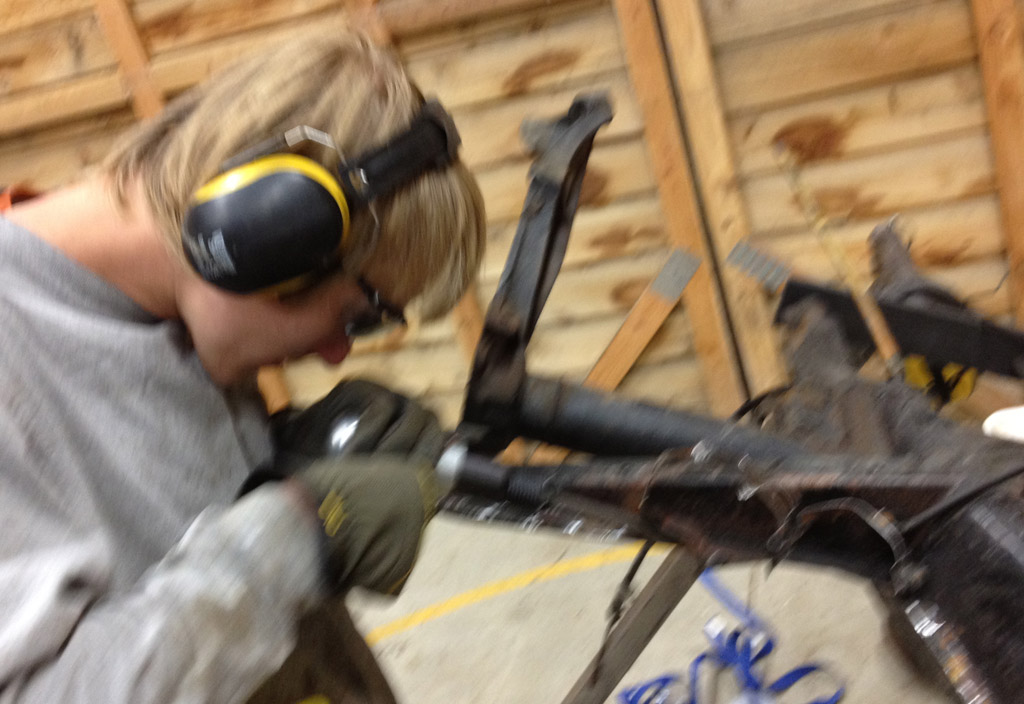
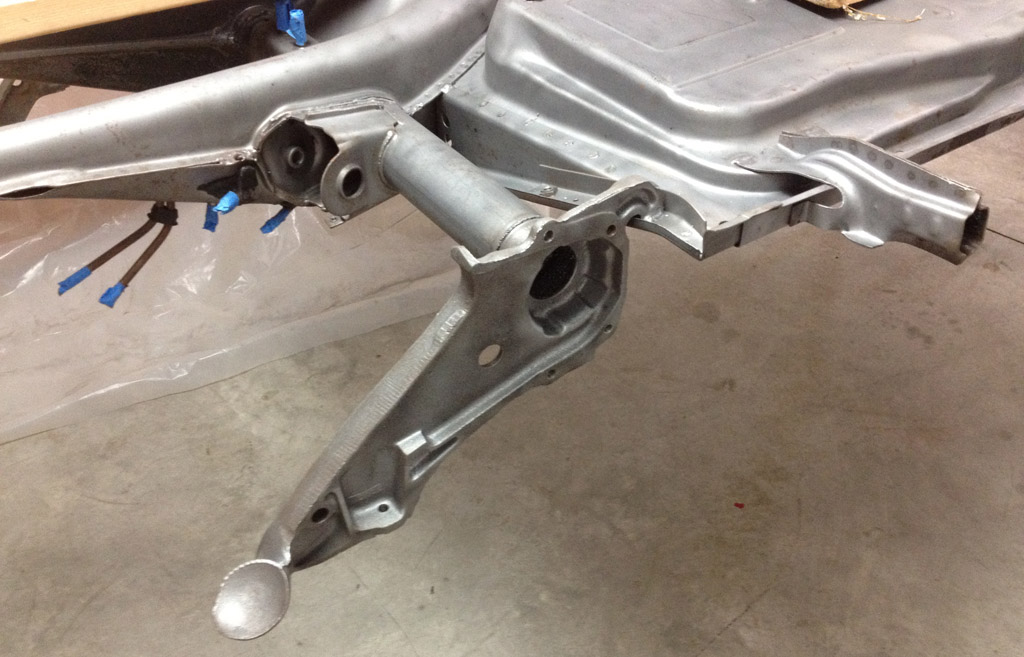
We finally got far enough along on the shop so that we could bead blast inside. We made a curtain out of plastic and set up a blower for negative pressure ventilation. Rolled the chassis rotisserie into the curtain and blasted away:
http://www.youtube.com/watch?v=pzdPClH5d9Y
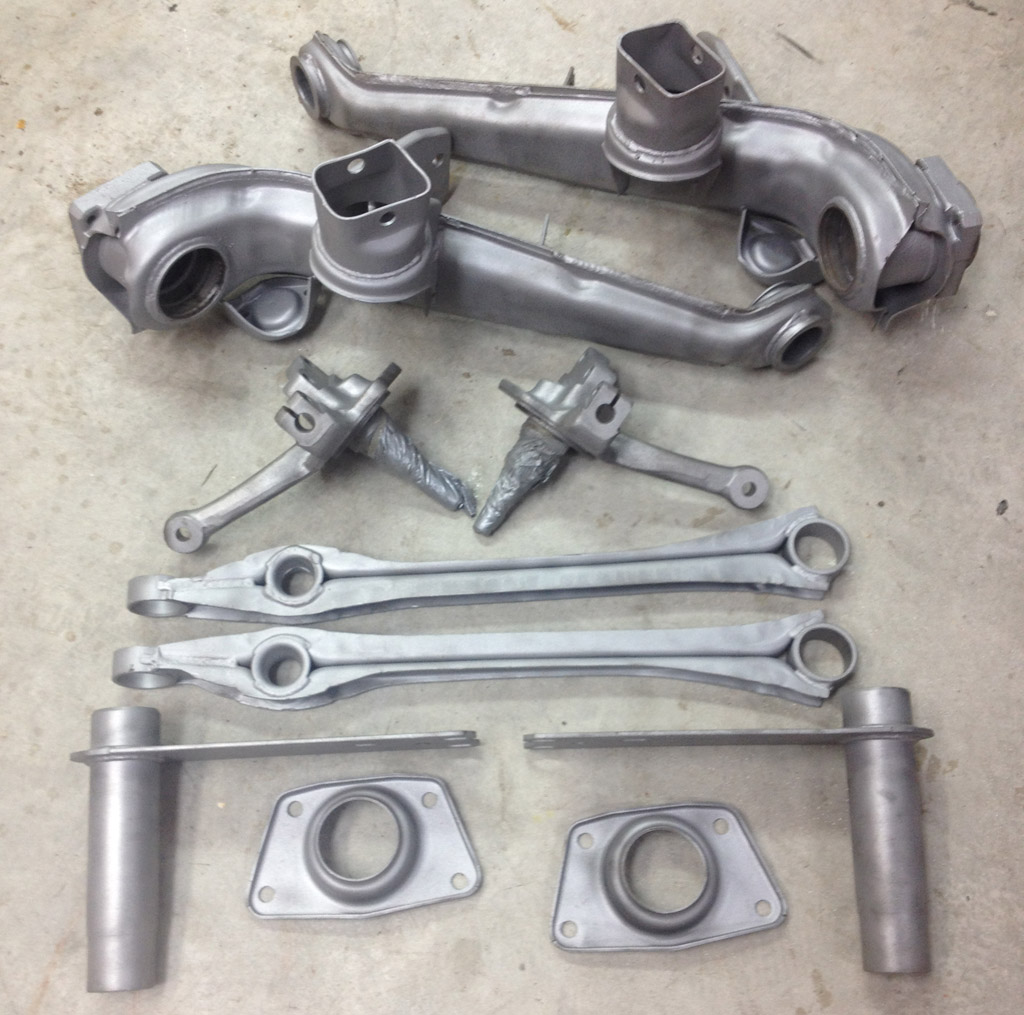
Here is one of the rear suspension arms:
Close shot of a jack point:
Close shot of the torsion bar housing welds:

The beads are "coarse" glass beads, though they are still very fine. We are sweeping them up, screening them and reusing them.
We used the cheapo HFT sand blaster with an upgraded nozzle, fed by the beefy 5hp compressor that will hold 60 PSI at the blaster continuously.
Last edited by Baxsie on Fri Aug 08, 2014 12:31 pm; edited 1 time in total |
|
| Back to top |
|
|
ONEBADBUG
Joined: 25 Oct 2003
Posts: 440
Location: Spokane
|
| Posted: Sun Nov 18, 2012 8:56 pm Post subject: |
|
|
| You guys are just way too into this! |
|
| Back to top |
|
|
Baxsie
Joined: 12 Apr 2012
Posts: 253
|
|
| Back to top |
|
|
ONEBADBUG
Joined: 25 Oct 2003
Posts: 440
Location: Spokane
|
| Posted: Sun Dec 02, 2012 7:59 pm Post subject: |
|
|
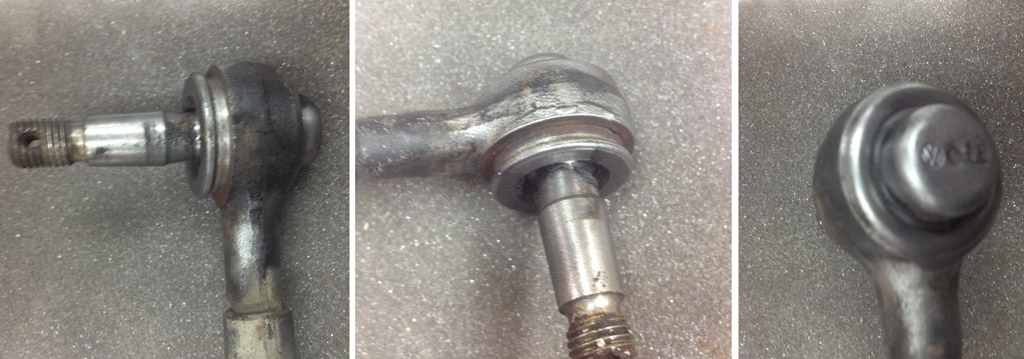
| Yea, you just buy the entire tie rod. |
|
| Back to top |
|
|
Baxsie
Joined: 12 Apr 2012
Posts: 253
|
| Posted: Tue Dec 04, 2012 7:38 am Post subject: |
|
|
| ONEBADBUG wrote: | | Yea, you just buy the entire tie rod. |
Yes, that seems to be the only way. It just seems a little "cheap" construction, even for VW 
I have a set on order from Wolfsburg West. |
|
| Back to top |
|
|
Baxsie
Joined: 12 Apr 2012
Posts: 253
|
| Posted: Sun Dec 09, 2012 9:45 am Post subject: |
|
|
We are now tackling the existing, poorly repaired front end collision damage.
We removed the poorly-attached-during-the-last-repair front apron, and the flanges of the original apron, which had never been properly removed. We have a new Front Apron With Louvers that will have the A/C condenser behind it.
We have a new Spare Tire Well, so we used a wire wheel brush to expose where the spare tire well attached to the inner fenders. We are trying to decide how much of the spare tire well to replace. It appears that to remove the entire spare tire well would be a major project. We will probably end up replacing the front 1/2 to 2/3 of the tire well:
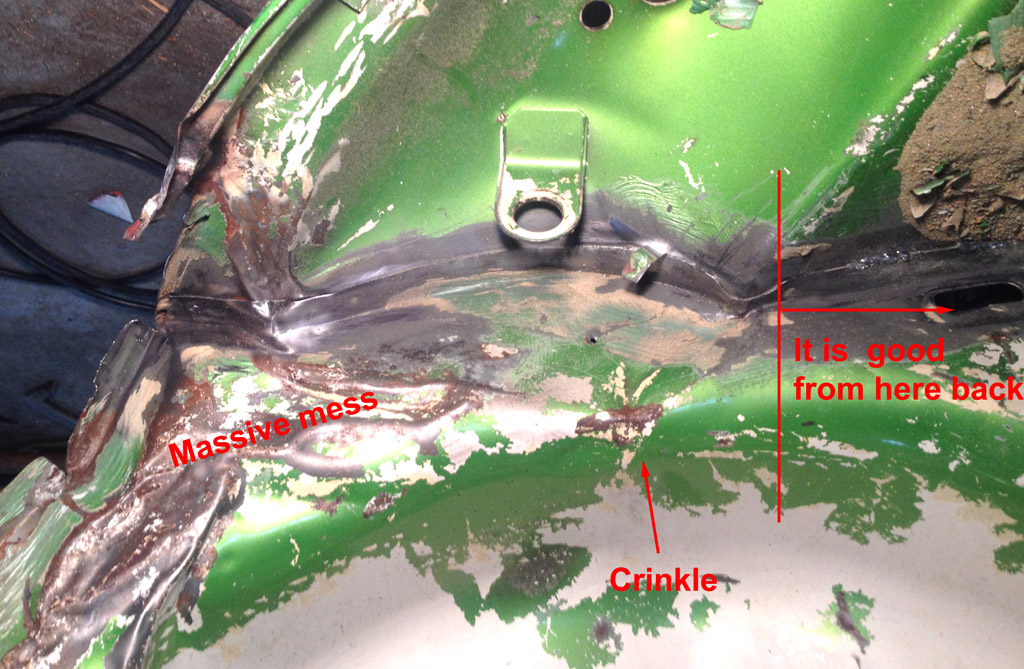
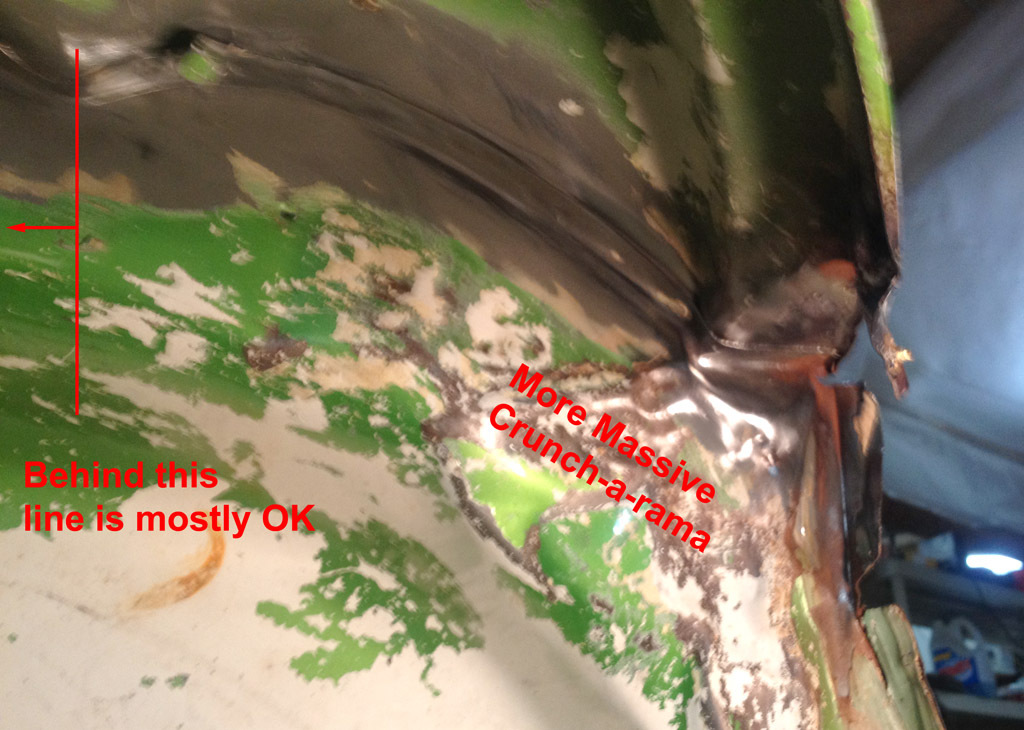
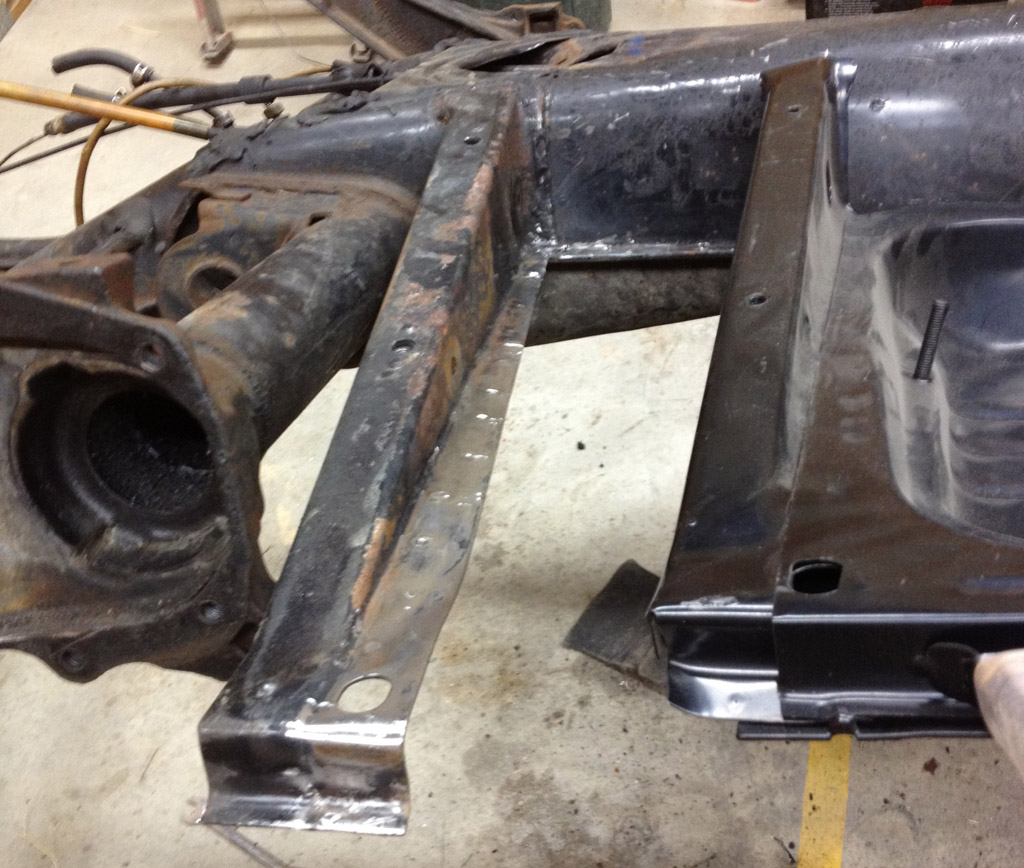
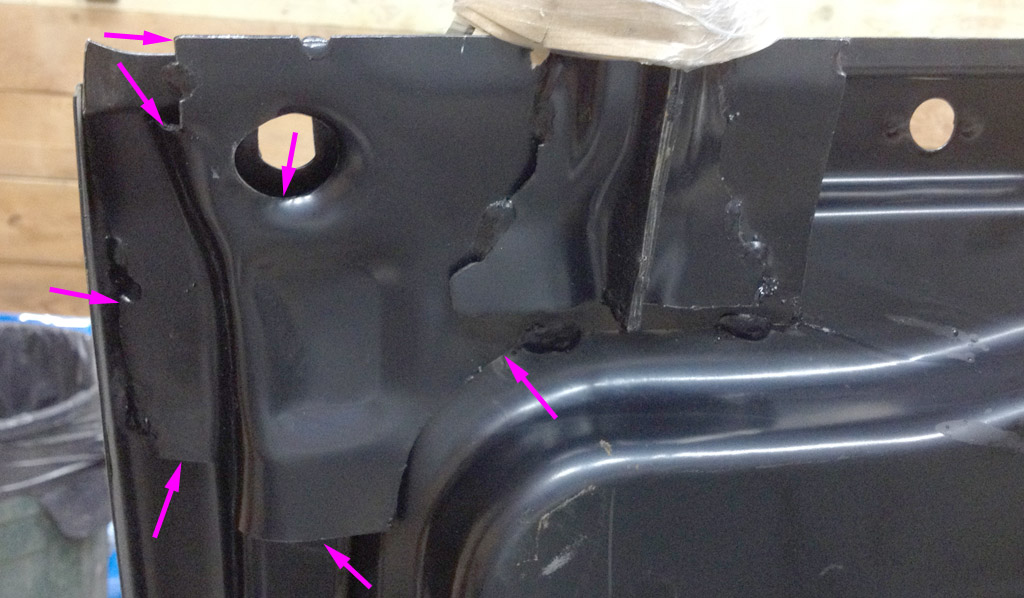
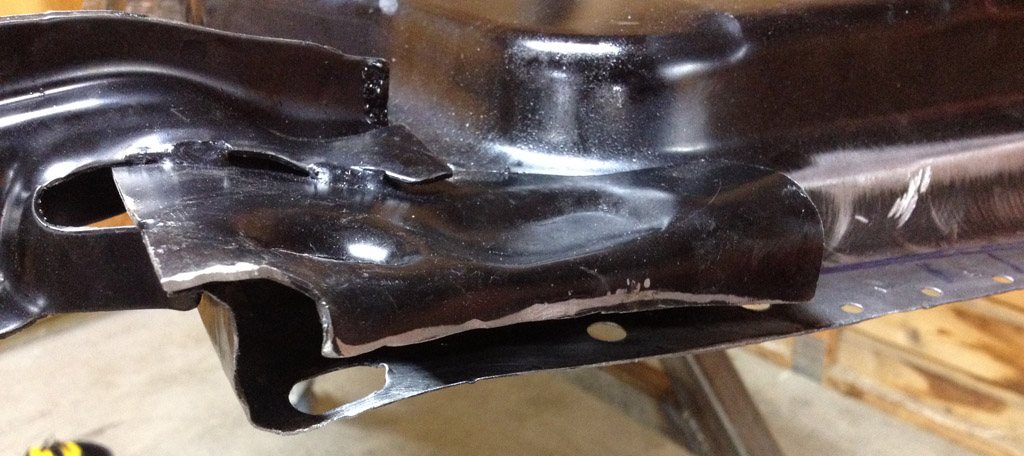
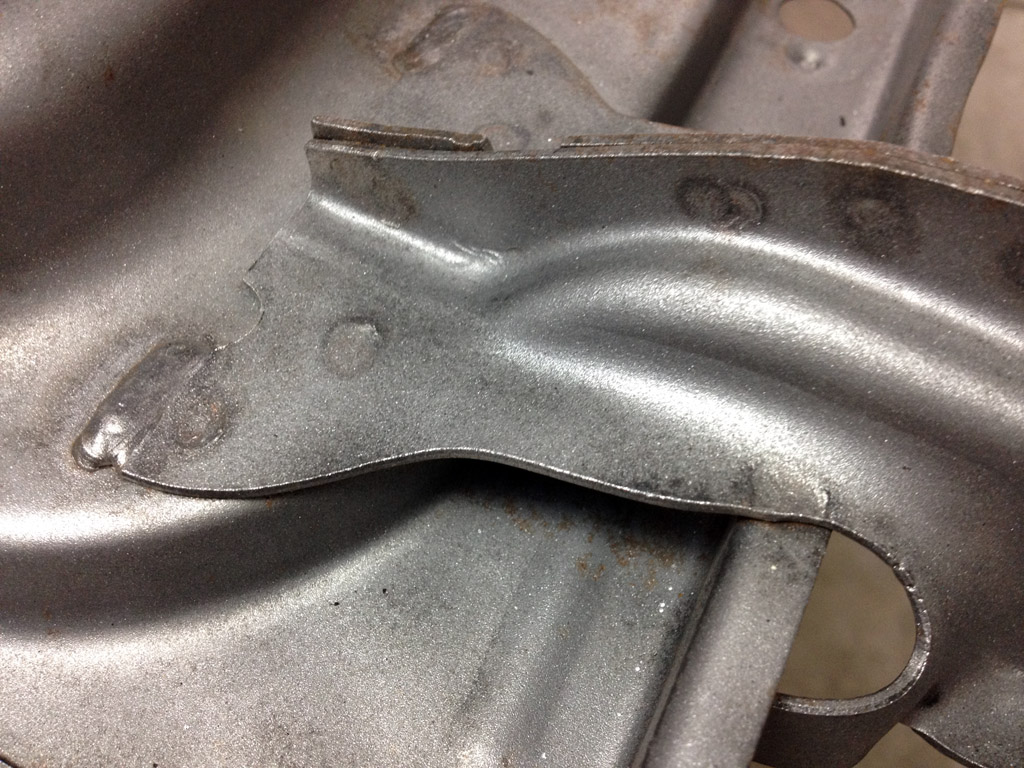
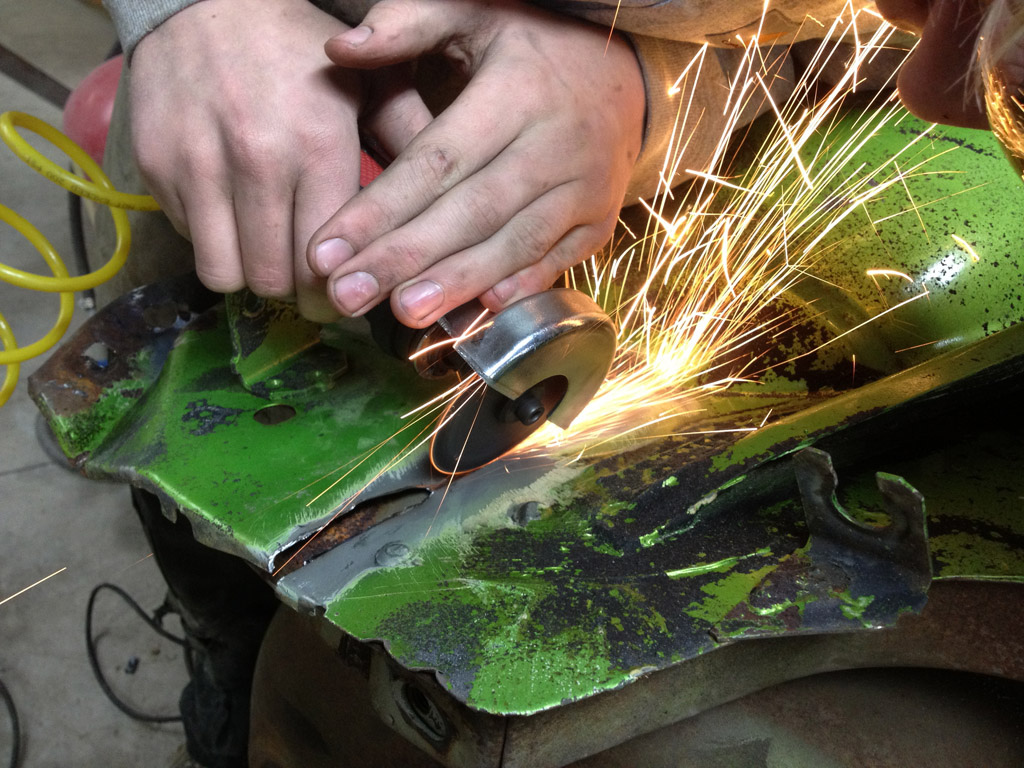
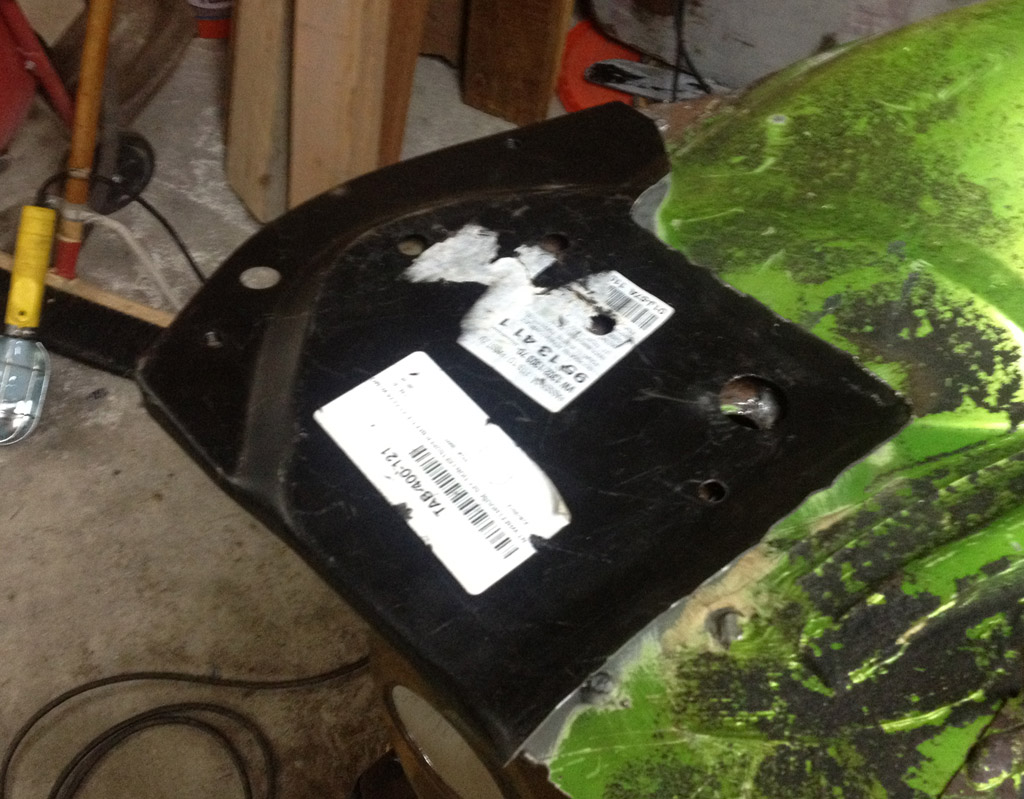
We purchased a Left and Right Wheelhouse Section. These come with the bumper support for 1302 supers spot welded on the back, but the support is much heavier and larger on our 1975. We removed the support from the new part and cleaned up the spot welds, then worked on cutting cutting the corresponding section of the crinkled part out:
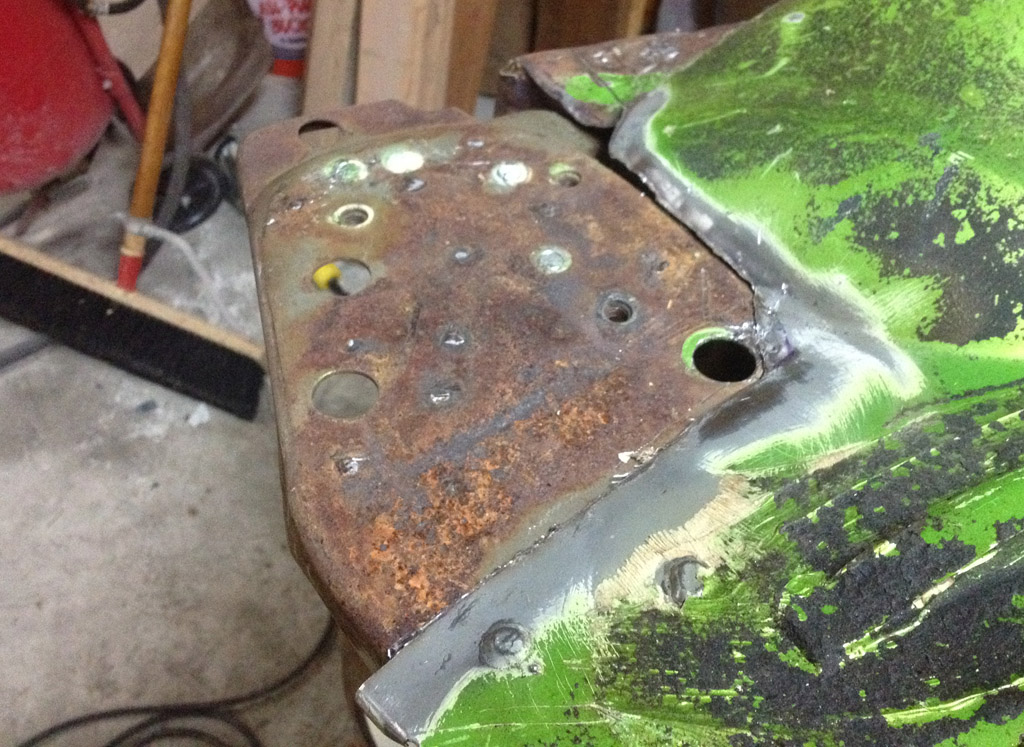
At this point, we could see that the heavy brace was bent inward, maybe 1/2" at the tip. This photo is after we straightened it.
Last edited by Baxsie on Fri Aug 08, 2014 12:32 pm; edited 1 time in total |
|
| Back to top |
|
|
Baxsie
Joined: 12 Apr 2012
Posts: 253
|
| Posted: Mon Dec 10, 2012 10:43 am Post subject: |
|
|
Worked on bead blasting the fenders today.
I think there is one rear fender that is original (judging by green paint underneath). I think all the other three are replacements (grey primer & rust underneath). The front two were probably replaced as a pair when the nose got crunched.
Every single fender one has various dings and scrapes that have been bondoed over. I have the bondo all blasted out but I am worried that it would be stupid to pay the body guy to spend a bunch of time on what is already a cheap fender.
I am considering just getting a full set of new replacement fenders.
It might be cheaper than the body work to fix the dings & scrapes in the old fenders, and I only have reason to think that one of those is original.
I have found the fenders at CIP, M&T, Jbugs and Mid America.
Only M&T claims "Italy" and only on one of the four (?) .
Is there a better source for better fenders that I am missing?
I guess I could take the time to blast the fenders that came off the yeller bug. Maybe those are in better shape. |
|
| Back to top |
|
|
Troy Hobbs

Joined: 05 Aug 2003
Posts: 766
|
| Posted: Mon Dec 10, 2012 10:51 pm Post subject: 1974 Super Beetle Project |
|
|
OEM VW fenders will always be better than after market (better fit and better metal). I think Cip1 had some OEM Mexico fenders. I bet the front replacements you took off are OEM VW
_________________
TROY
current RCVW club Pres
ARR #3 |
|
| Back to top |
|
|
Baxsie
Joined: 12 Apr 2012
Posts: 253
|
| Posted: Tue Dec 11, 2012 12:42 pm Post subject: |
|
|
After bead blasting, ALL of the fenders measured 0.027" to 0.028", which is like 23 gauge.
I have not been able to find a definitive "OEM Fenders are made of XX gauge material".
So at this point I am still confused. I guess I will finish blasting all eight fenders I have, try to figure our which four match the best and are in the best condition, then use those.
Maybe I'll haul them all up to the next meeting and everyone can vote on them |
|
| Back to top |
|
|
|