| View previous topic :: View next topic |
| Author |
Message |
Baxsie
Joined: 12 Apr 2012
Posts: 253
|
 Posted: Sat May 26, 2012 8:58 pm Post subject: Posted: Sat May 26, 2012 8:58 pm Post subject: |
 |
|
So my son and I decided to see if we could get the rusty red bug running. Here are some quick videos of the fun:
http://www.youtube.com/watch?v=xvauKpOvmn
http://www.youtube.com/watch?v=RfNIIL7oNZk
We cleaned the plugs, distributor cap, rotor, and replaced two leaking sections of fuel line, the air filter, the points and condenser.
I think the coil was the only thing really wrong. It actually started and ran for about 30 seconds on the old coil, then would not start again. The spark looked really weak:
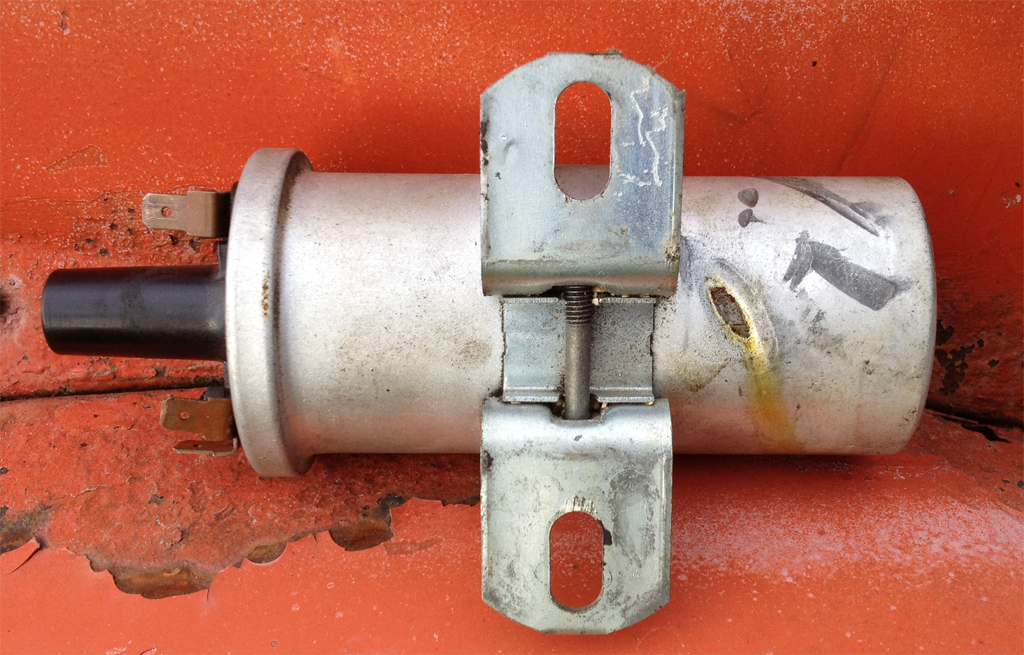
The old coil is a "Lucas" "Made in England", with a VW emblem on the end. Something had worn through the can, and what appeared to be oil was leaking out.
We swapped another coil and then it starts OK. Runs rough as heck, but I just wanted to see if it would run at all, and I do not want to put the effort of tuning it up.
Other topic: We have been trying to figure out some nice solution for mirrors. We went to the Spalding's "Pull And Save" where for $7 each, I picked up 4 power mirrors (two matching pairs) from two Honda Accords:
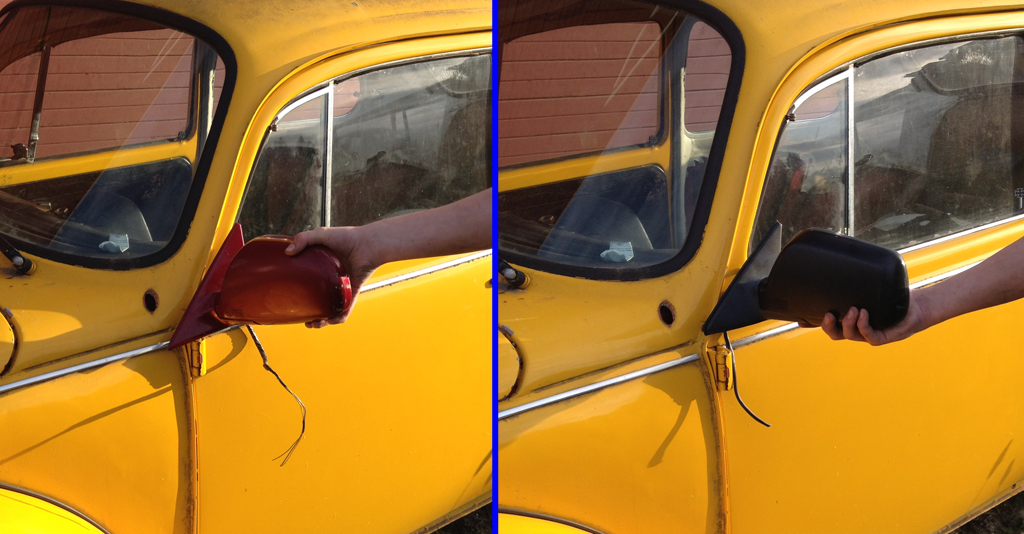
It would take some very special custom work to modify the mirror and the door to work together seamlessly. The black one is smaller and a bit more square, the red one larger but rounder. I think in any case we would paint the mirror to match the body. We shall see.
Last edited by Baxsie on Fri Aug 08, 2014 12:43 pm; edited 2 times in total |
|
| Back to top |
|
 |
Baxsie
Joined: 12 Apr 2012
Posts: 253
|
| Posted: Sun May 27, 2012 9:23 am Post subject: Could this engine be the original for this chassis? |
|
|
Is there a way to tell if the number of the engine is the original for this chassis? Does that mean anything to have a matching set?
The engine number is : K058276
The VIN is: 1332416312
Here are pics of the number plates.
 |
|
| Back to top |
|
|
DuaneL

Joined: 02 Feb 2012
Posts: 14
Location: Spokane Valley
|
| Posted: Sun May 27, 2012 1:29 pm Post subject: |
|
|
| I would think number matching would only be a plus if you were going for a all original resto which your plans are not but it appears that the engine serial number is one character to short so it is either a replacement engine or there is a A in front of the k if there is a A at the beginning then it would be the correct engine code for original you can find the engine codes from vin id list such as http://www.thesamba.com/vw/archives/info/bugchassisdating.php |
|
| Back to top |
|
|
Baxsie
Joined: 12 Apr 2012
Posts: 253
|
| Posted: Mon May 28, 2012 5:46 pm Post subject: |
|
|
You are right, I missed the first number of the engine. And I forgot the door sticker. Here are updated images:
 |
|
| Back to top |
|
|
Baxsie
Joined: 12 Apr 2012
Posts: 253
|
| Posted: Mon May 28, 2012 6:48 pm Post subject: |
|
|
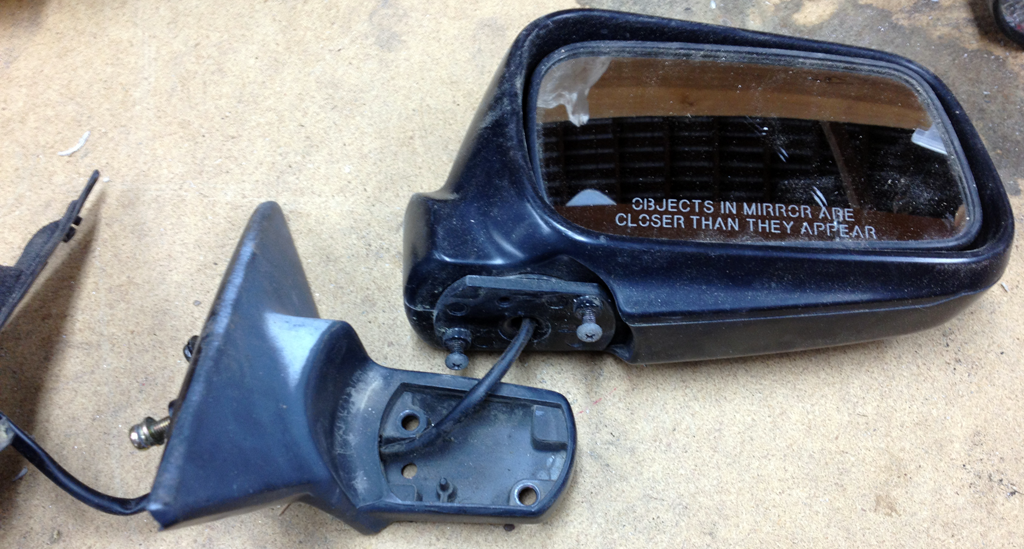
Back on the mirror investigation. We disassembled the mirror from the base:
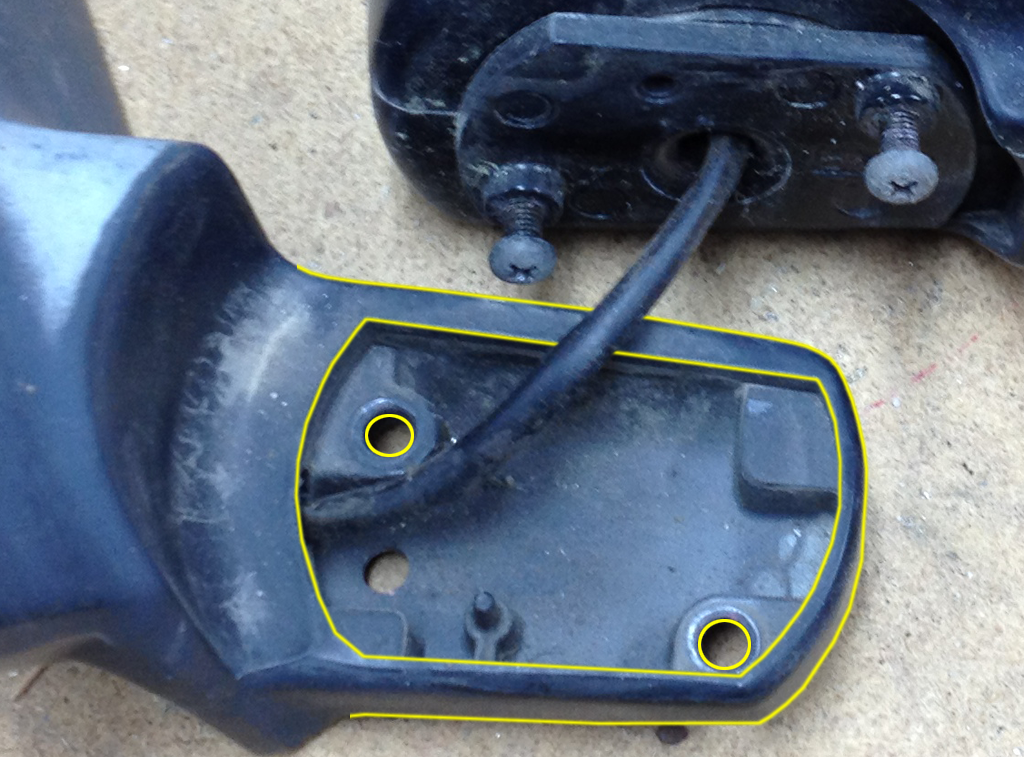
It looks like we could machine a bracket that mates with the mirror (as highlighted here), and bolts to the original VW mounting hole. A hollow bolt would let the wires pass into the door:
Last edited by Baxsie on Fri Aug 08, 2014 12:44 pm; edited 1 time in total |
|
| Back to top |
|
|
Baxsie
Joined: 12 Apr 2012
Posts: 253
|
| Posted: Wed May 30, 2012 8:00 pm Post subject: 1974 Super Beetle Foam Rust Doom |
|
|
Not much progress on the car. The "remodel the barn into a shop" is progressing well.
Back story: For another job we had a fairly beefy DeWalt 4200PSI, 4GPM pressure washer hooked up and dangerously near the car. Boys will be boys, and soon the pressure washer and car met.
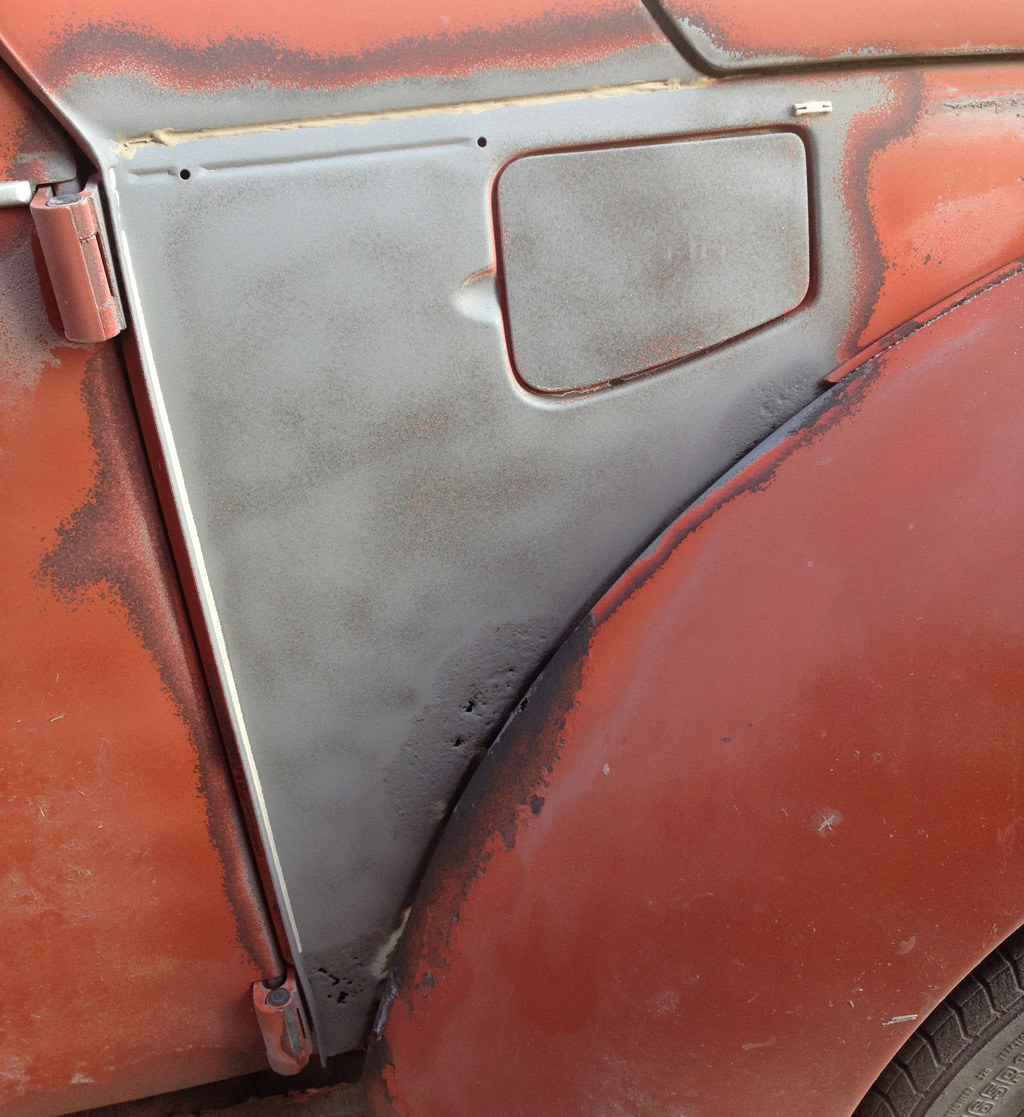
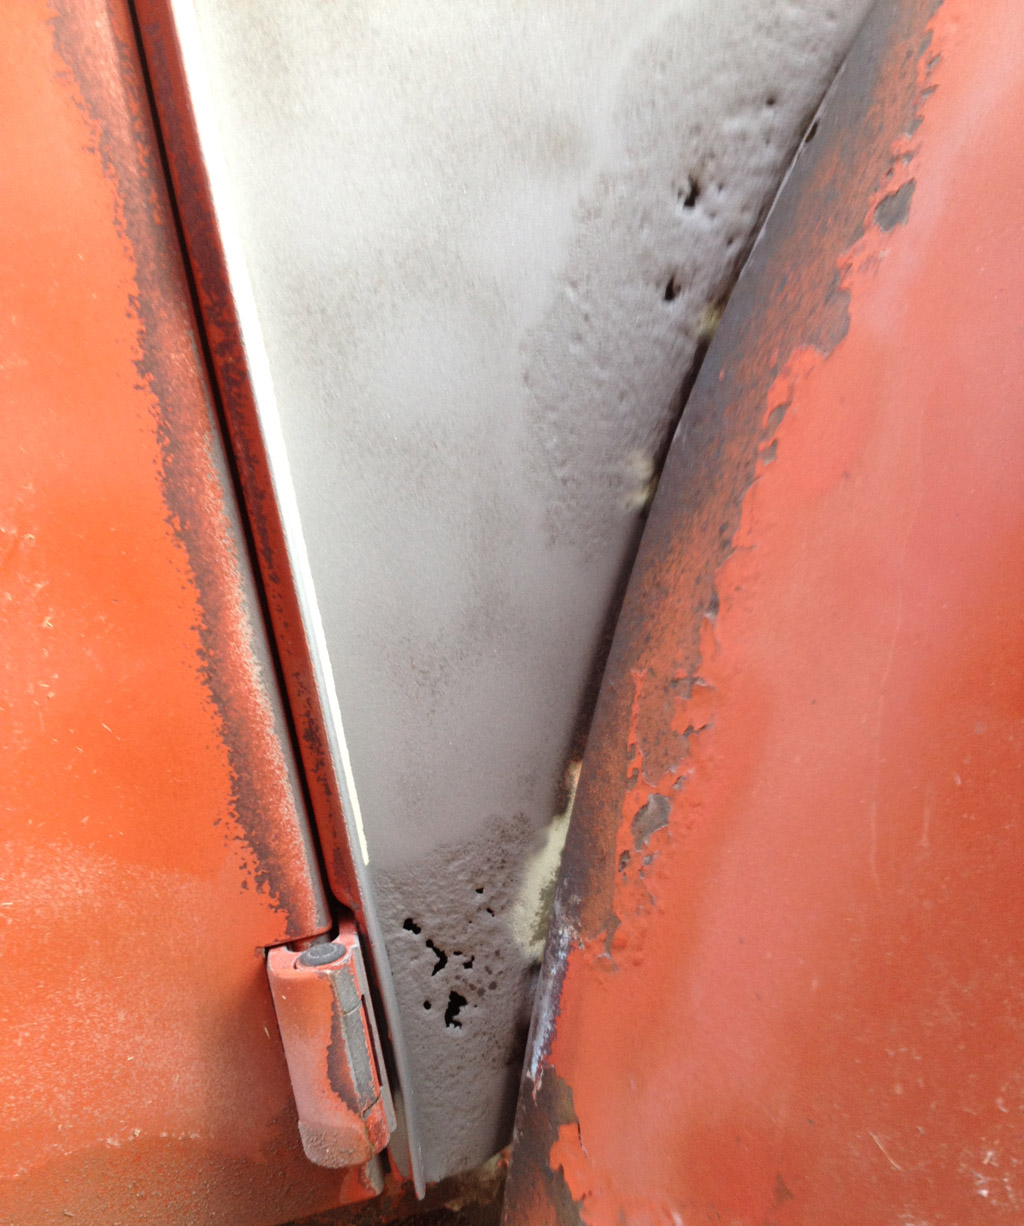
I knew that on the yellow chassis, there was some trouble on the right rear vent. We could see some cracks and poor bondo.
Today I got to see how bad the trouble is.
The pressure washer with its turbo tip made short work of the cruddy body work:
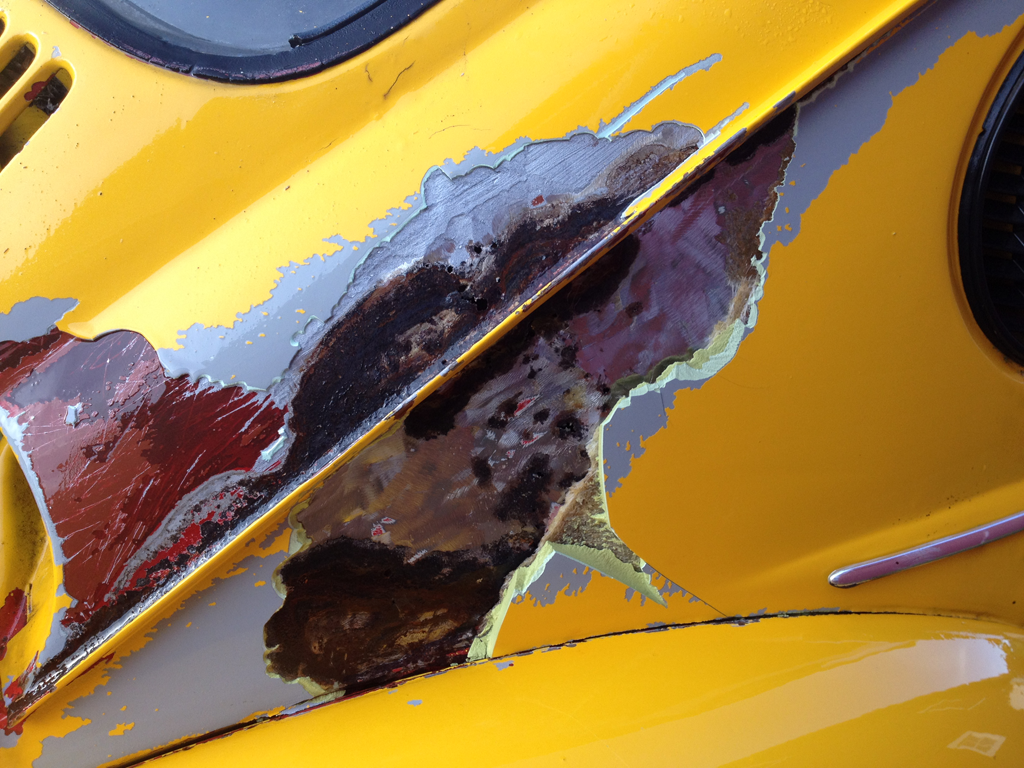
The water gets under the patch and lifts it right off. Frankly I think this says more about the patch than the pressure washer. All that was removed in the above photo was done by the pressure washer.
A little prying with the screwdriver brought the patch off. Here is the back side:
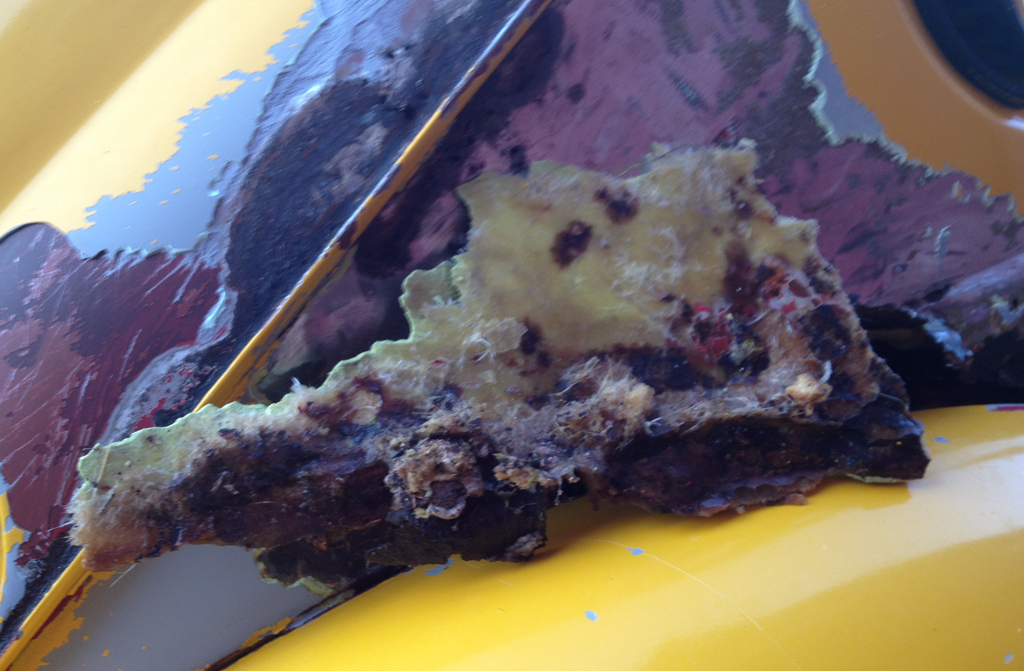
The pain is obvious. The hole goes down into the fender well and you can see right into the interior. Ugggh:

Well. I guess that is why you take them apart 
Last edited by Baxsie on Fri Aug 08, 2014 12:44 pm; edited 1 time in total |
|
| Back to top |
|
|
Baxsie
Joined: 12 Apr 2012
Posts: 253
|
| Posted: Tue Jul 03, 2012 1:40 pm Post subject: Maybe now it is a 1975 Super Beetle project? |
|
|
We are still working on making a shop in the barn, so not so much actual VW work happening.
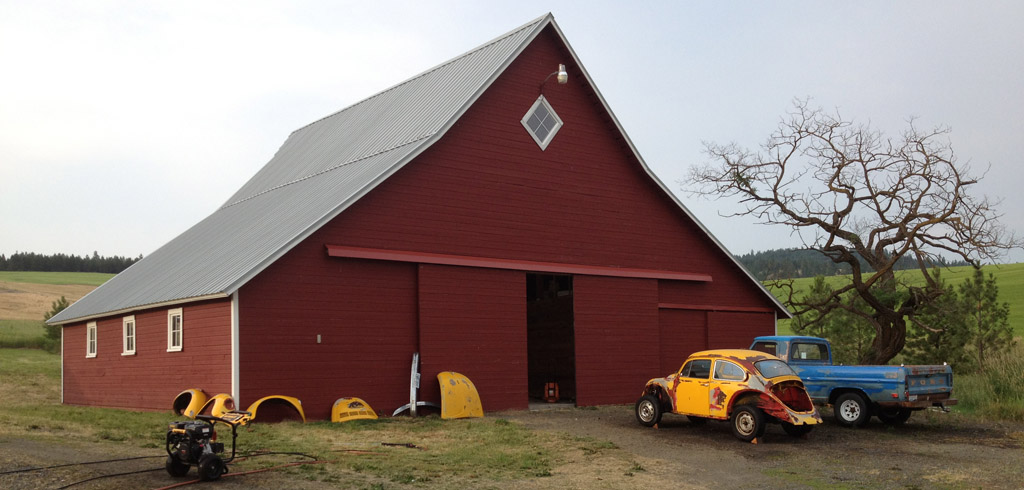
We went ahead and picked up the white 1975:
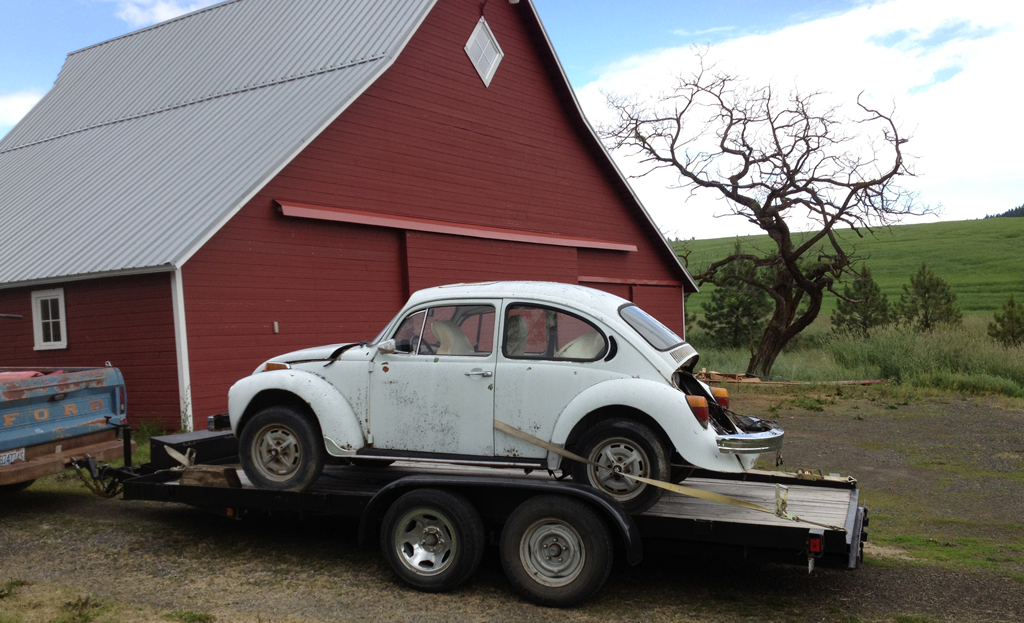
We now have a red 1973, yellow 1974 and this white 1975. Sigh.
What intrigued me about the 1975:
* sunroof
* rack-and-pinion steering
* 4 (apparently good) bumper struts
* clean metal in back (do not know about the foam rust of death)
* had factory fuel injection, so there are already two lines from the tank to the engine
* probably was a green LaGrande Bug
* interior in bad shape, but not the worst, and lots of parts there.
So now we most probably have one of everything, and 3 of many things.
Lots of progress made on the barn/shop project, and lots more to go. But when it is done it should be a nice place to work.
In the meantime, I think we will use the sand blaster to take the finish off the foam areas of the white 75 and red 73 to see if either of those is usable without major metal work.
Last edited by Baxsie on Fri Aug 08, 2014 12:45 pm; edited 1 time in total |
|
| Back to top |
|
|
Baxsie
Joined: 12 Apr 2012
Posts: 253
|
|
| Back to top |
|
|
Baxsie
Joined: 12 Apr 2012
Posts: 253
|
| Posted: Wed Jul 04, 2012 8:28 pm Post subject: |
|
|
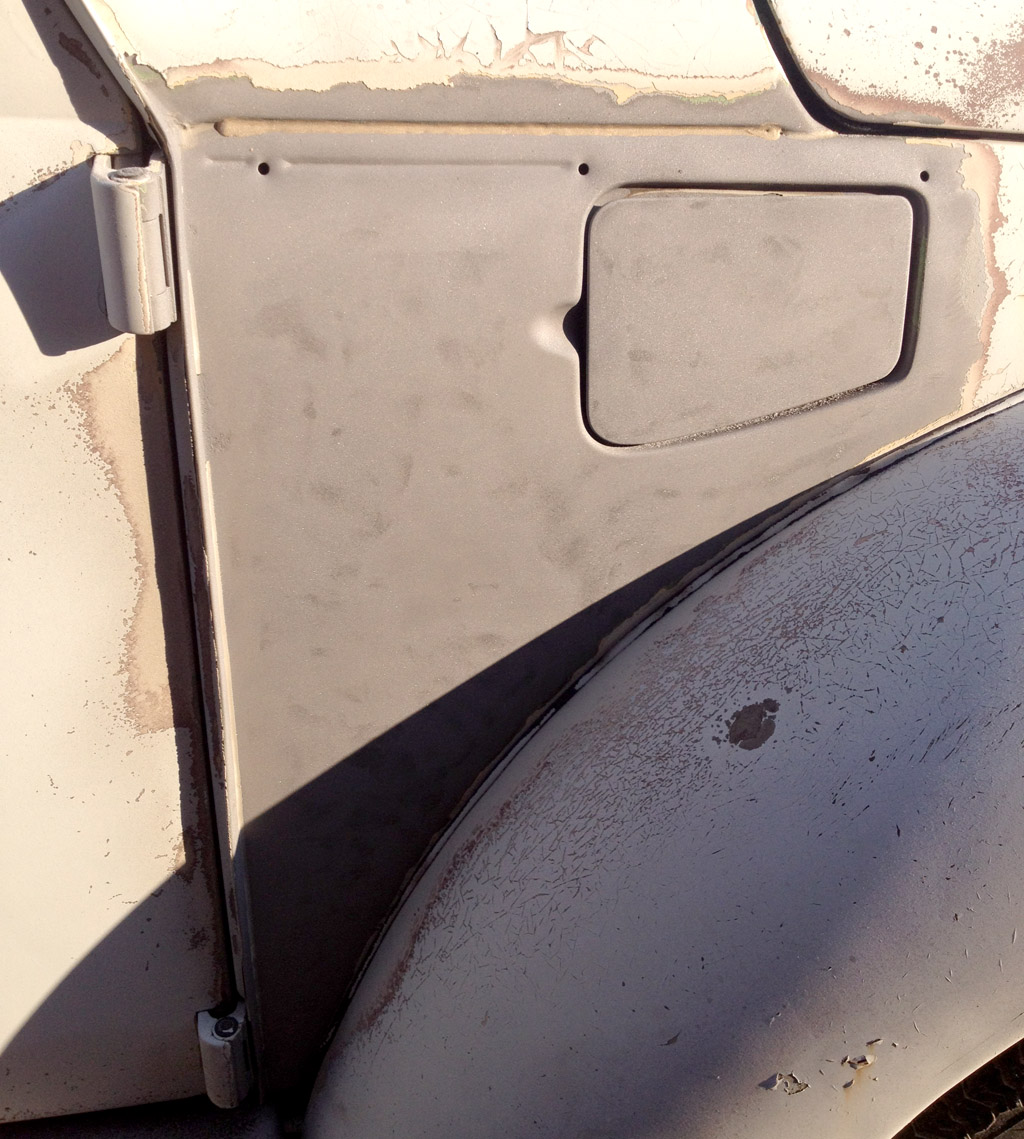
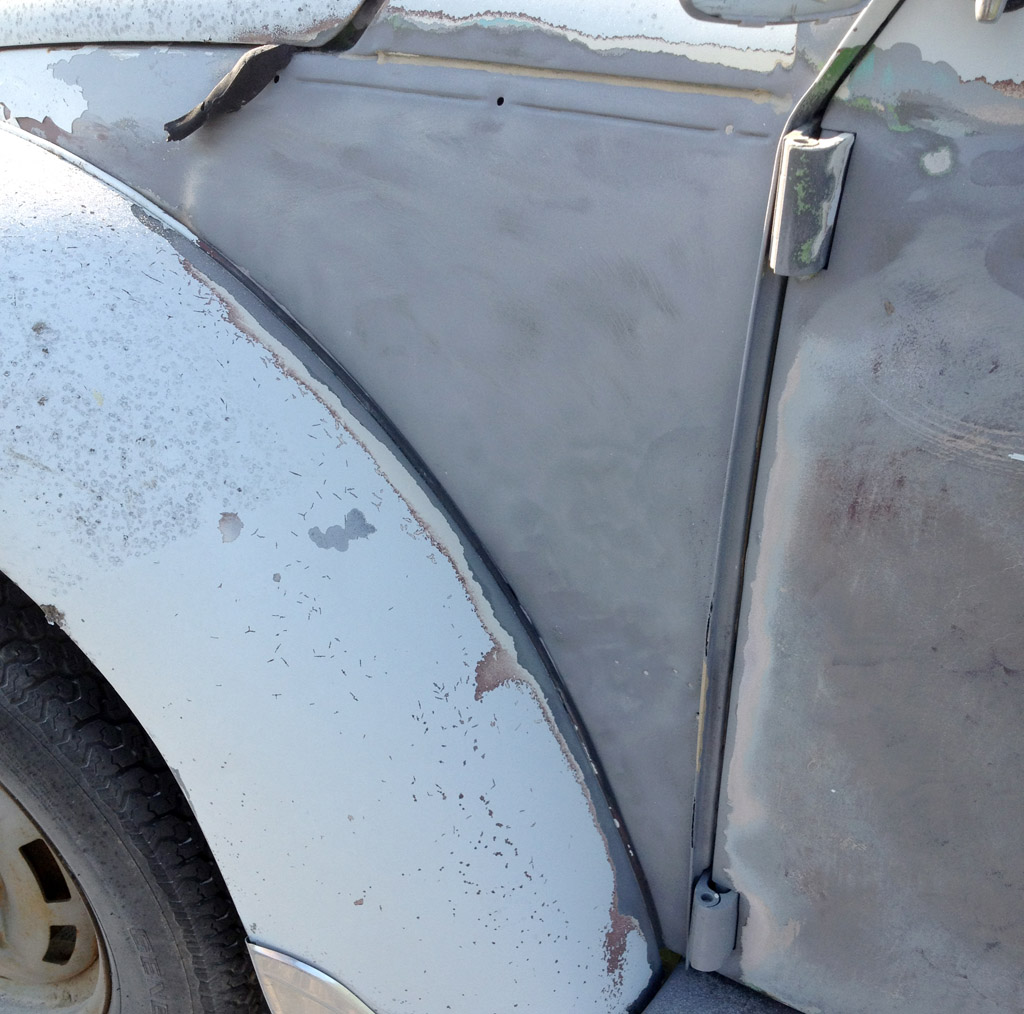
We decided to look at the rest of the the likely rust spots on the white 1975 super beetle. Of course there is under-body stuff to explore too, but that will wait.
The right side front quarter is perfect
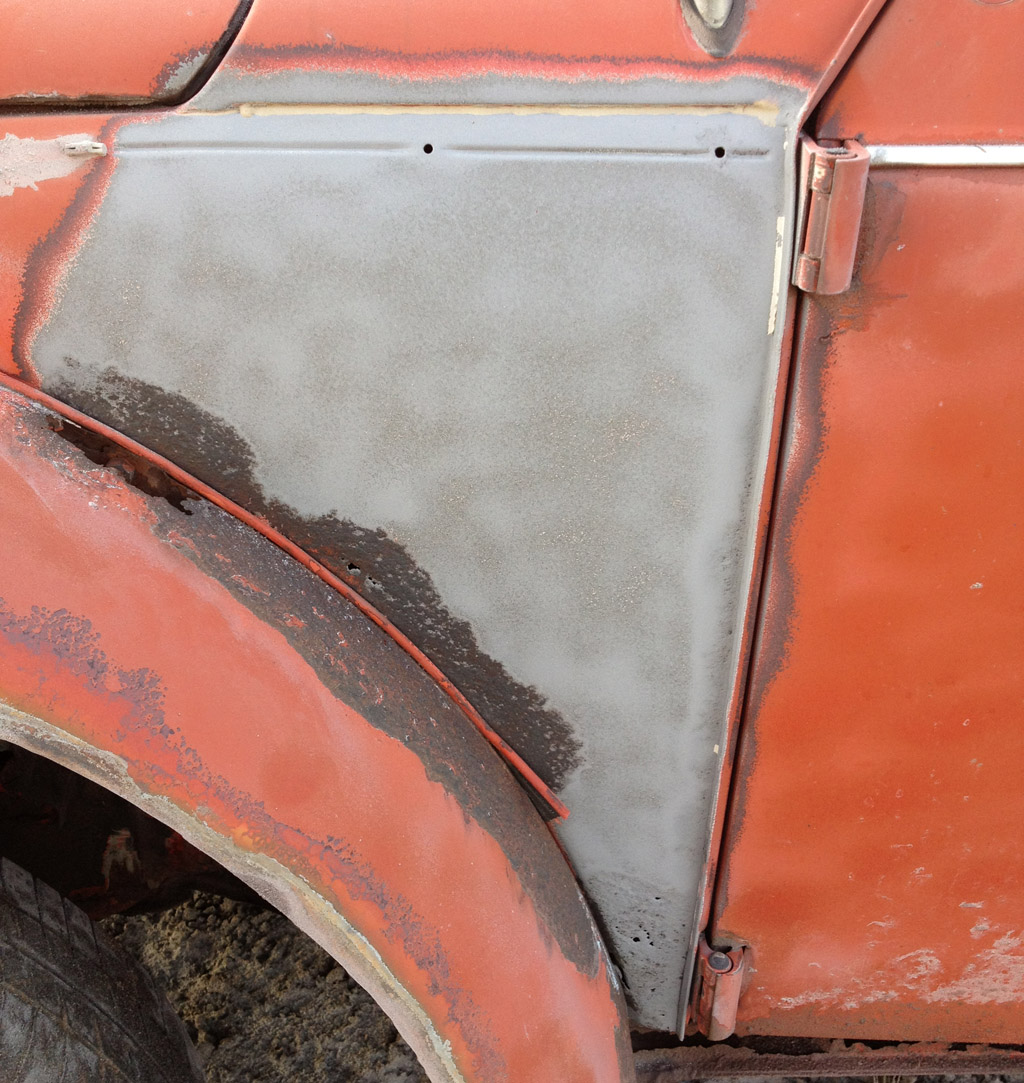
The left side front quarter had some pretty substantial bondo, with rust forming under it. We removed all the bondo to make sure the rust is just surface and not all the way through:
The repair job included some nice brazing work on the body seam. Oddly the fix did not continue upward, where the seam is also damaged:
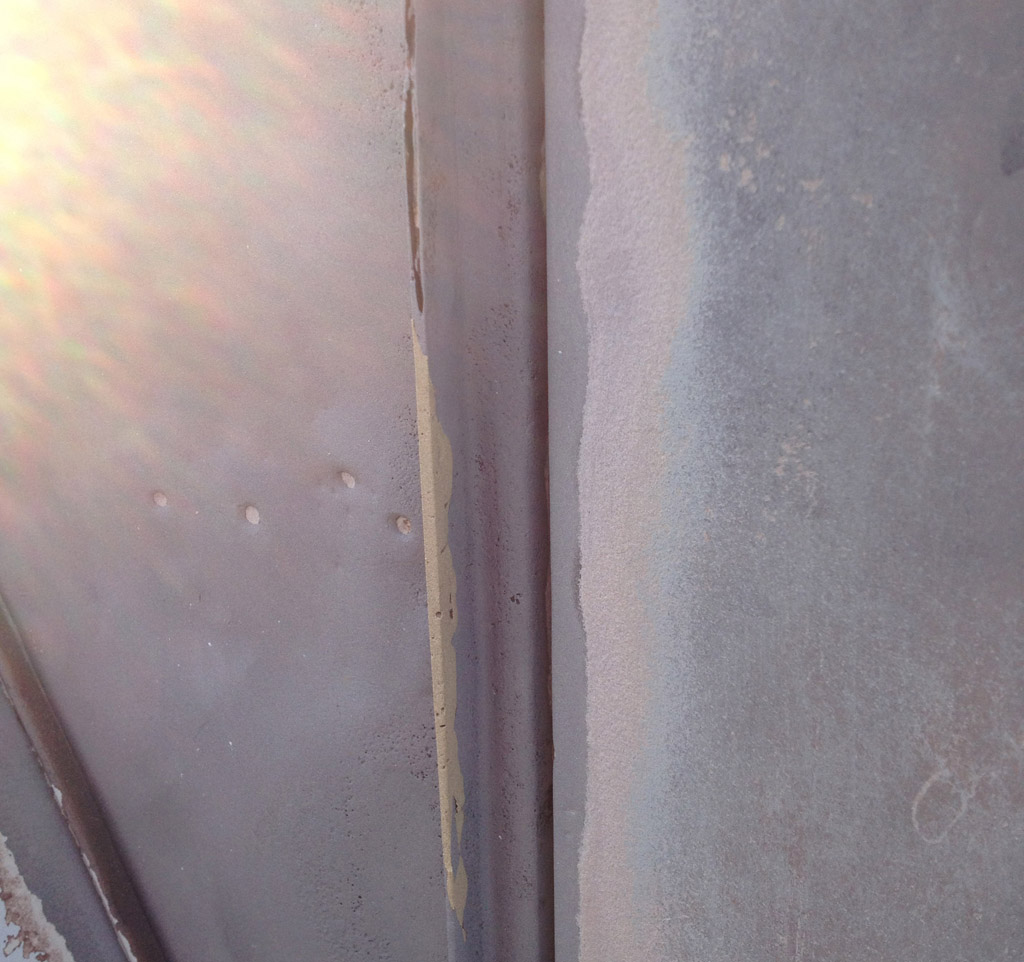
Is there factory brazing on the seam here?
Last edited by Baxsie on Fri Aug 08, 2014 12:45 pm; edited 2 times in total |
|
| Back to top |
|
|
Baxsie
Joined: 12 Apr 2012
Posts: 253
|
| Posted: Wed Jul 04, 2012 8:34 pm Post subject: |
|
|
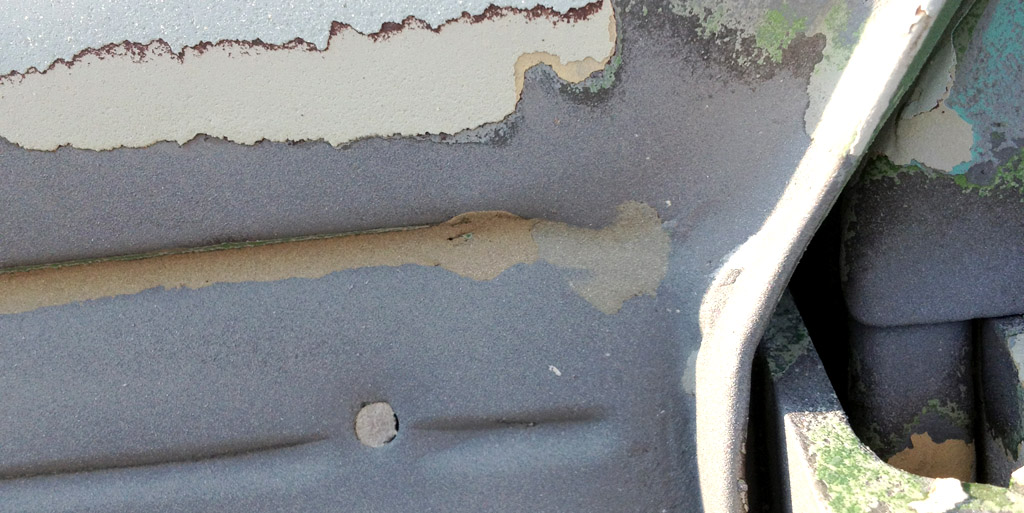
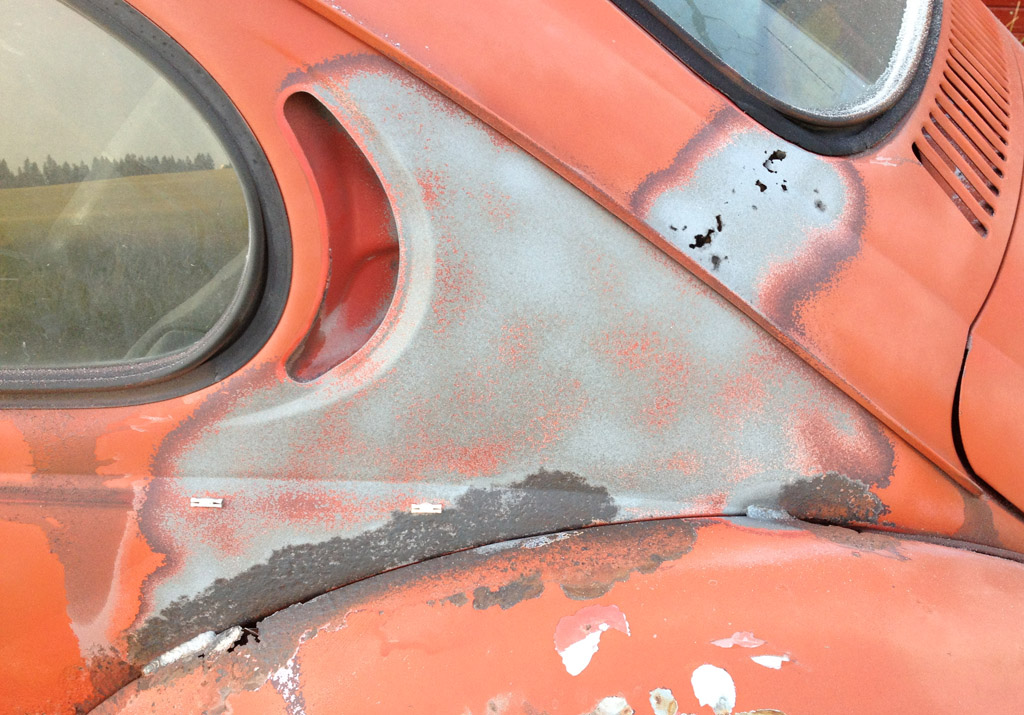
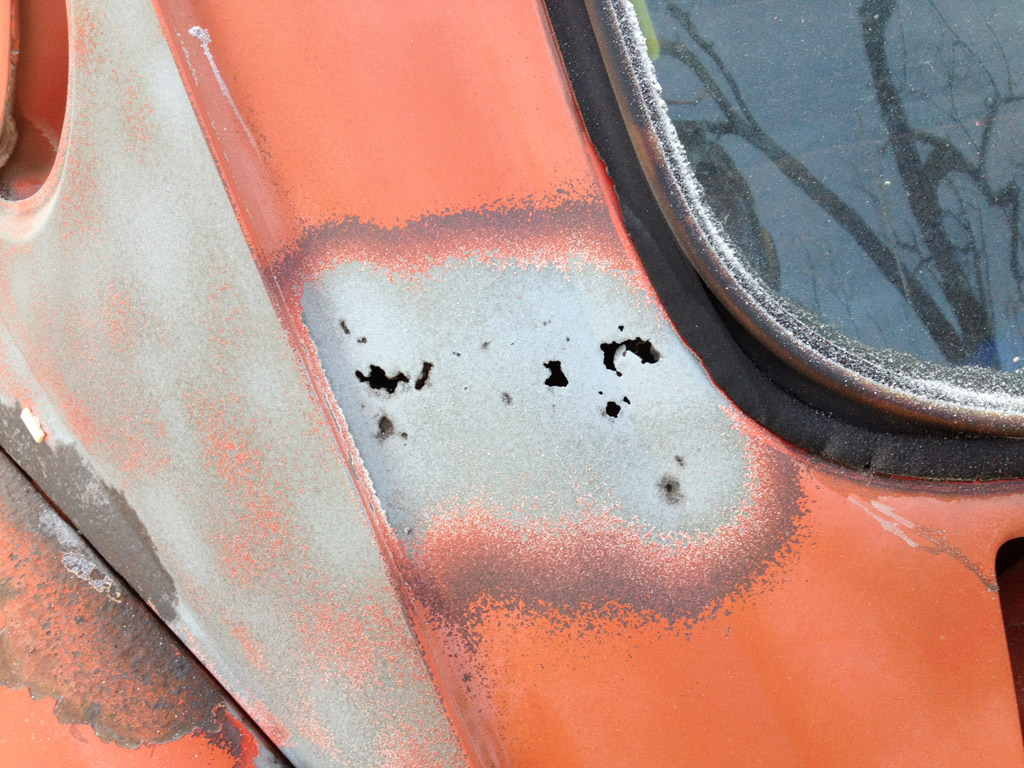
For completeness, we also removed the paint on these same areas on the rusted red 1973 super beetle donor car. This car has serious lower rust -- both heater channels are completely open, and every fender bolt area is rusty. OK, that is pretty normal for a bug, right? Here are the weird things. The battery area appears to be original and completely solid. And the rear foam of death areas appears to have no rust, at least on the side.
The right side front quarter. Rust is bad, centered around fender holes:
Close up of perforations:
The left side front quarter. Rust is bad, centered around fender holes:
The right side foam of death area. The "foam" area is clean (or at least not all the way through). The rust that is there appears to be growing from the fender holes:
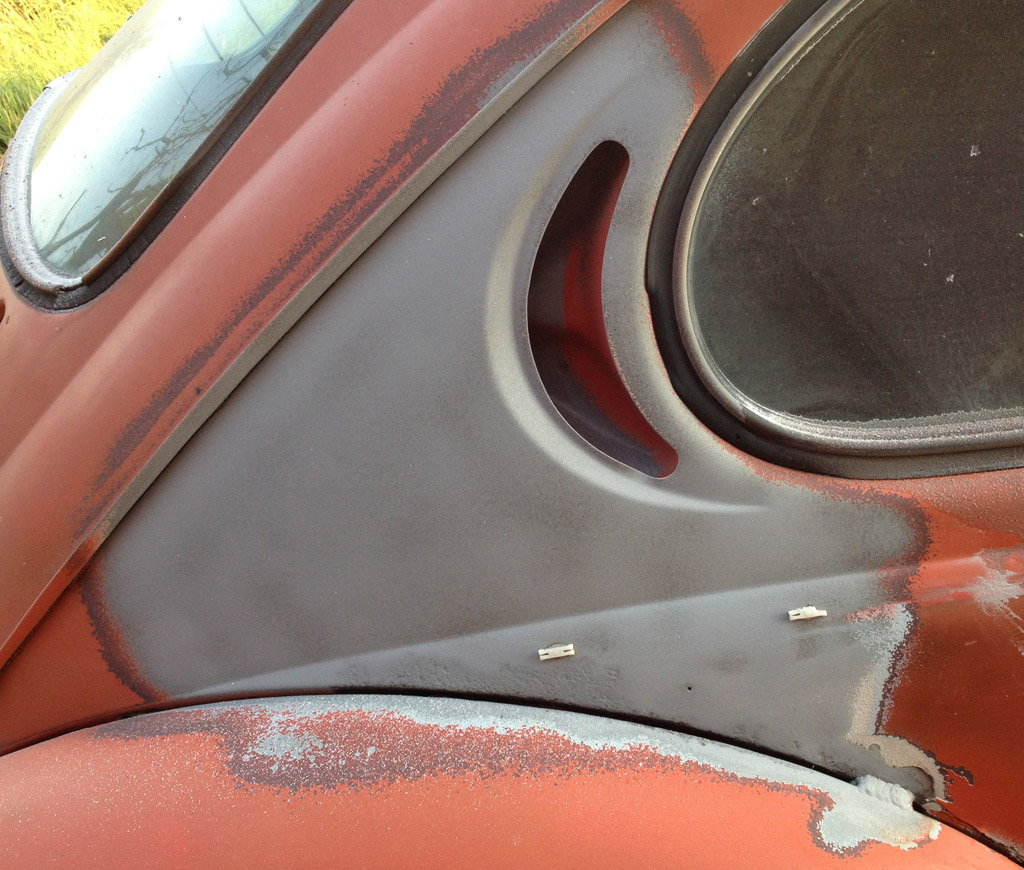
The left side foam of death area. The "foam" area is clean (or at least not all the way through). The rust that is there appears to be growing from the fender holes:
There is nasty perforated rust to the left of the rear window, about 3/4 of the way down. Is this from the foam?:
Last edited by Baxsie on Fri Aug 08, 2014 12:45 pm; edited 1 time in total |
|
| Back to top |
|
|
Baxsie
Joined: 12 Apr 2012
Posts: 253
|
| Posted: Thu Jul 12, 2012 6:38 pm Post subject: |
|
|
We finally got the barn/shop job far enough that we could pull the yeller bug into the main bay and start disassembly:
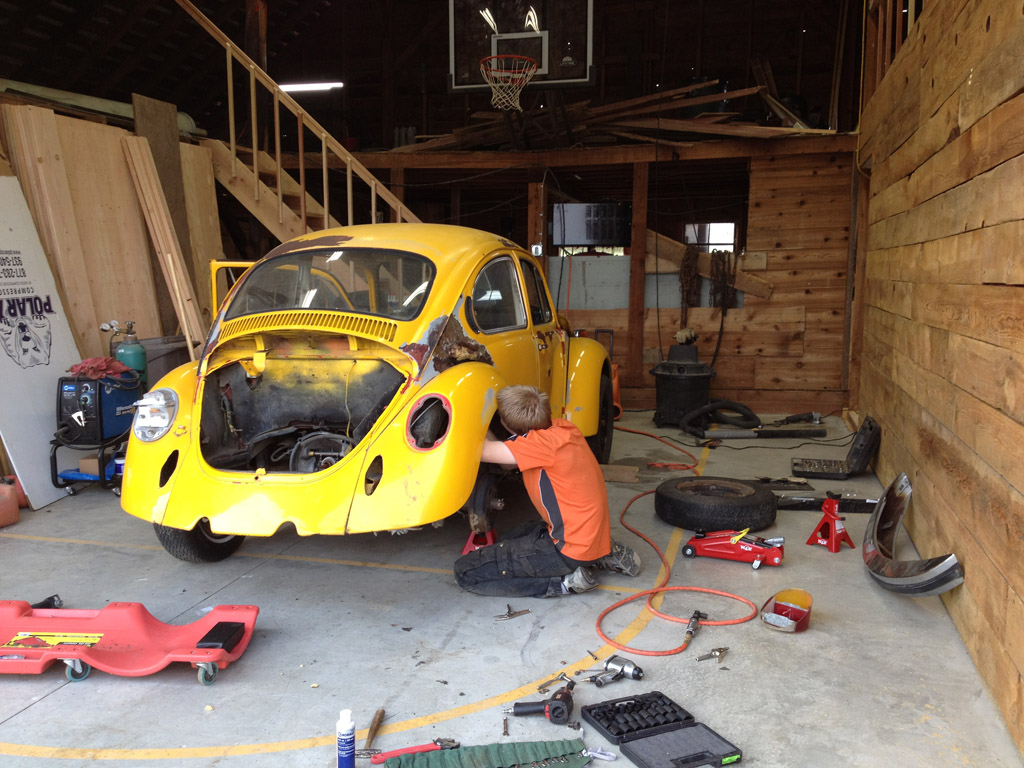
This is the first time for serious mechanic work for my son. Just trying to let him figure it out as much as possible, and help only when he is stuck or frustrated.
Last edited by Baxsie on Fri Aug 08, 2014 12:47 pm; edited 1 time in total |
|
| Back to top |
|
|
Baxsie
Joined: 12 Apr 2012
Posts: 253
|
| Posted: Fri Jul 13, 2012 7:11 pm Post subject: |
|
|
The boy got the bumpers and all four fenders off today. He is getting the hang of it
We pressure-washed the body parts, they will get stored in case we need them for the build, then we will offer them for sale.
We also pressure washed the wheel wells and around the transmission. His job tomorrow is to drop the tranny.
Is there some kind of etiquette for junking a chassis? This yellow one is rusted bad in the foam spots, has lots of (bad) body work up front, and has the usual battery rust issues.
I hate to sell it for the $50 scrap, but I can't have it laying around either.
Right now the plan is to disassemble it as far as is practical . . . maybe even to the point of separating the pan and the body. Save all the parts for spares or sale, then dispose of the actual pan and body.
A lot of the reason to disassemble this one so far is to let my son have a good learning experience -- like med students practicing surgery on cadavers And also so for us both to get experience and knowledge about the car before working on the "real" one (which will probably end up being the '75).
Is there some better use to for a "pretty darn trashed" body and pan?
Last edited by Baxsie on Fri Aug 08, 2014 12:48 pm; edited 1 time in total |
|
| Back to top |
|
|
ONEBADBUG

Joined: 25 Oct 2003
Posts: 440
Location: Spokane
|
| Posted: Sat Jul 14, 2012 7:44 am Post subject: |
|
|
| You need the title to take it to the scrapper. If you separate the body/pan, then 1 of them has no title. Then you have to cut into pieces. They will take 1/3 of a car w/o the title. |
|
| Back to top |
|
|
Sam Cates
Joined: 14 Feb 2012
Posts: 51
Location: Spokane
|
| Posted: Sat Jul 14, 2012 7:56 am Post subject: |
|
|
| Bust out the sawzall!! Save any panels you think you may need for the good car. |
|
| Back to top |
|
|
Baxsie
Joined: 12 Apr 2012
Posts: 253
|
| Posted: Sat Jul 14, 2012 10:31 am Post subject: |
|
|
ONEBADBUG: The title might be an issue. I only have bill-of-sale on two cars, but I think I have a title on this yellow one.
We (well, the boy) will keep disassembling and see where it goes.
Sam Cates: We are trying to see if between the three cars we can get all the rust fixed by swapping body panels around. I guess after that we could slice off any non rusted chunks that look like they might be useful. |
|
| Back to top |
|
|
|


